Introduction
There are a number of ways you can use automation with our app and it's a simple case of clicks and not code. These include the Creation of Shipments, Emailing Labels, Calculating Rates and Tracking Shipments all utilizing process builder.
If you are happier to use Flows then you can follow this guide here.
Creating Shipments
Our invocable method allows you to create a shipment using Process Builder from any object for which you have set up a Custom Address Source. If you haven't set up a Custom Address Source then please follow this guide that explains how to do so.
In this example we will create a shipment from the Opportunity object when the Stage field gets set to "Closed Won".
Step 1. Set all required fields
In your Custom Address Source you will need to have these items set as a minimum:
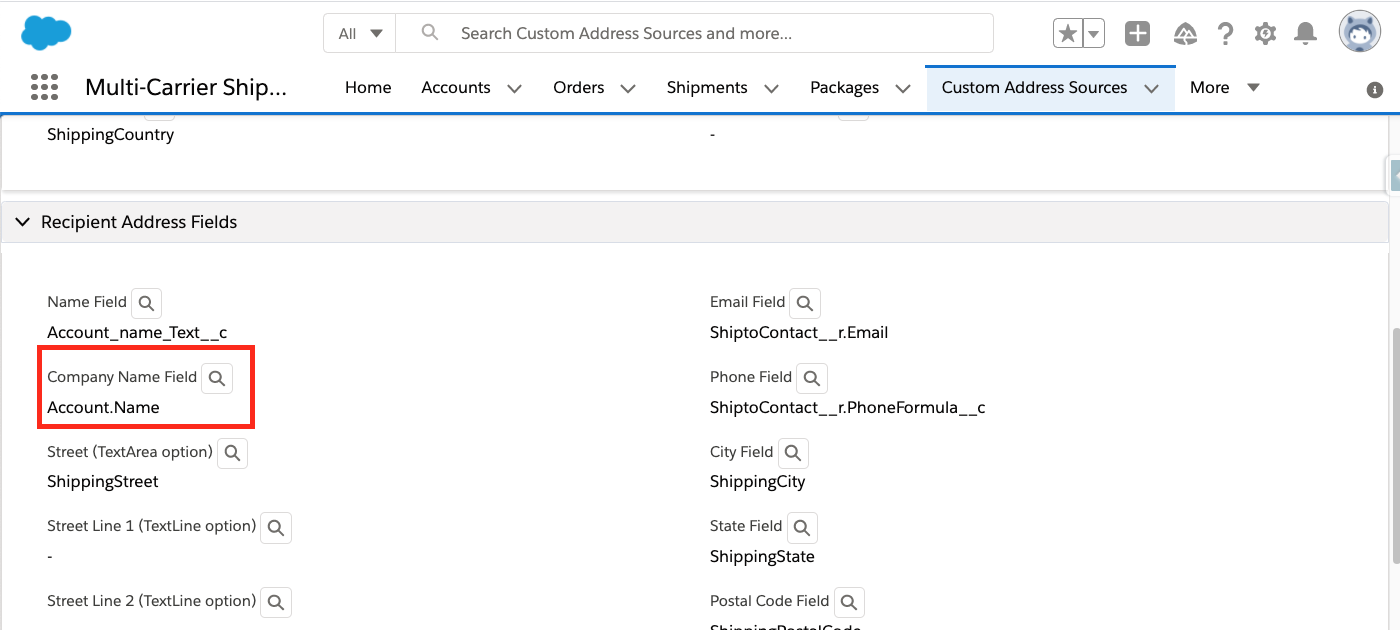
Recipient Address Fields:
- Name Field
- Street 1 Text Line Field
- City Field
- State Field
- Postal Code Field
- Country Field
- Phone Field

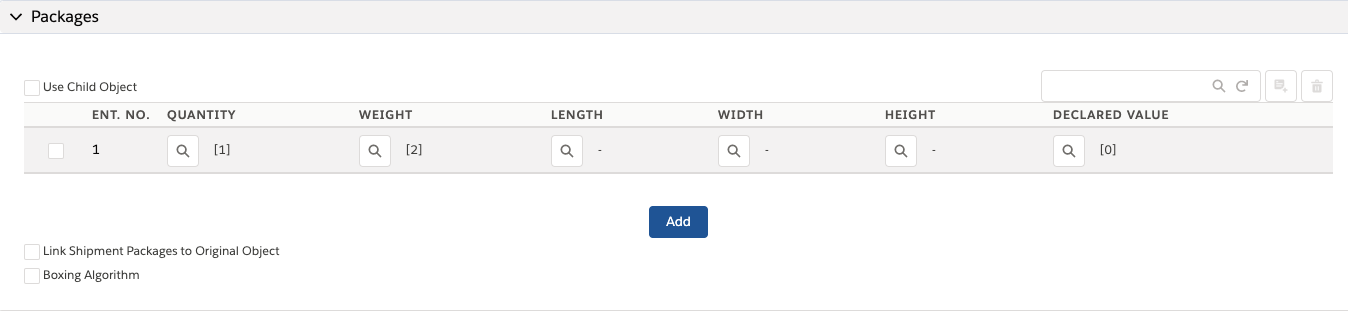
Packages
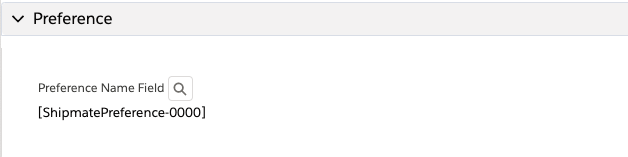
Preferences
Preference Field: the value of this field can be set to the name of the preference (e.g. "ShippingPreference-0000")
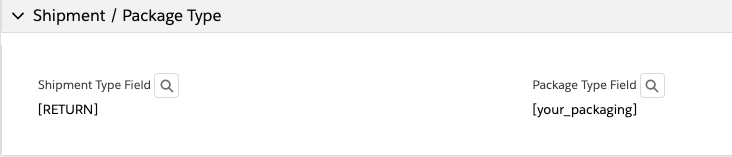
Shipment / Package Type
Service Types

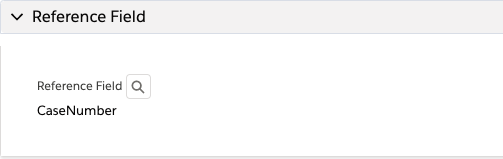
Reference Field
Step 2. Setup Process Builder Task
Create a Process Builder Process by going to Setup > Create > Workflow & Approvals > Process Builder and click the New button.
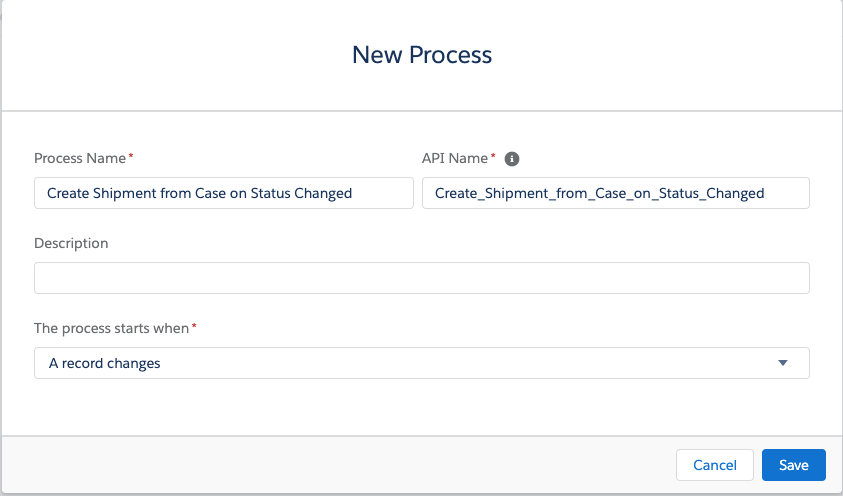
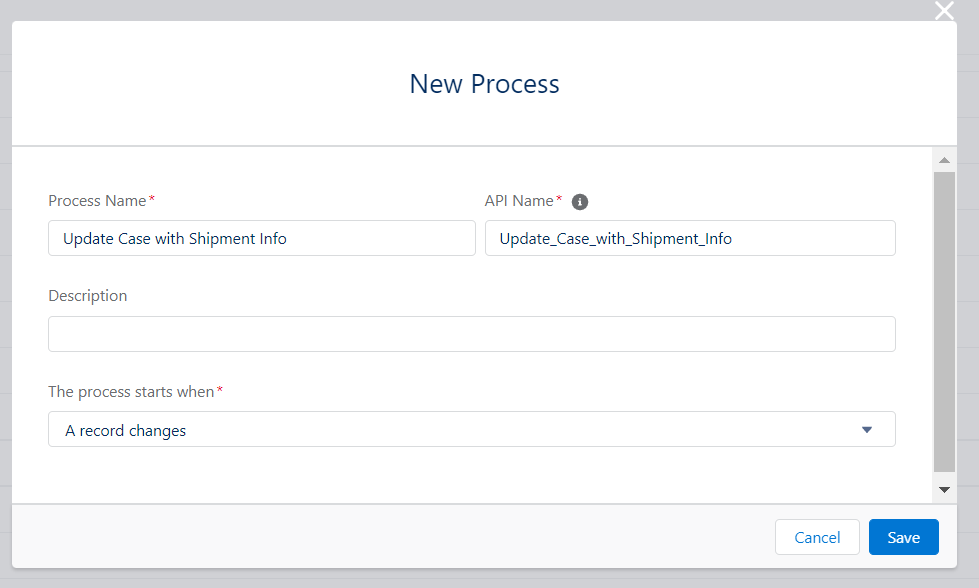
Give the process a name, description, and choose to start the process when "A record changes".

Click Save, and then select "Add Criteria".
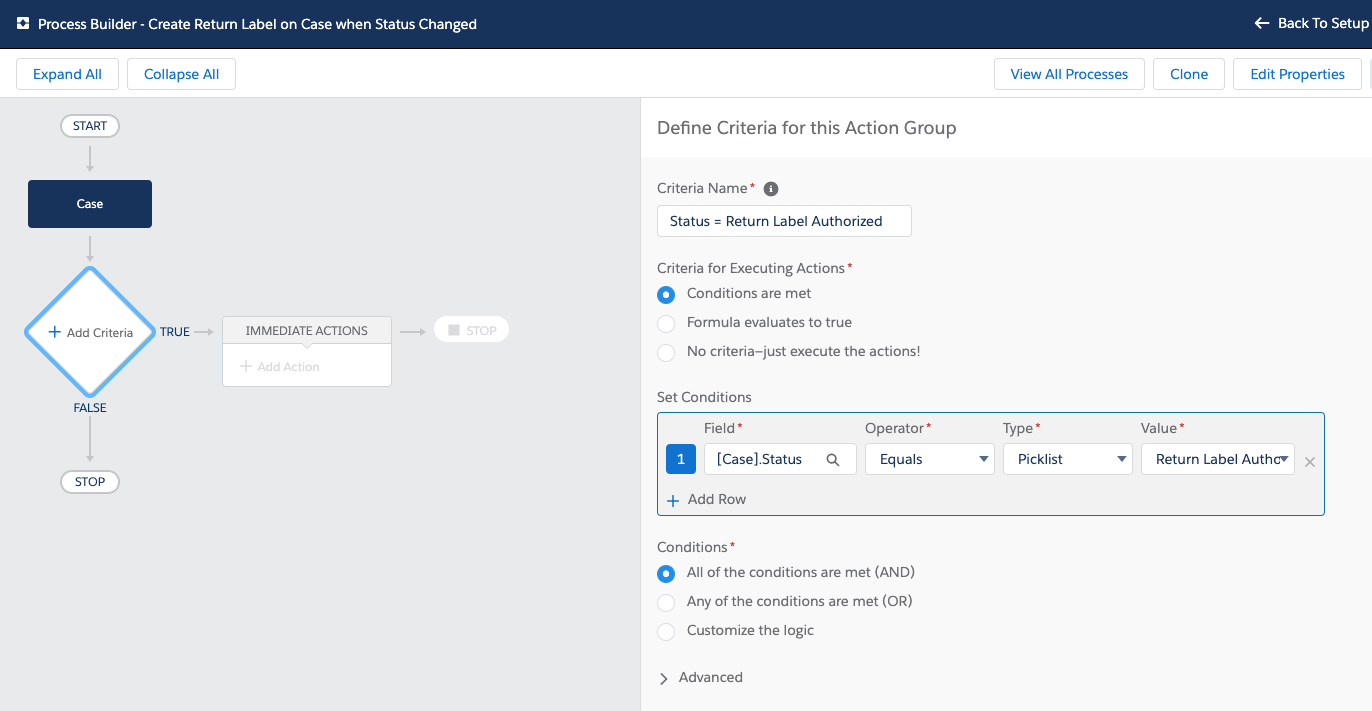
Next choose the object you are starting the process from.
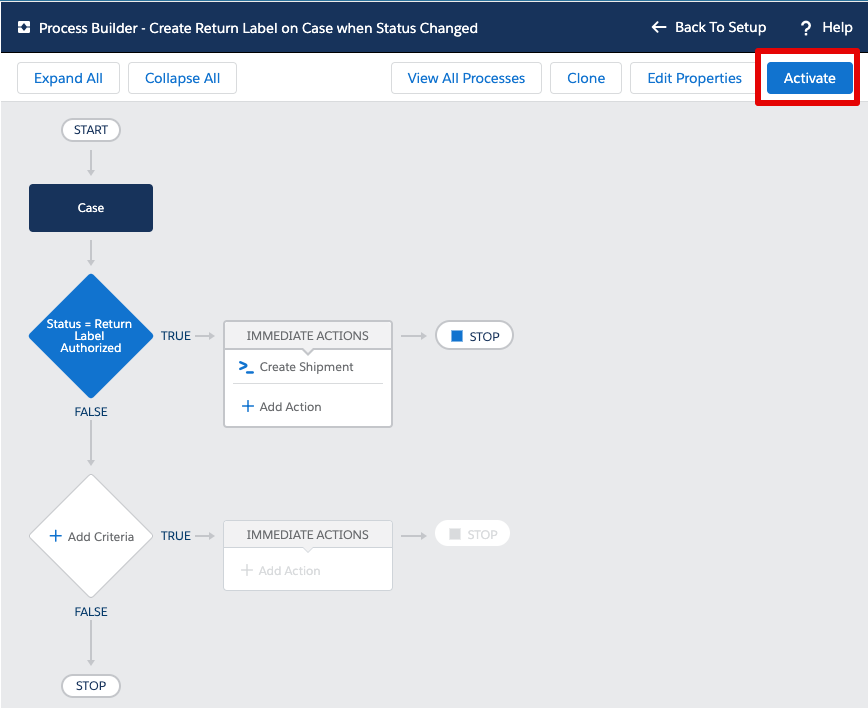
Remember in this guide, we are using the Case object,
and we will be running the shipment creation when Status = "Return Label Authorized".
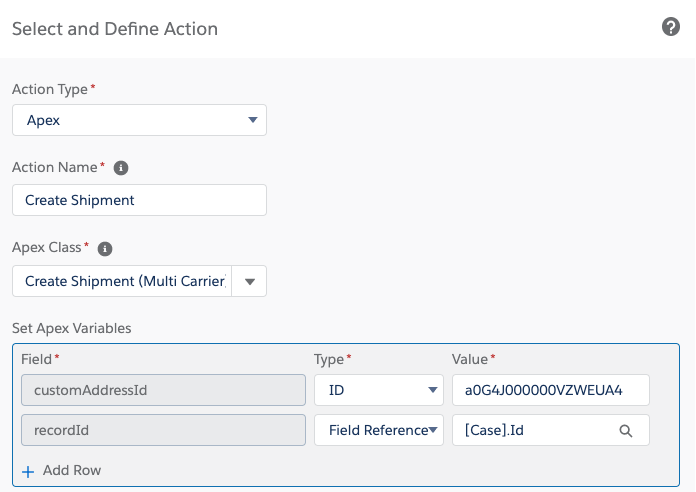
Next add an immediate Action. The Action Type will be "Apex", and the Apex Class will be "Create Shipment (Multi Carrier)".
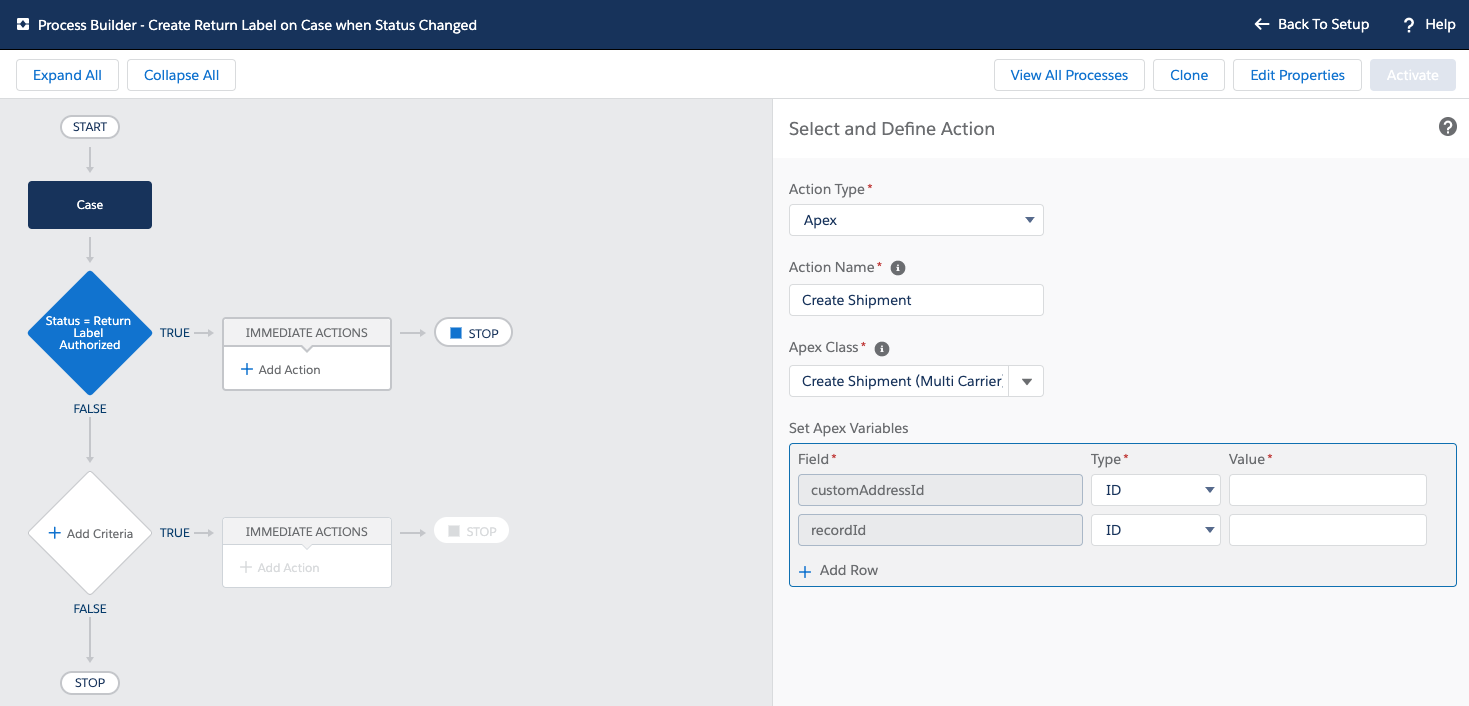
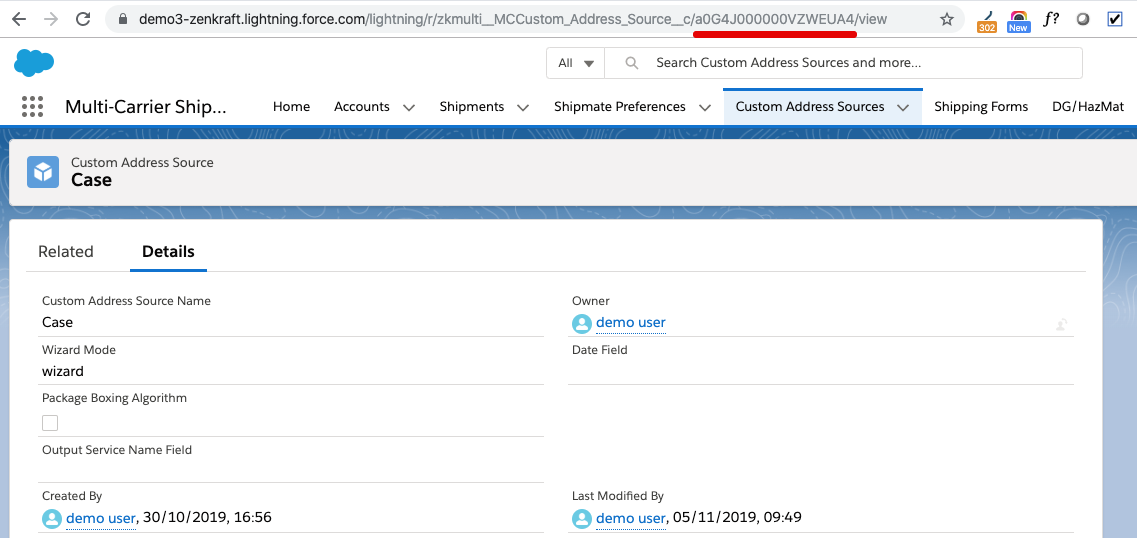
For the customAddressId please set it to the Custom Address Source ID that you are running this process from. To get this ID, navigate to your Custom Address Source and copy the last part of the URL. If you are in Lightning just use the first 15 characters of this objectId.
For the recordId please set the Type as Field Reference, and the value to be the Object ID. In our case it will end up being the Case ID.
Once set up correctly, it should look like this:
Click Save, and don't forget to Activate this Process Builder.
That is all set, you will now be able to have shipments created via process builder.
Once you have activated the process builder, go to a Case, change its Status to "Return Label Authorized" and a shipment will be auto-created.
One-button Shipment Creation
In this section we will show you how to create a custom button on your object that does the same as the New Shipment button from your related list.
The most usual use case for this is if you want to create two one-click shipment buttons from a standard or custom object. One for a standard outbound shipment, and the other for a return shipment.
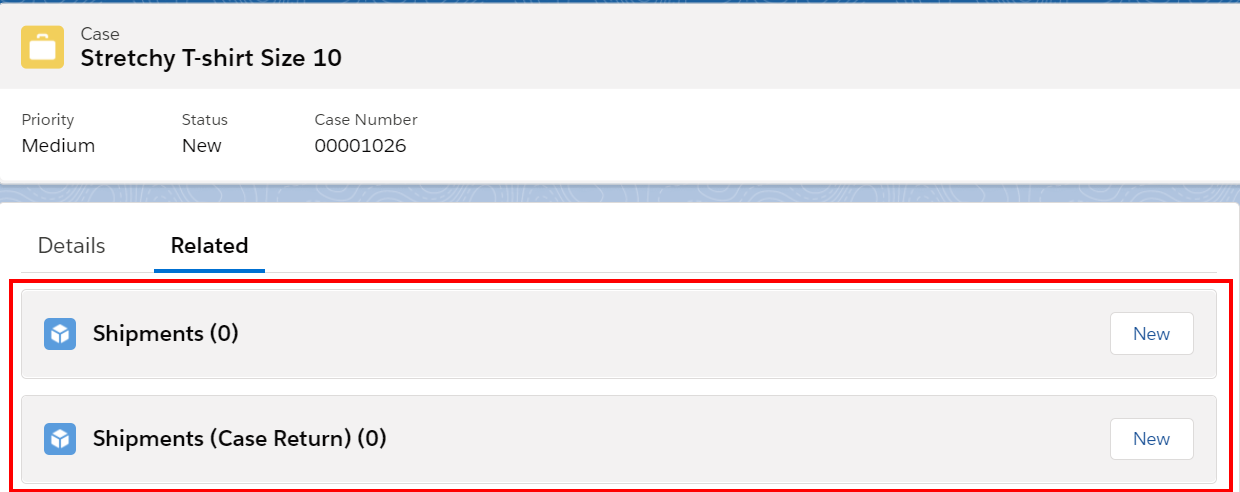
In this guide we will use the standard Case object. First, we need to make sure that our Custom Address Source related lists are already added to the page. If you haven't set up your custom address sources yet, please follow this guide.
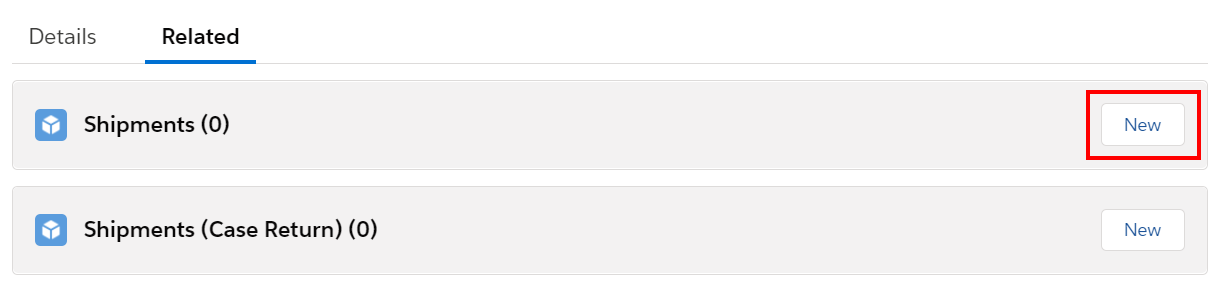
Once set up, you should have the two related lists on the page like so:
Click on the New Shipment button on the first item and copy the Shipment Wizard URL. Save this URL somewhere, as we will need it later on.

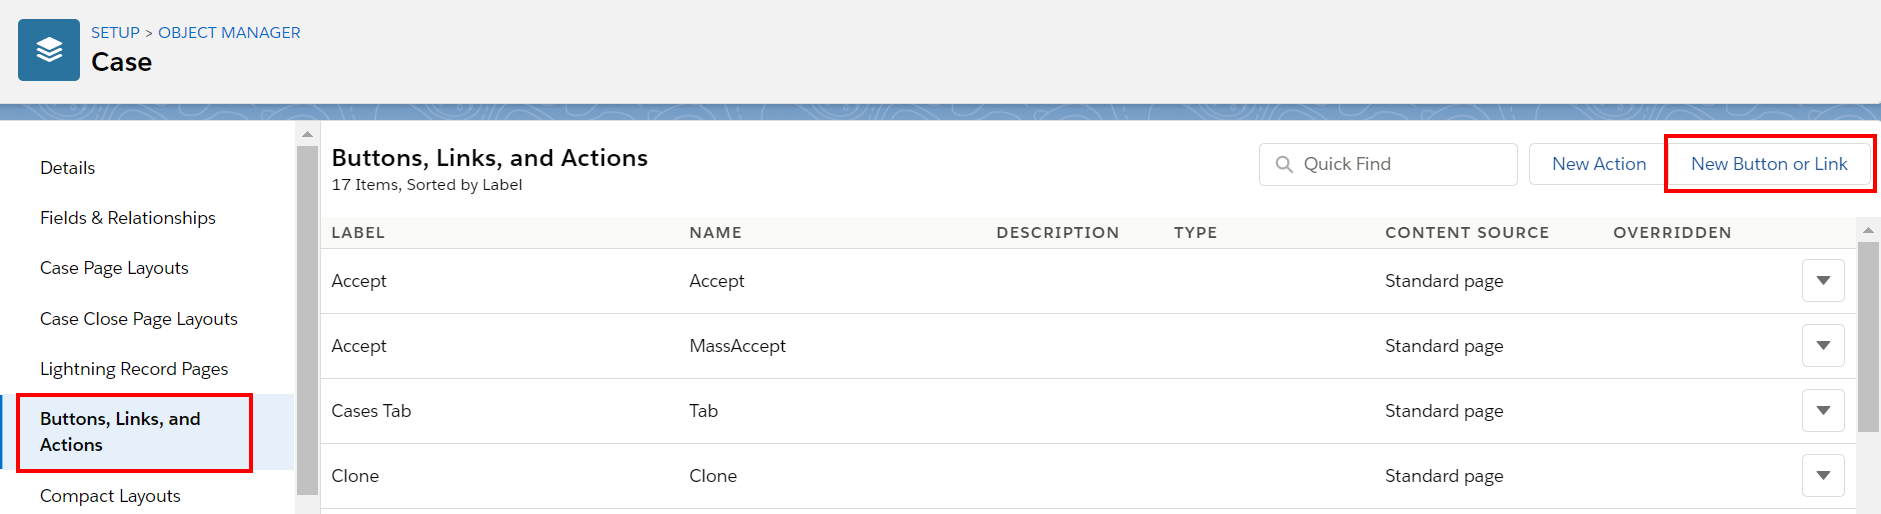
Next go to Setup > Object Manager > Case (the object you're using) > Buttons, Links, and Actions, then click on New Button or Link. (If you're using Salesforce Classic, then the steps are Setup > Customize > Case (the object you're using) > Buttons, Links, and Actions > New Button or Link.)
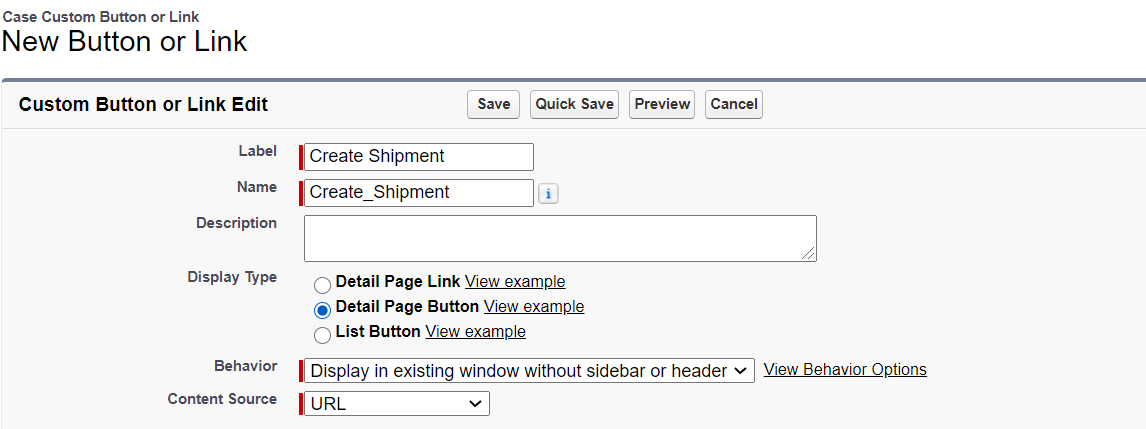
Enter a Label and Name. Select Detail Page Button. Under the Behaviour select Display in existing window without sidebar or header. Set the Content Source to be URL.
Now it's time to get the Shipment Wizard URL we previously copied, and paste it in the text area.
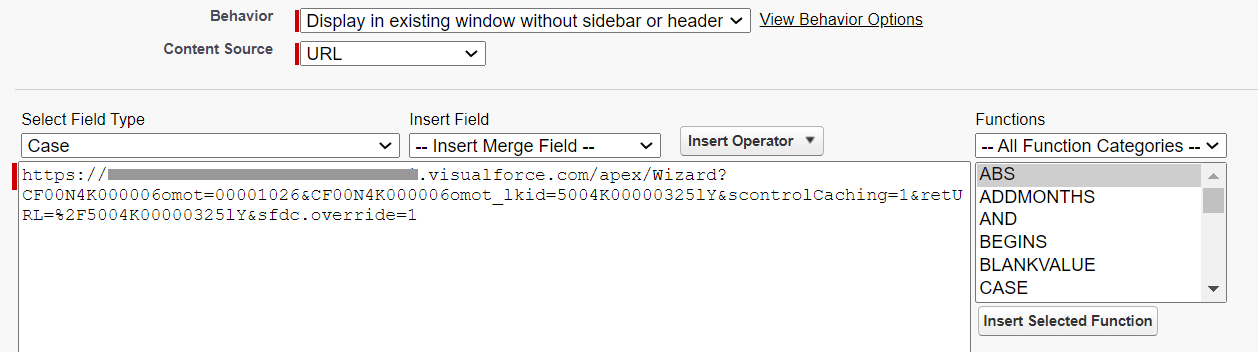
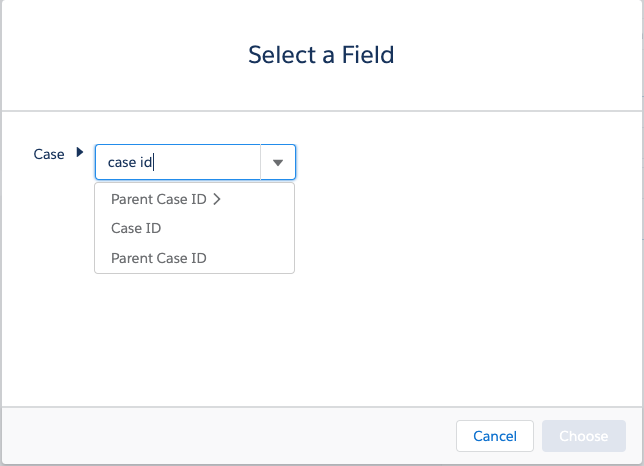
There are three changes we need to make to the URL. Lets split out the URL so its easier to read. Every time you see the “&” or “?” press enter. This is the point we need to insert the merge fields.
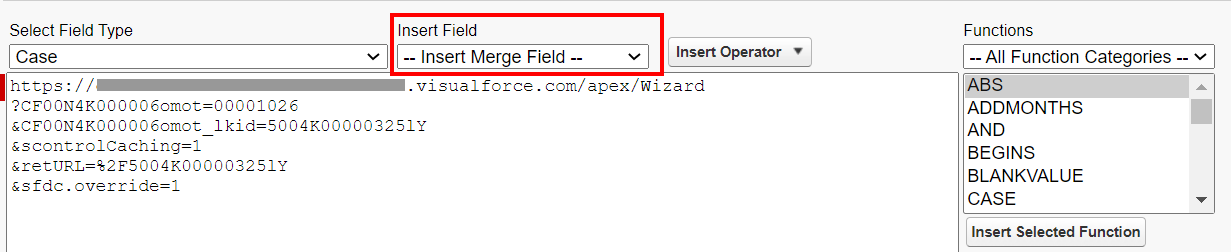
The first one to replace is the “Case Number” of the Case object. In this example 00001026 will be replaced with this merge field {!Case.CaseNumber} And the next two replacements of 5004K00000325lY are the salesforce case IDs, which are replaced with {!Case.Id} as you can see here.

Click Save.
The next step is to add this newly created button to the object layout.
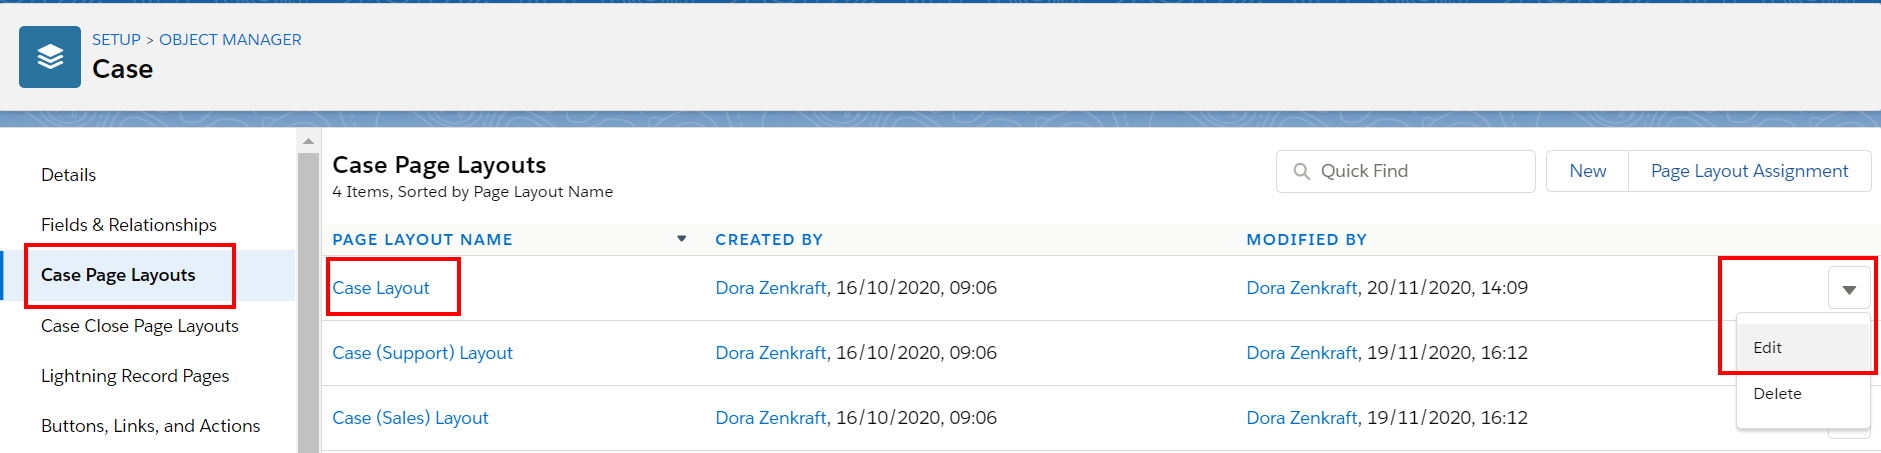
Go to Setup > Case > Case Page Layouts, then click on the arrow next to the layout you want to change, and click Edit. (If you're using classic, then navigate to any Case object and click on Edit Layout.)
Click on Buttons, find the button you created earlier, and drag it down into the Custom Buttons section.
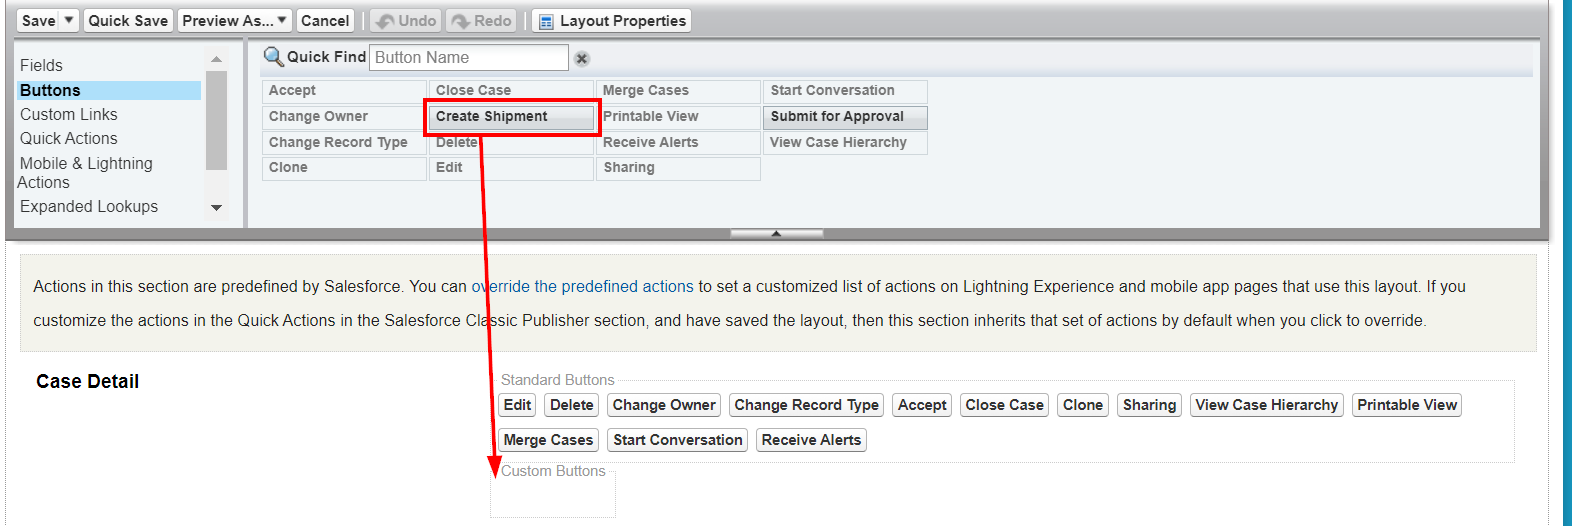
Click Save. The button should appear on the top of the page.
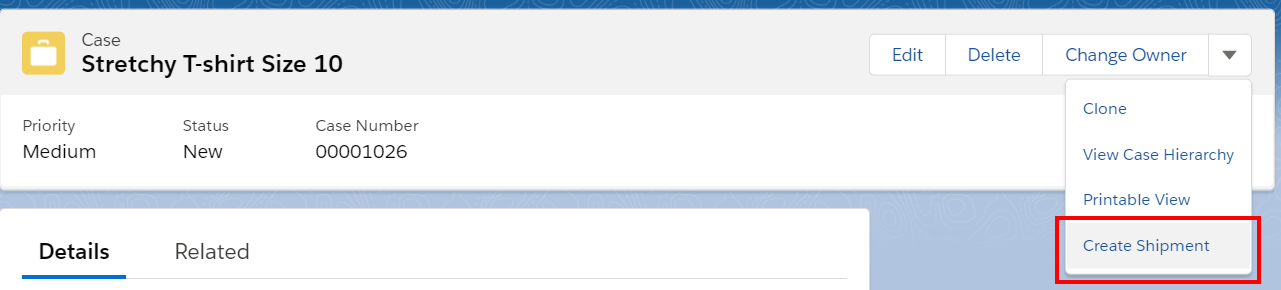
Repeating the steps above you should now be able to create the Return Shipment button linked to the second Custom Address Source.
Shipping in Bulk
It is possible to ship in bulk with our application. For more information please review our Bulk Shipping guide.
Creating Return Shipments
It is possible to create return shipments within the Multi-Carrier app if it is supported by the carrier.
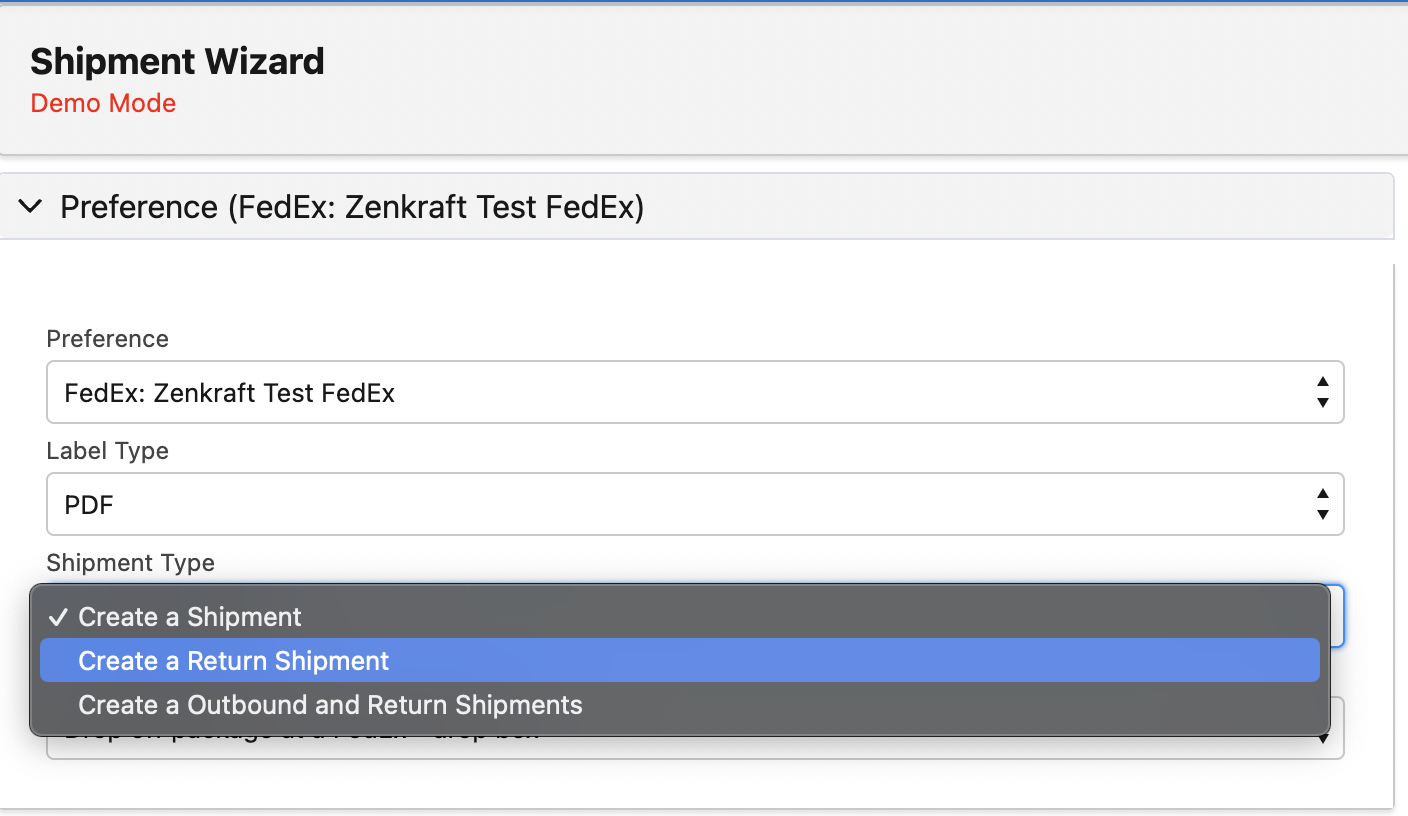
Create return shipments in the wizard
Open the wizard and click on the Preference section, then select Create a Return Shipment.
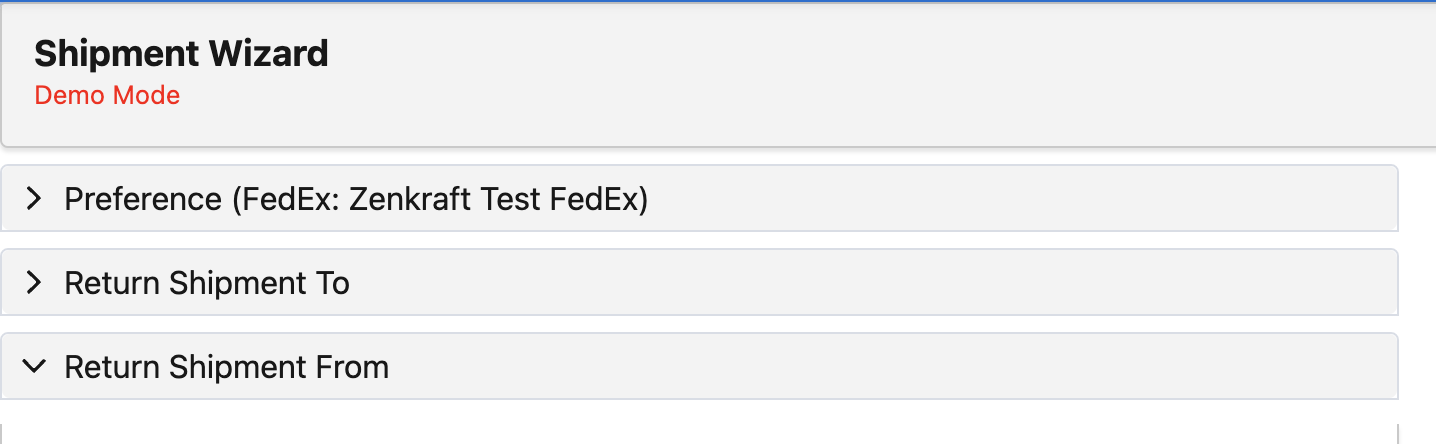
The address information headers will change to Return Shipment to and Return Shipment From.
Fill in any carrier specific details. For specific information please visit the carrier guides.
Create return shipments using the custom address source
Put the Return Shipment To address information under the Sender address details and the Return Shipment From information under the Recipient address details. This is because the app will know based on the shipment type that these addresses need to be reversed. (See above.)
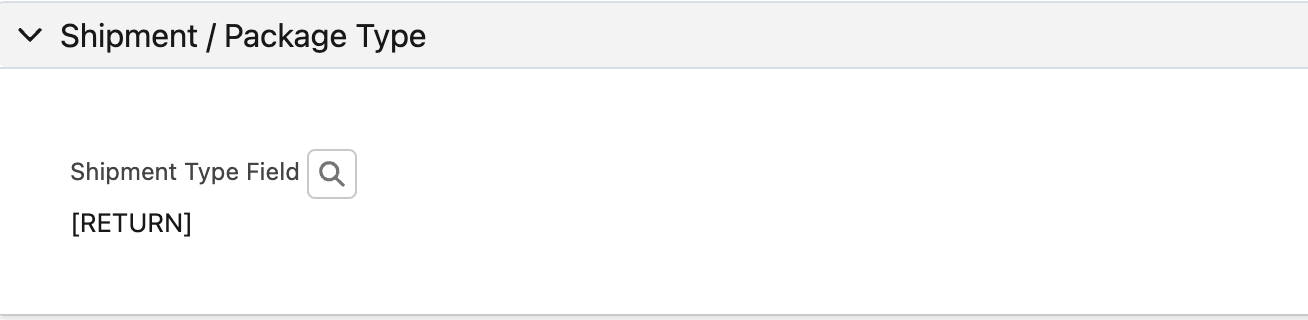
Set the Shipment Type to RETURN under Shipment/Package Type.
Fill in any carrier specific details. For specific information please visit the carrier guides.
Emailing Labels
Our invocable method allows you to automatically send a Multi Carrier label via email as an attachment.
Fill out the details in the Shipping Preference
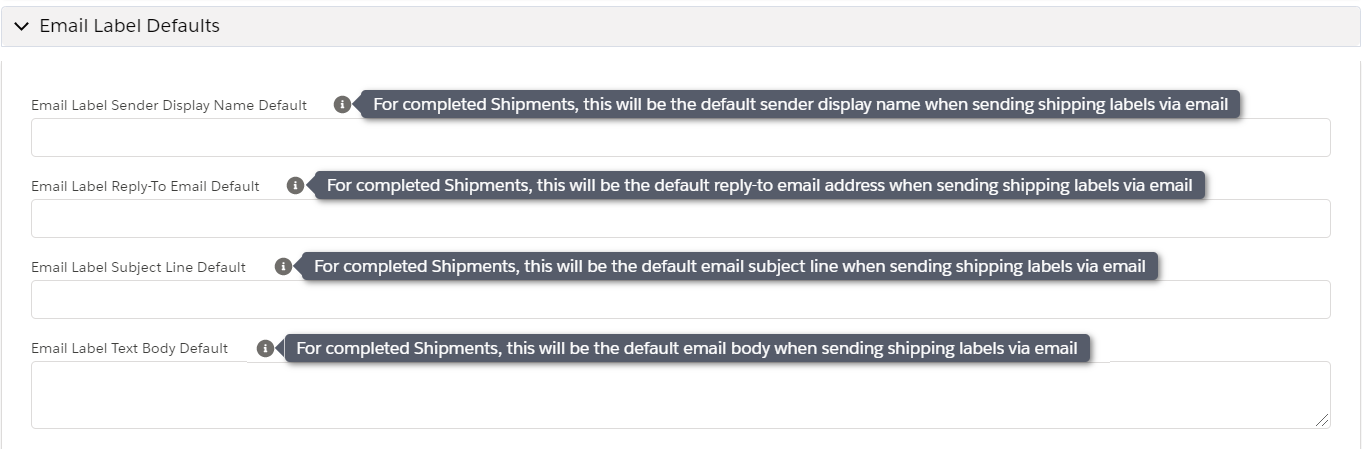
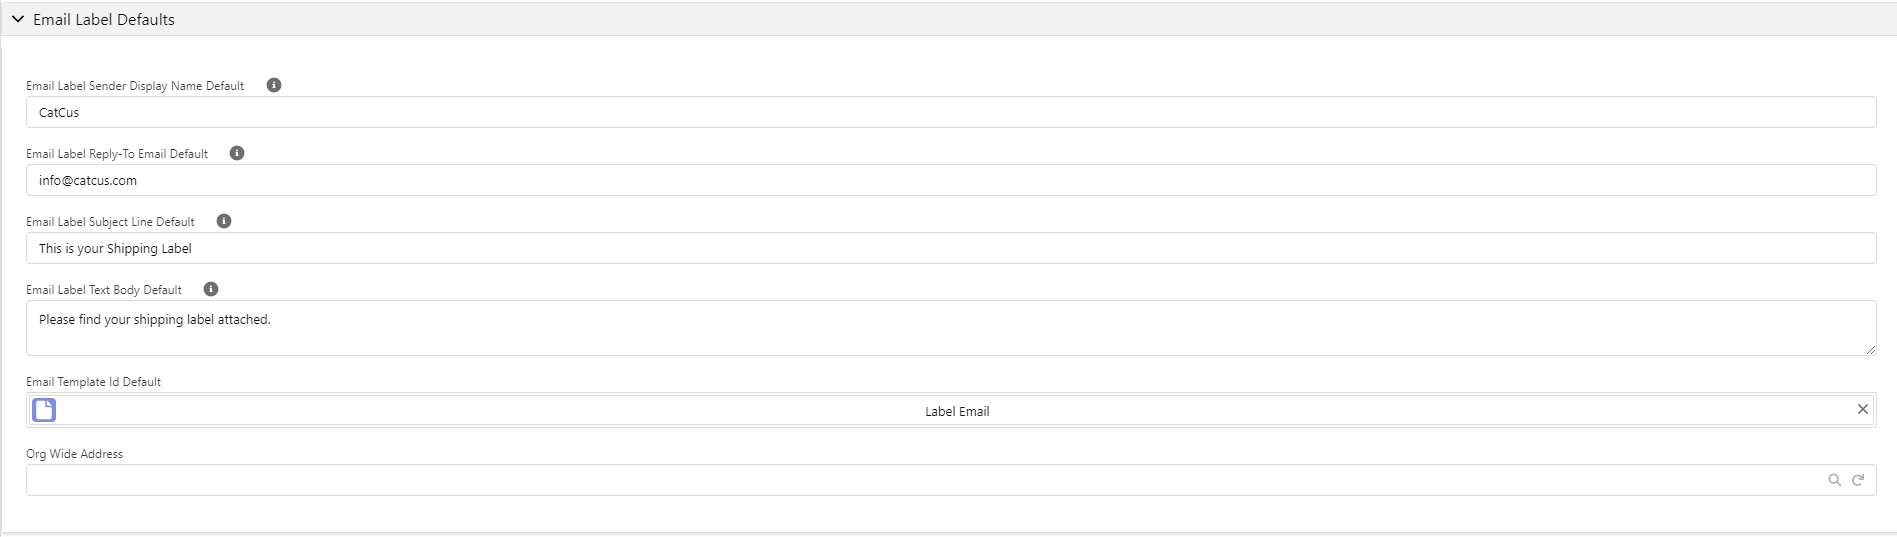
Go to the Shipping Preference you are using and click Edit. Scroll down to the Email Label Defaults section, then fill in the Email Label details, or add an already created email template.
You can also create an email template by going to Setup > Email > Classic Email Templates, where you can create a new HTML template. Once created your template might looks similar to this:
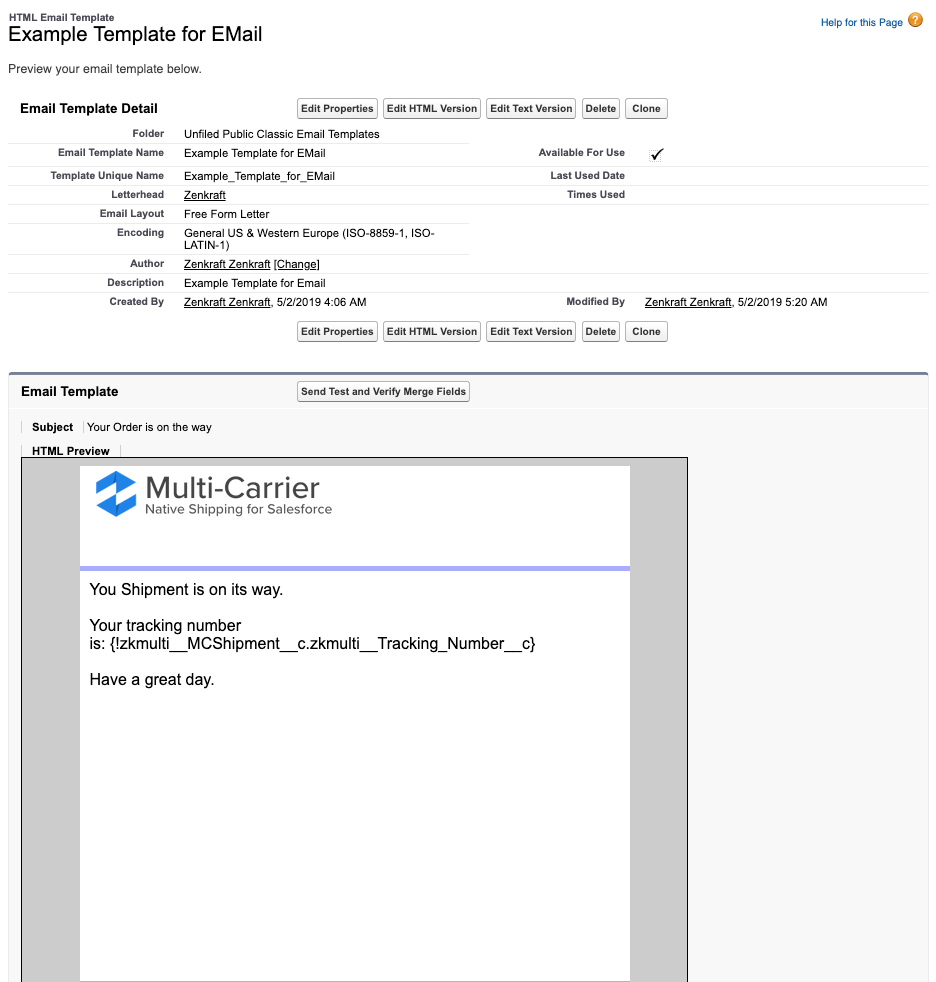
As you can see you are able to add merge fields and a good example might be the tracking number. You can only reference fields on the Shipment object, so if you do need to reference any other fields, you will need to create formula fields on the shipment object so that you can add them to your email.
Once all details filled in and an email template is added your settings should look like this:
Create Process
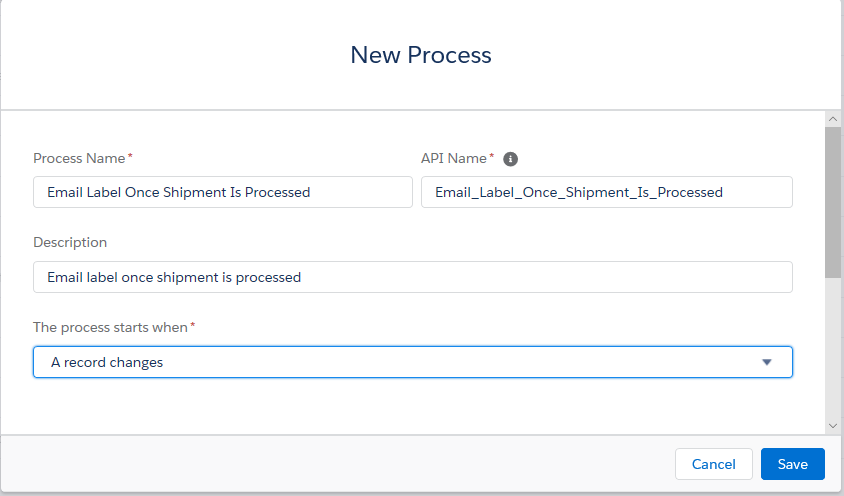
First create a Process Builder Process by going to Setup > Create > Workflow & Approvals > Process Builder and click the New button.

Give the process a name, description and choose to start the process when "A record changes".
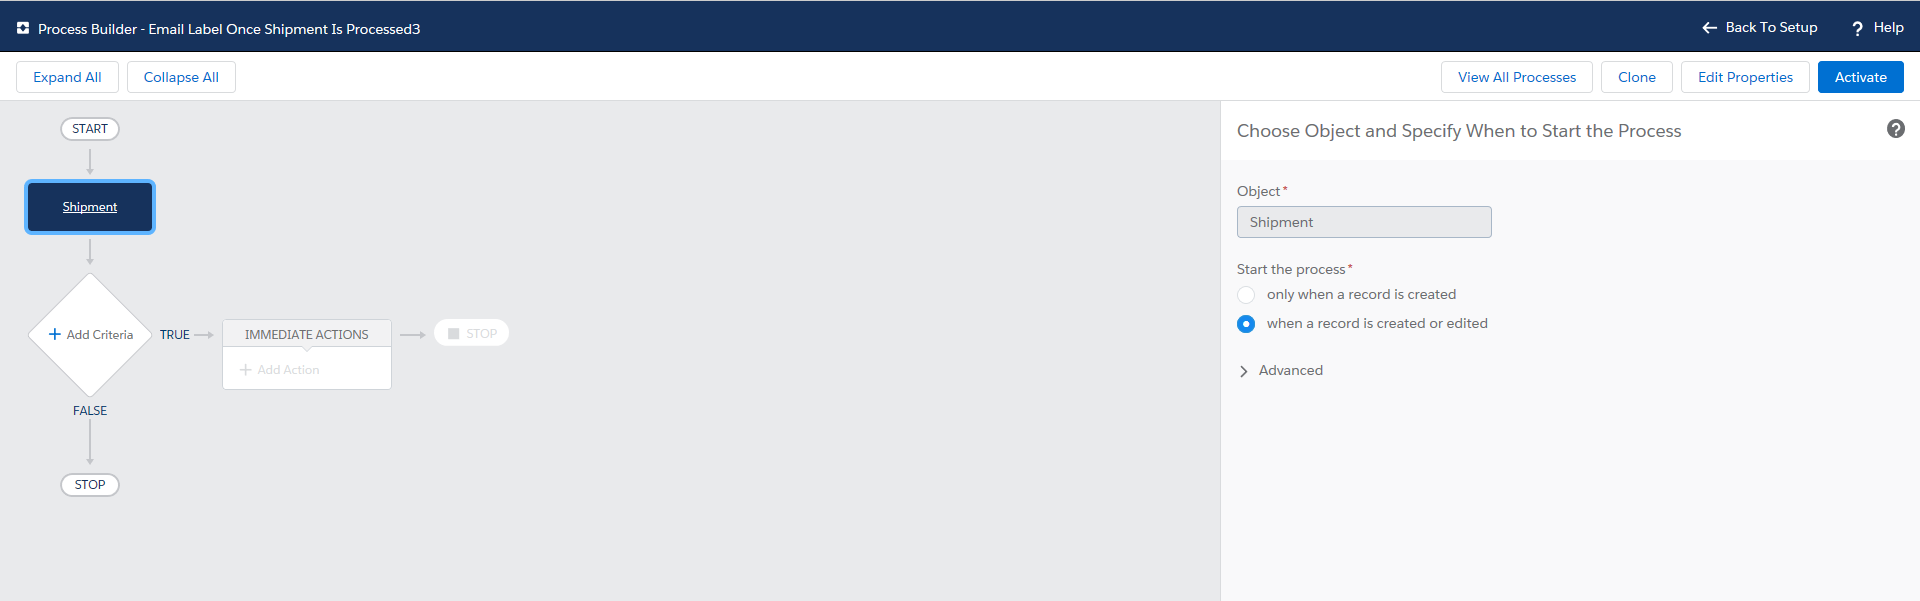
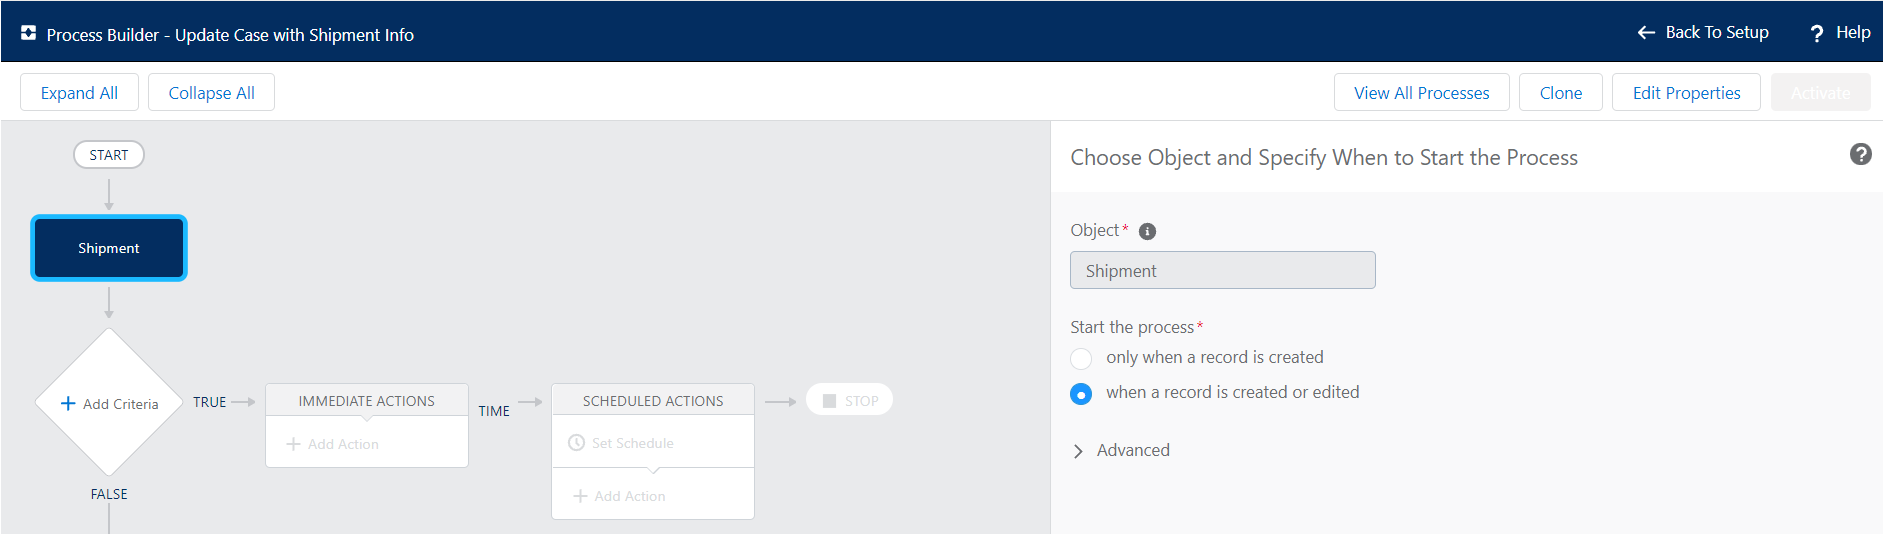
Next, click "Add Object", choose the Shipment object and we want to start the process "when a record is created or edited".
Click Save and your screen will look like so:
Next we select "Add Criteria".
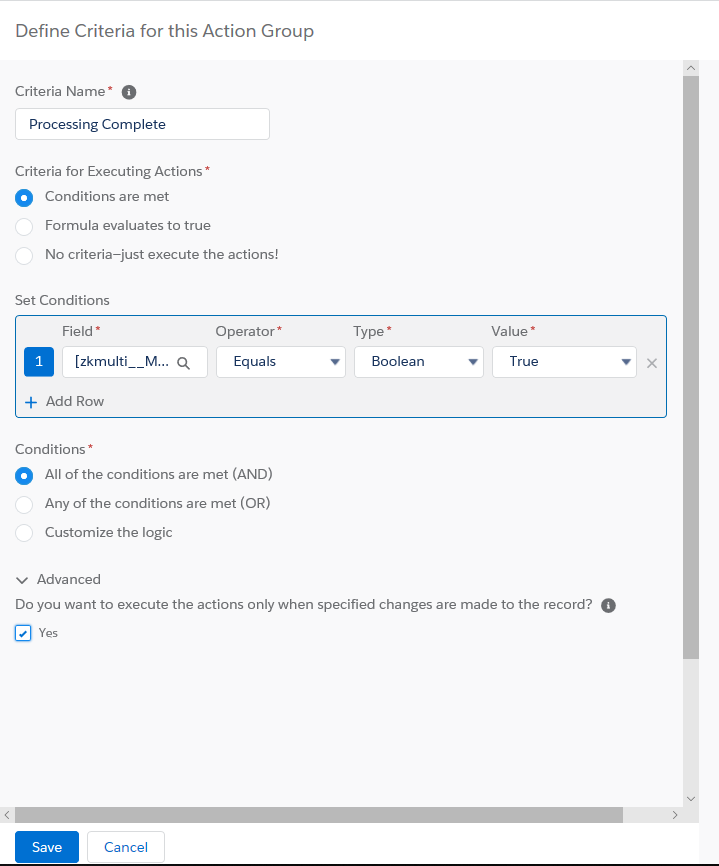
On the right hand side set the Condition Field to be "Shipment Processing Completed",
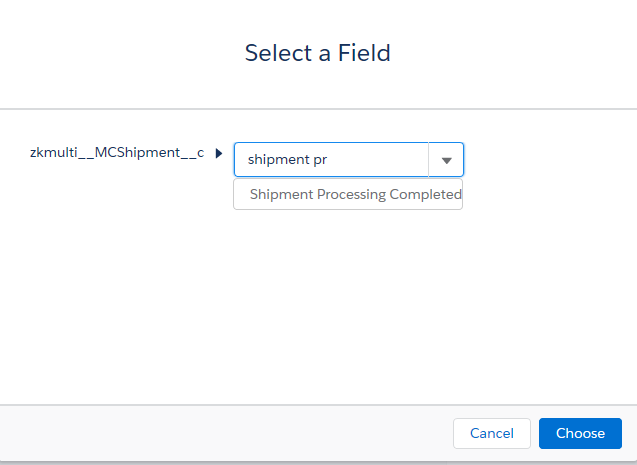
and the value we are looking for to be True.
We also need to check the checkbox under Advanced to execute the actions only when specified changes are made to the record.
You should finish with a screen like so:
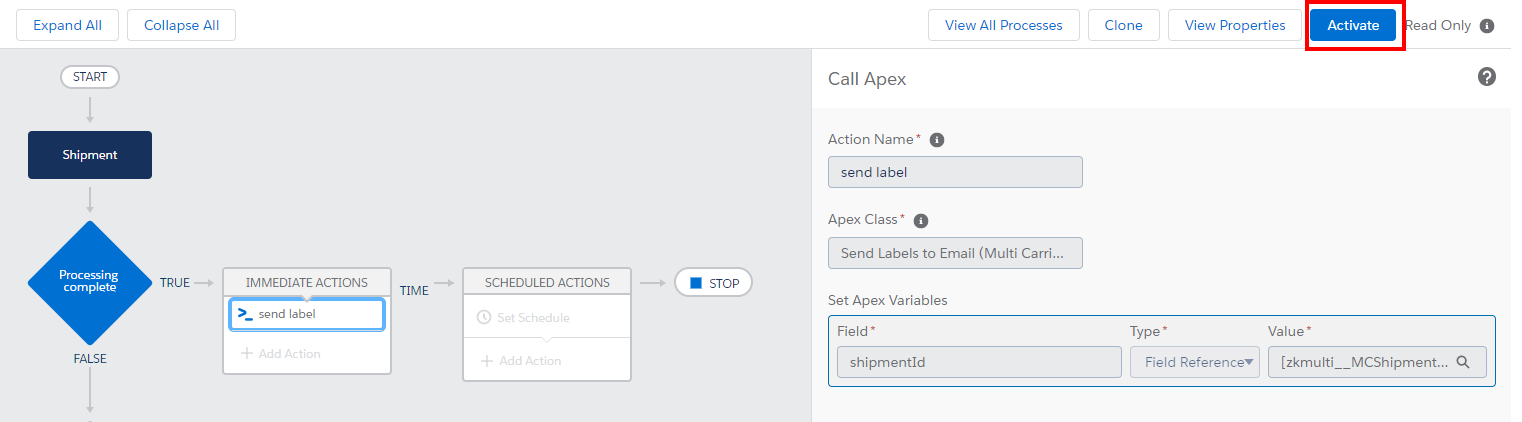
In Immediate Actions click "Add Action", set the Action Type to be "Apex", and the Apex Class to be "Send Labels to Email":
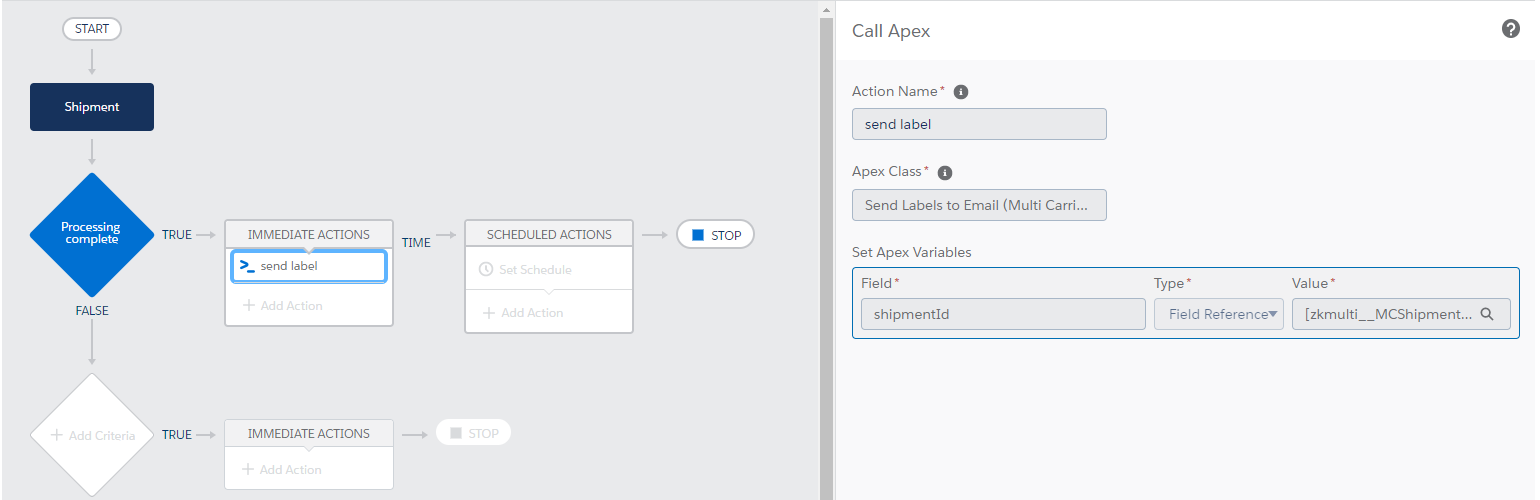
You will then need to set the Apex variables. There is only one to set.
Choose the Type "Field Reference", and select "Record ID" from the field dropdown.
Your screen will now look like so:

If you want to use different email templates depending on certain predefined criteria, you also specify the email template ID:
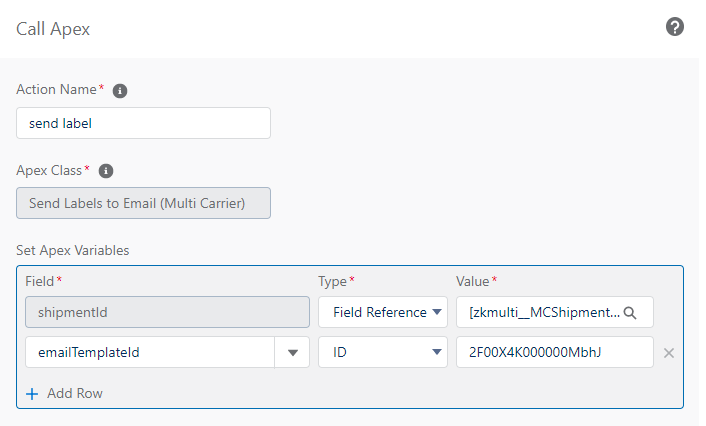
Click Save, and then activate the Process Builder process.
You can now test this procedure. Create a Shipment manually or using the automated process described above.
Automate Using Flows Instead of Process Builders
If you have advanced logic that is better served using Flows, then our Invocable Methods from the guide above are all still accessible via the Flow interface.
Once you are editing your flow select to add an Action:
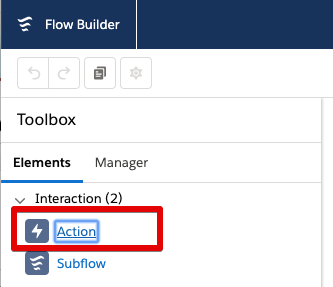
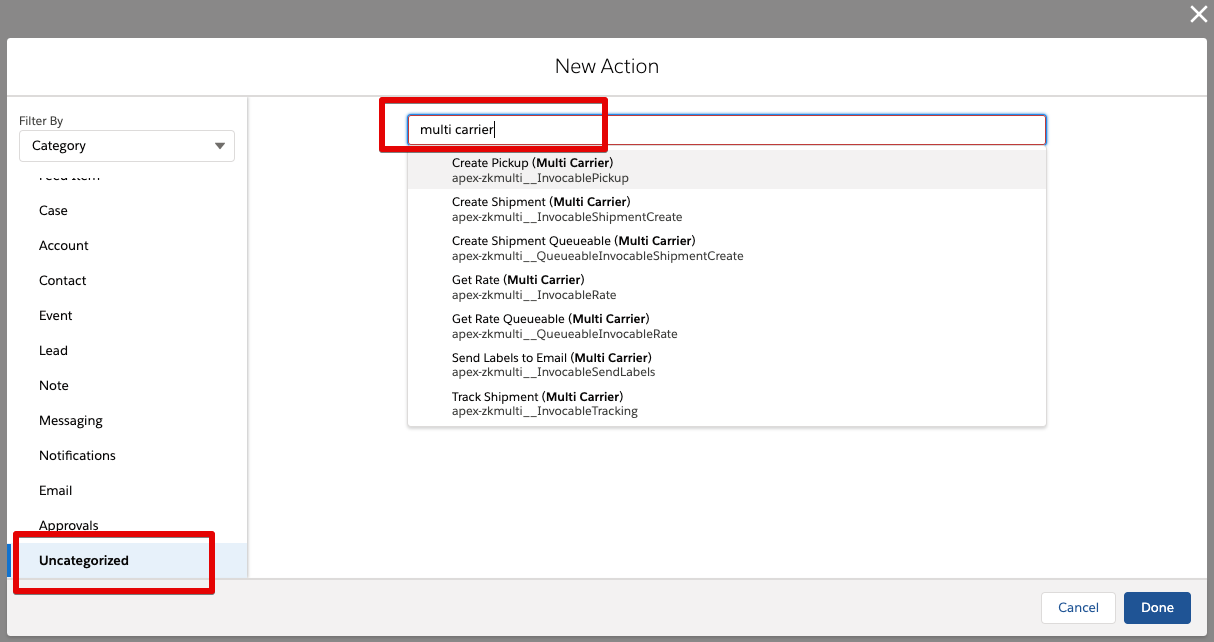
You will then need to scroll down to Uncategorized, and then in the search section do a search for Multi Carrier. You can now select the type of method to use.
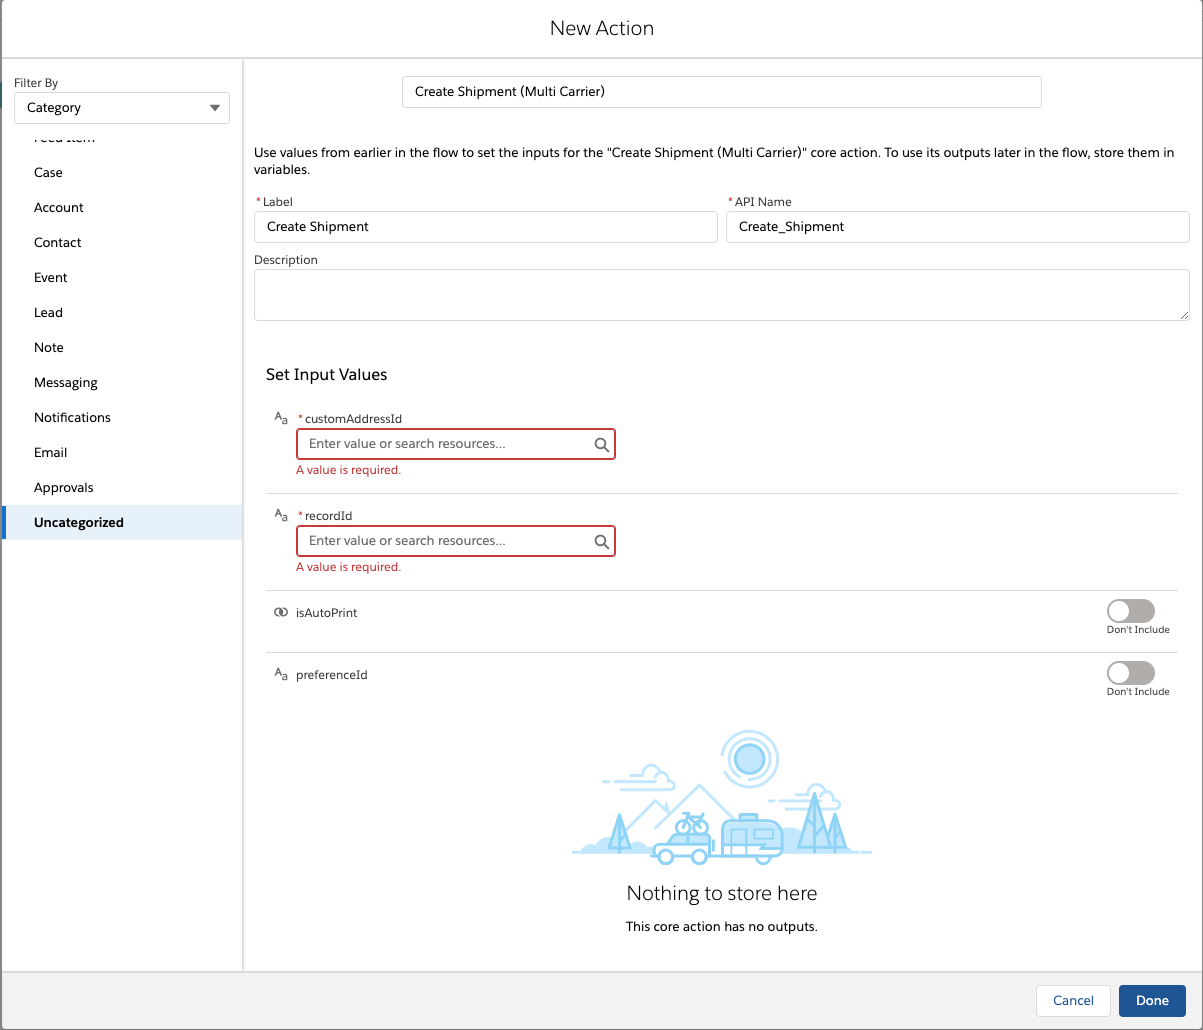
You are then able to enter the same inputs as you would do using process builder.
Use Process Builder to Copy Shipment Information
You can use a process builder to copy information from the shipment back to the original record.
In this example we are going to use the Case object. Make sure you have a Custom Address Source set up and remember the name of the lookup relationship you are using there.
Go to Setup > Process Builders, and create a new process builder. The process should start when a record changes.
Select the Shipment object and set the start to "when a record is created or edited".
Set the criteria to Shipment Processing Completed is true and only execute when specific changes are made.
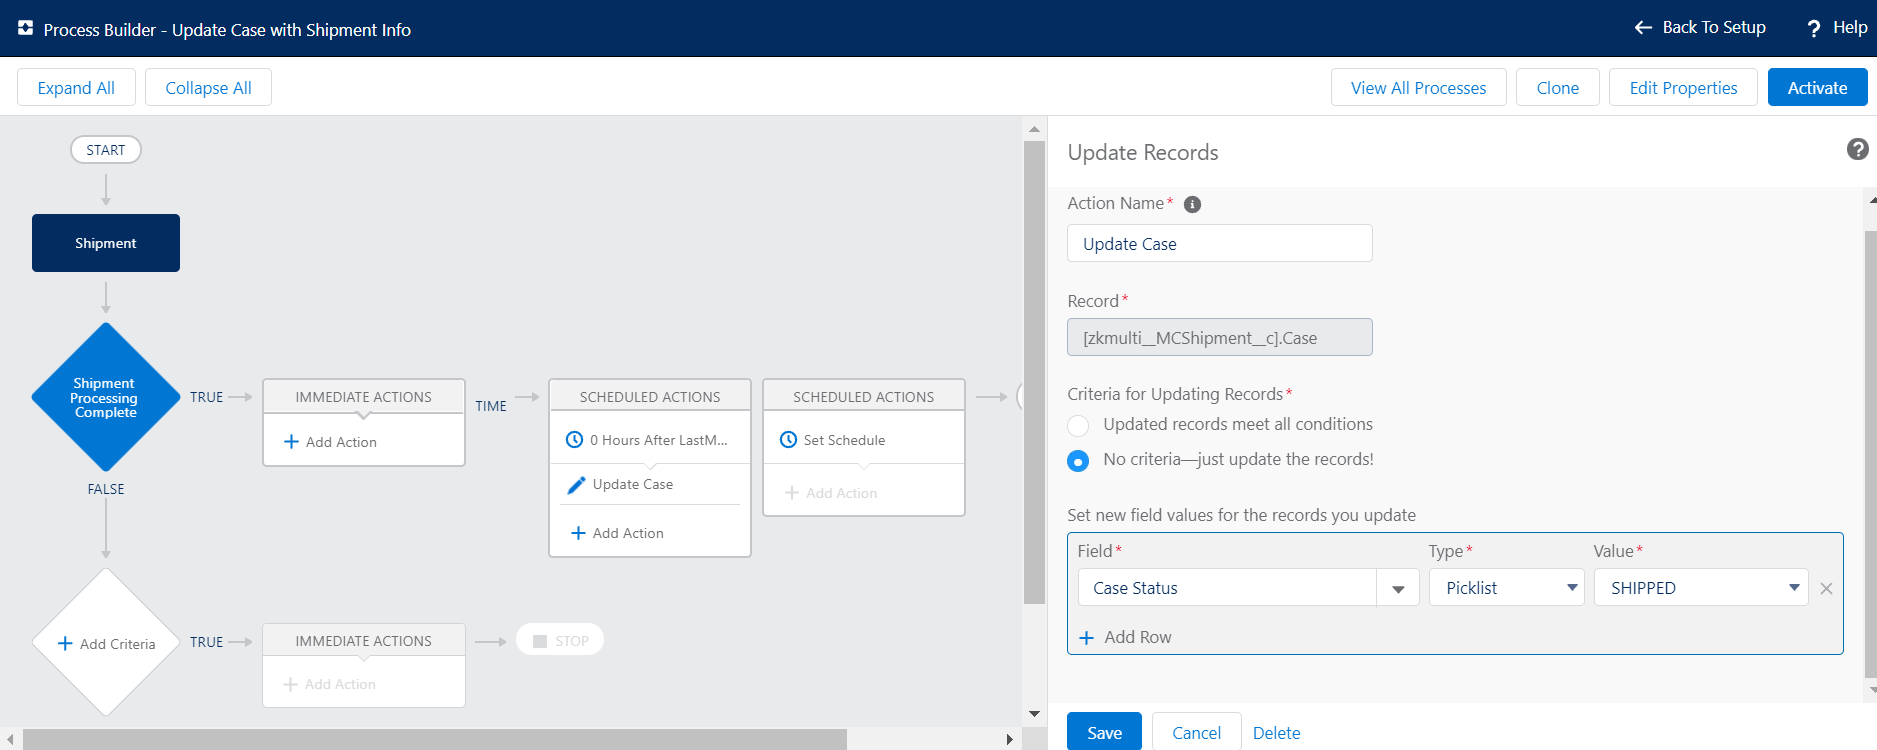
Set a scheduled action for 0 hours after LastModifiedDate.
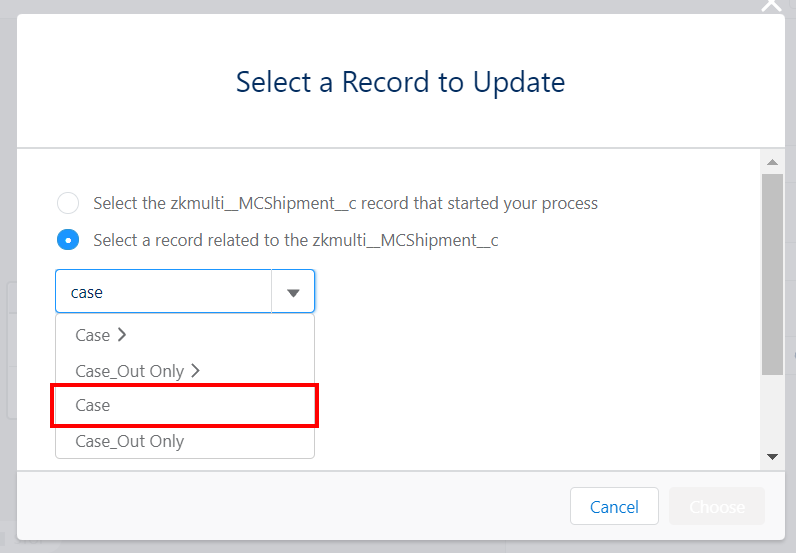
Add an Update Record action and select the record type to be a record related to the zkmulti__MCShipment__c.
Now you can select the fields to update. In this example we will update the Case Status to be "Shipped".
Save your changes and activate the process builder.
Package Profiles
Package profiles are package records used as templates when calculating rates or creating shipments. They are essential when using the Boxing Algorithm or when creating shipments using Pack and Ship, but can be useful when creating shipments using the regular wizard as well.
Create Package profiles
Go to the Packages object in the Multi-Carrier app and select the Package Data view.

Click on New to create a new profile. Add a description, select the carrier and the package type.
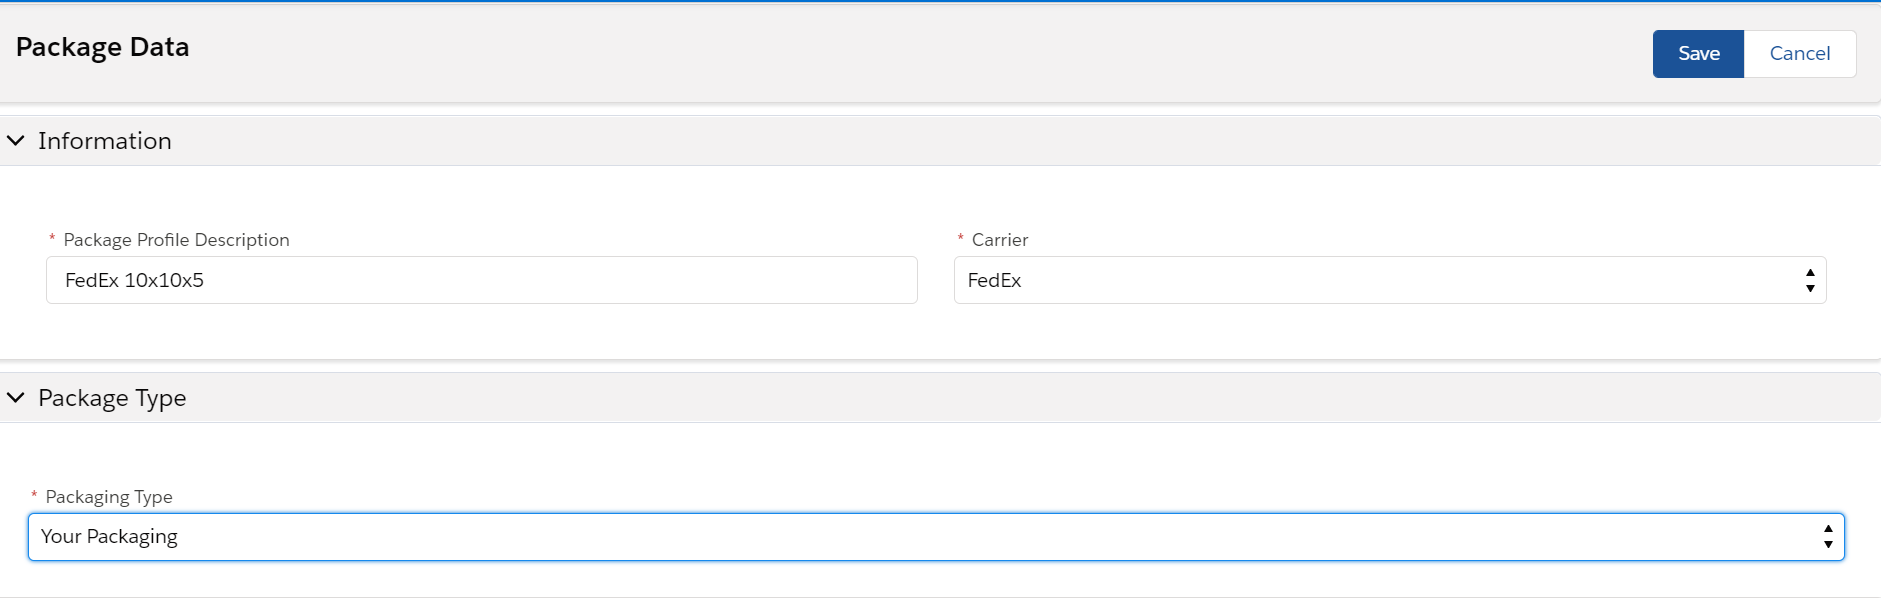
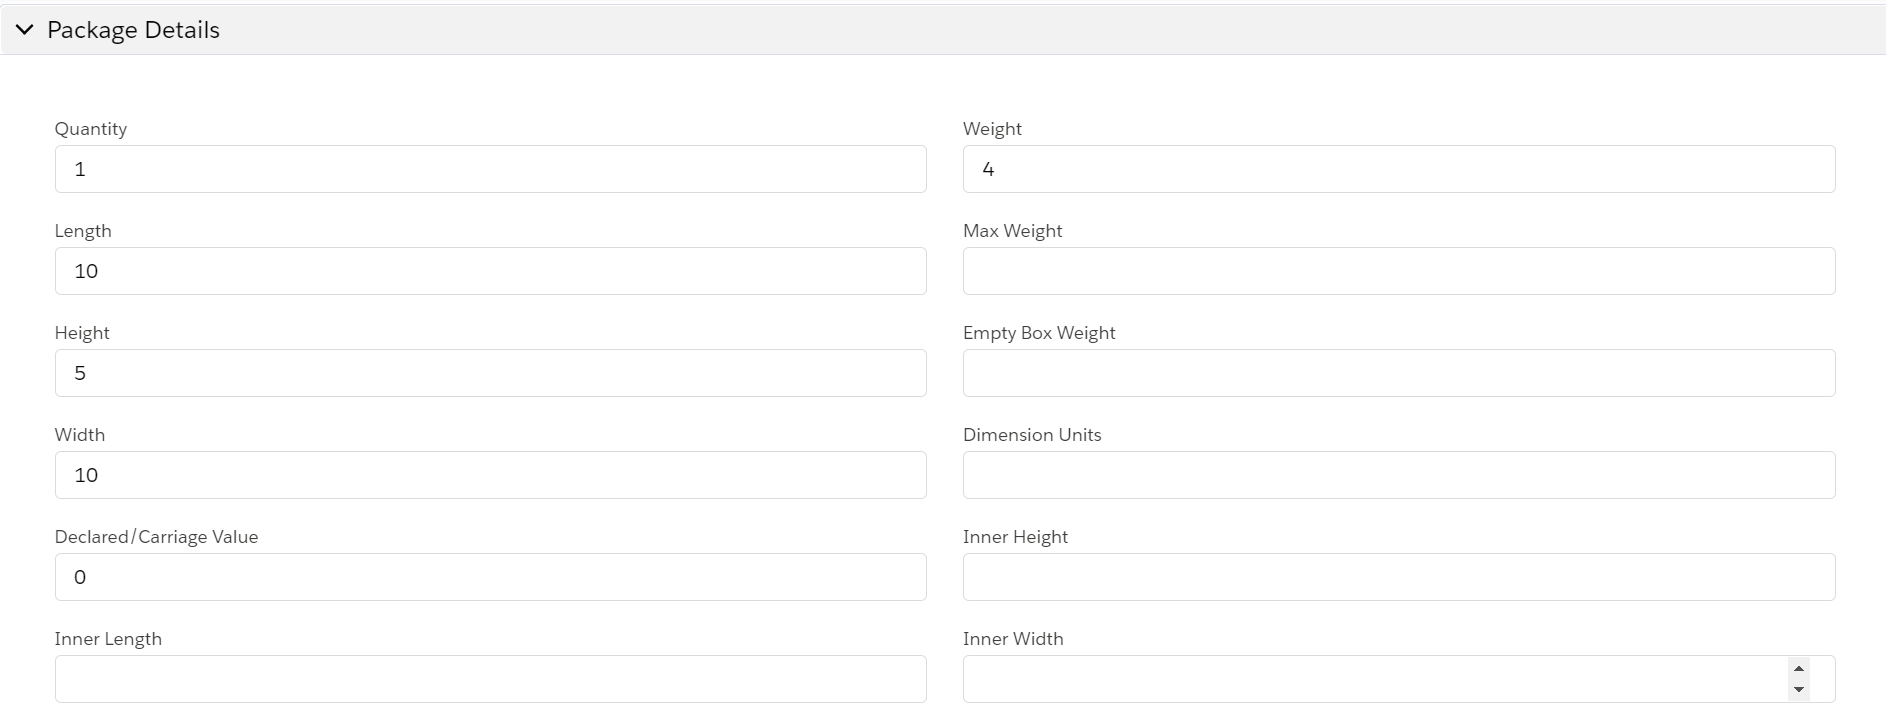
Add the Package Details, like the length, width, height, and package weight (if applicable).
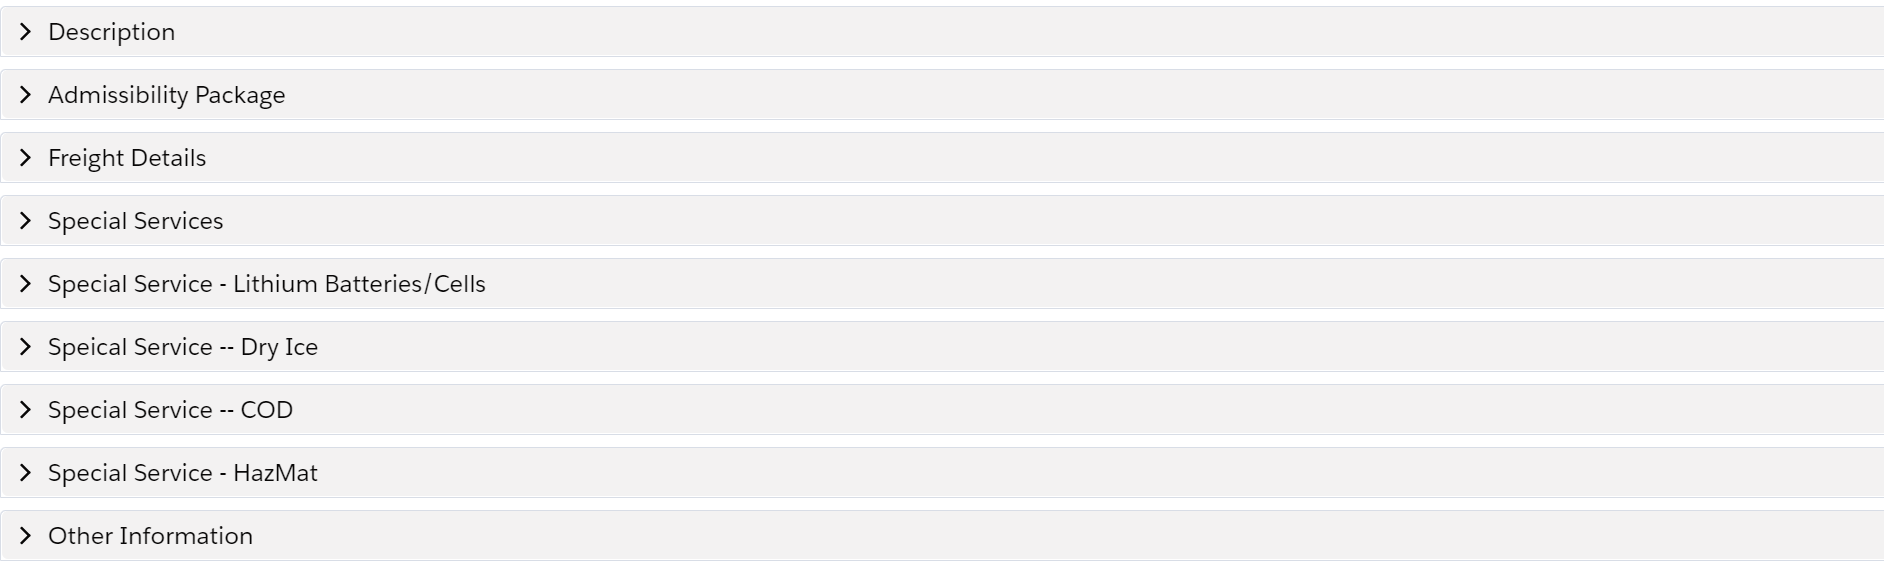
Add any other information under the dropdowns.
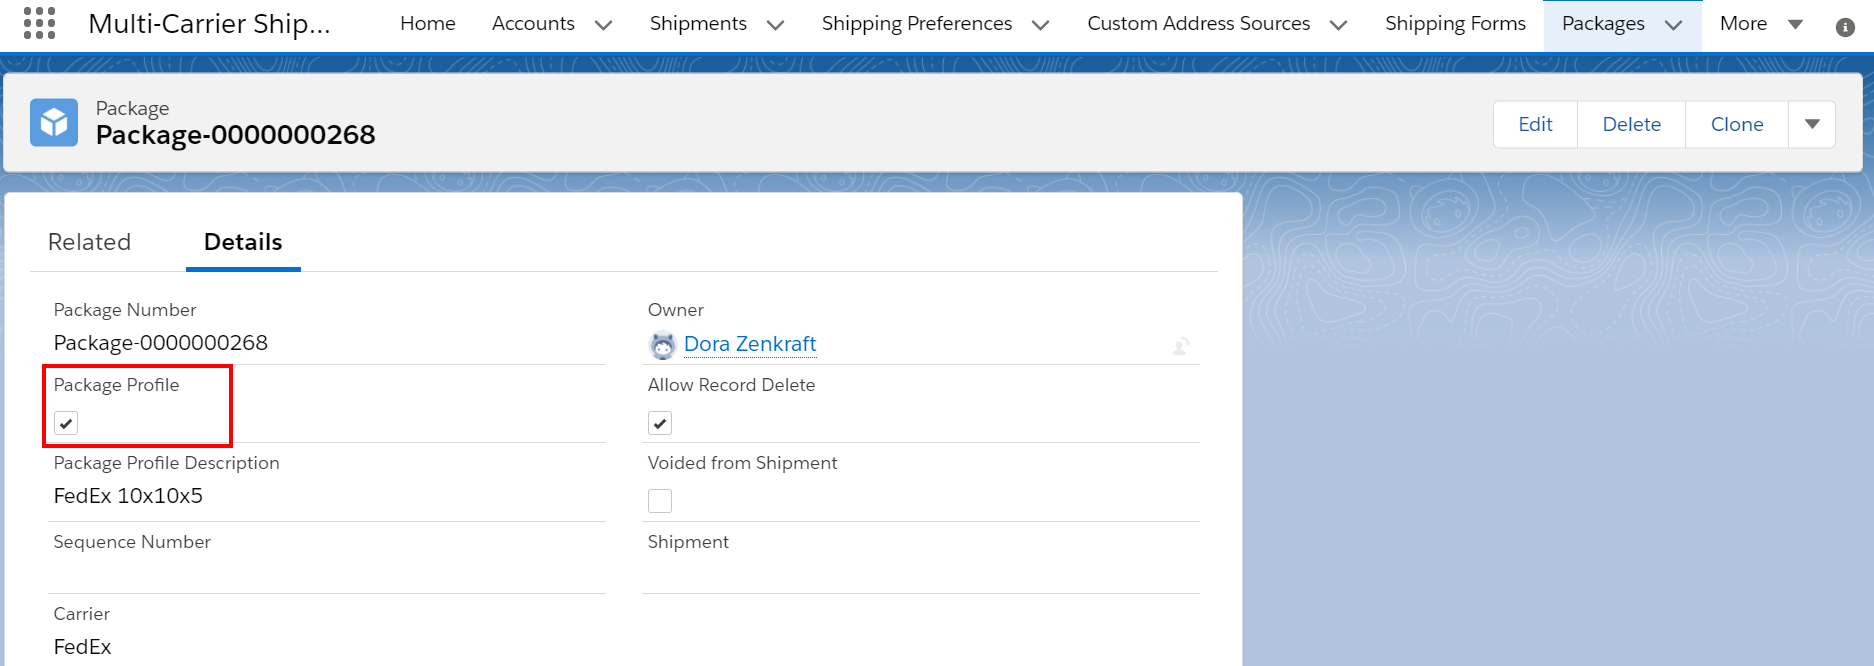
Save these details and a new profile will be created. You will always see if a Package record is a profile from the Package Profile checkbox.
Modify or Delete Package Profiles
You can easily modify or delete a package profile by opening the package profile record and selecting Edit or Delete.
Use Package Profiles
The most common usage of package profiles is for Pack and Ship. Open your Pick and Pack wizard and click in the Containers searchbox then select the container you want to use.
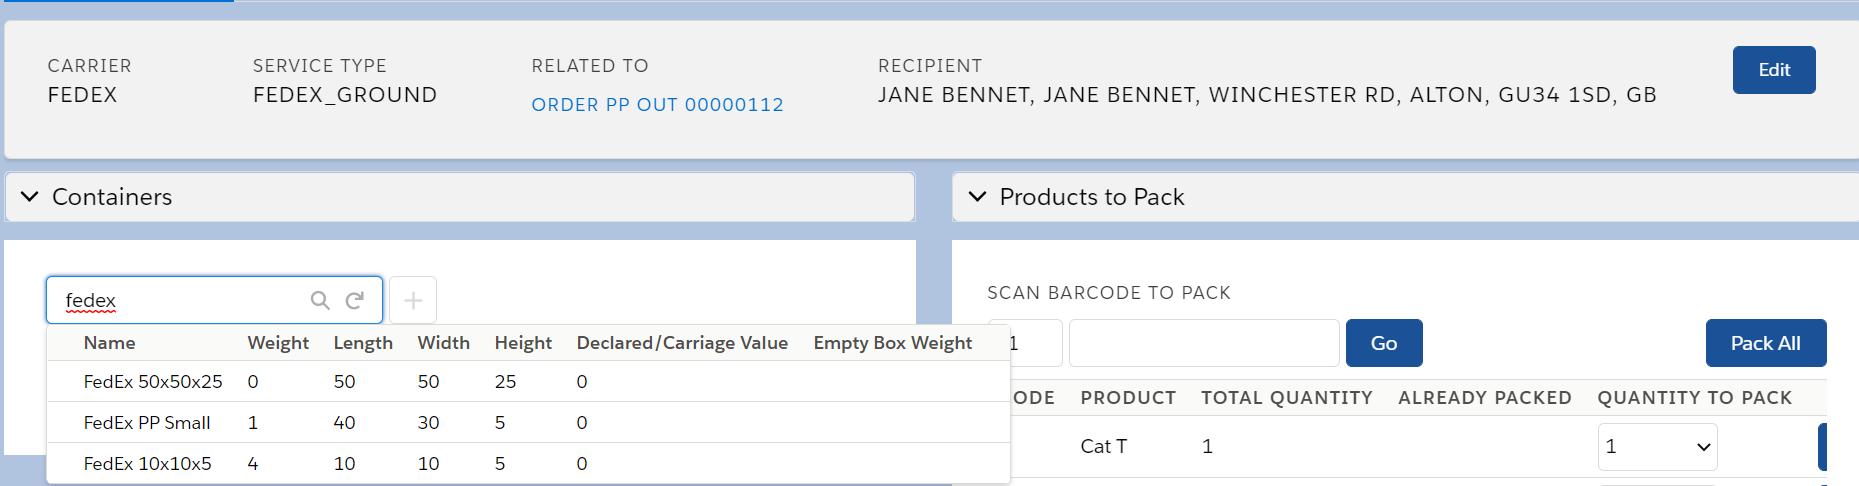
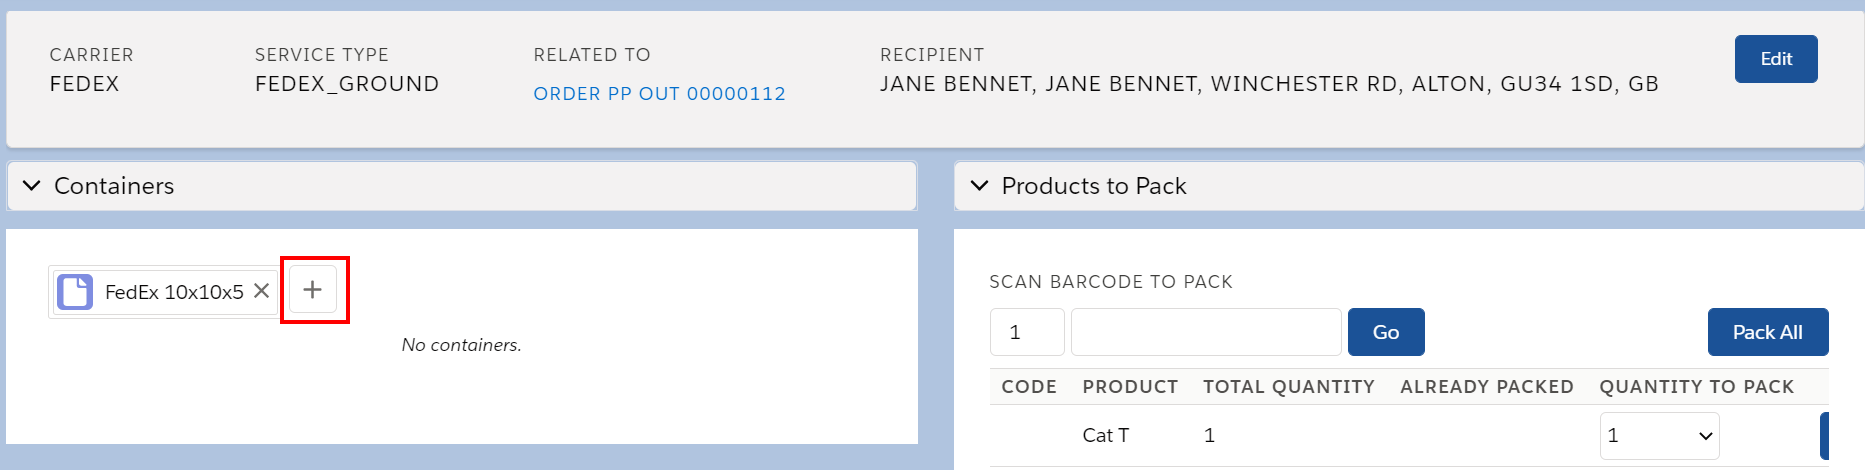
Click on the + sign to add the container.
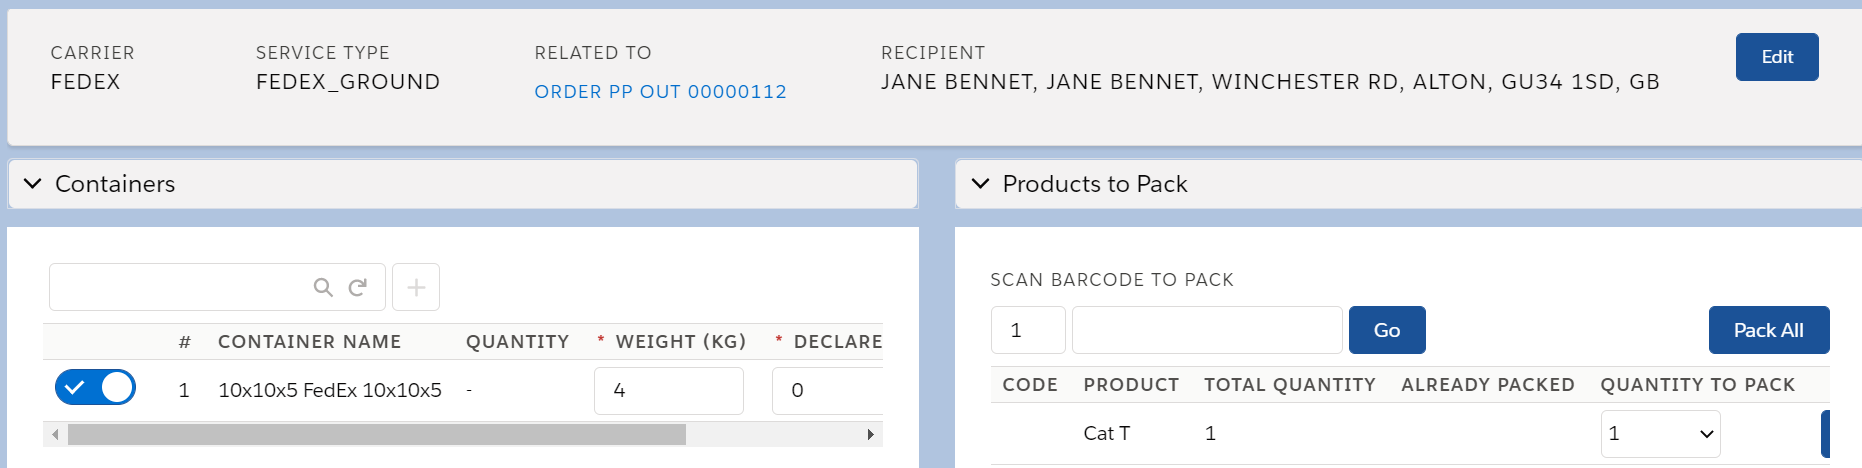
The package information will appear and you will now be able to pack all your items ready to ship.
You can also use package profiles with the regular Shipping Wizard. Open the wizard and make sure that all the address lines, package type and service type fields are filled in.
Click in the Packages search box and select the package profile you want to use.
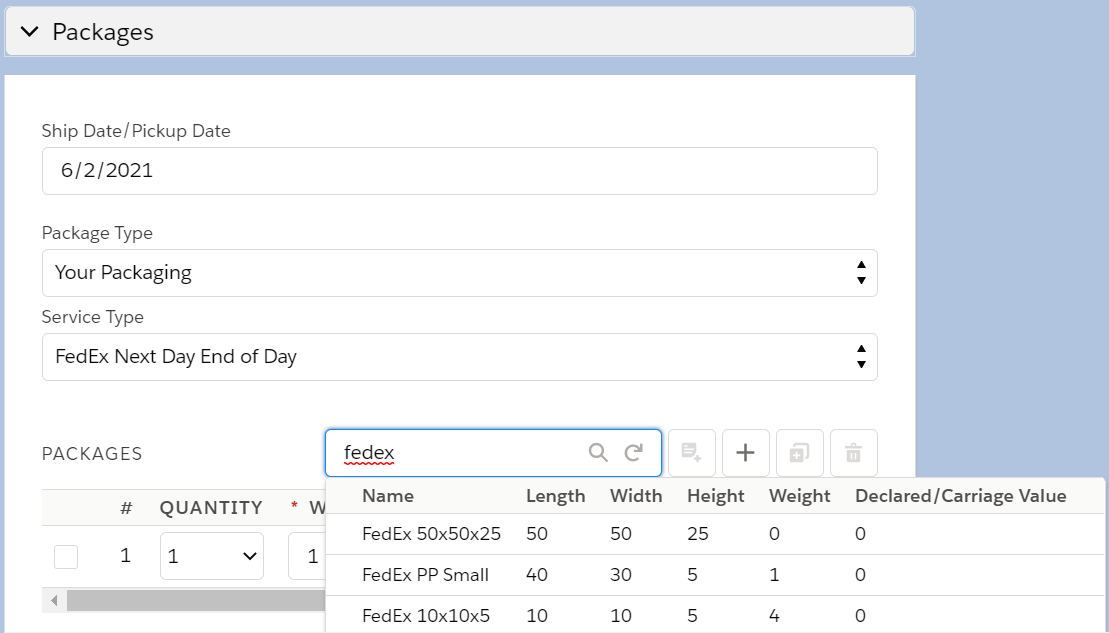
Click on the add template icon to add the package.
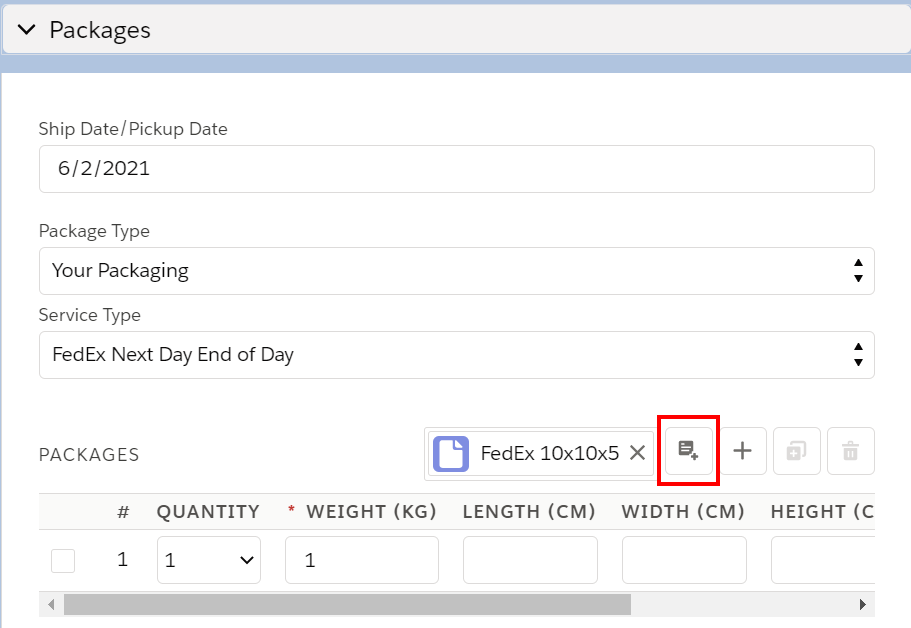
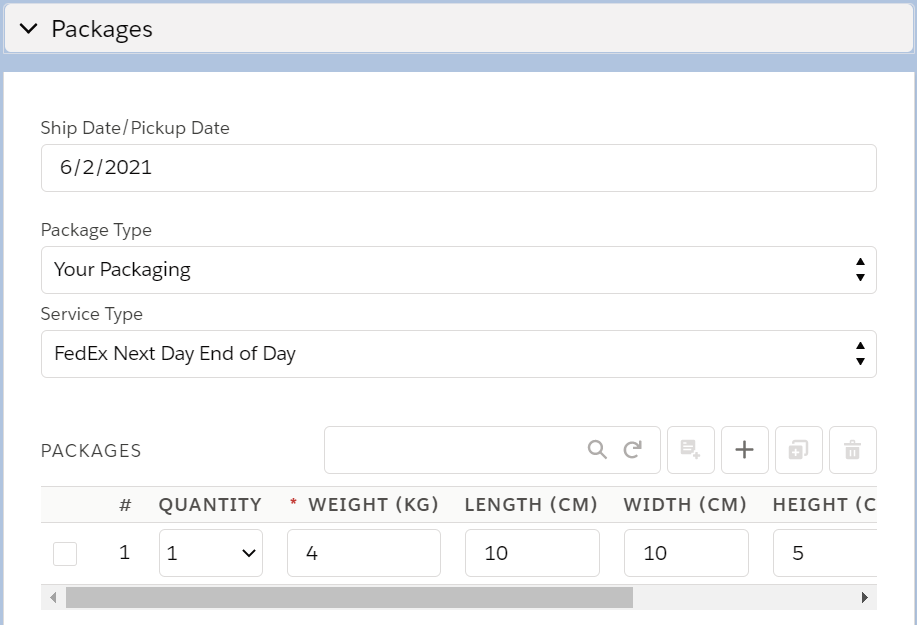
The package information will be filled in with the data from the profile.
Customs Items
Customs items records are automatically created with each international shipment. But if you have items that you ship regularly you can create customs items templates to reuse.
NOTE: From v1.108 this object is called (labelled) Products.
Create Customs Items
Go to the Customs Items object in the Multi-Carrier app and select the Customs Items Data view.
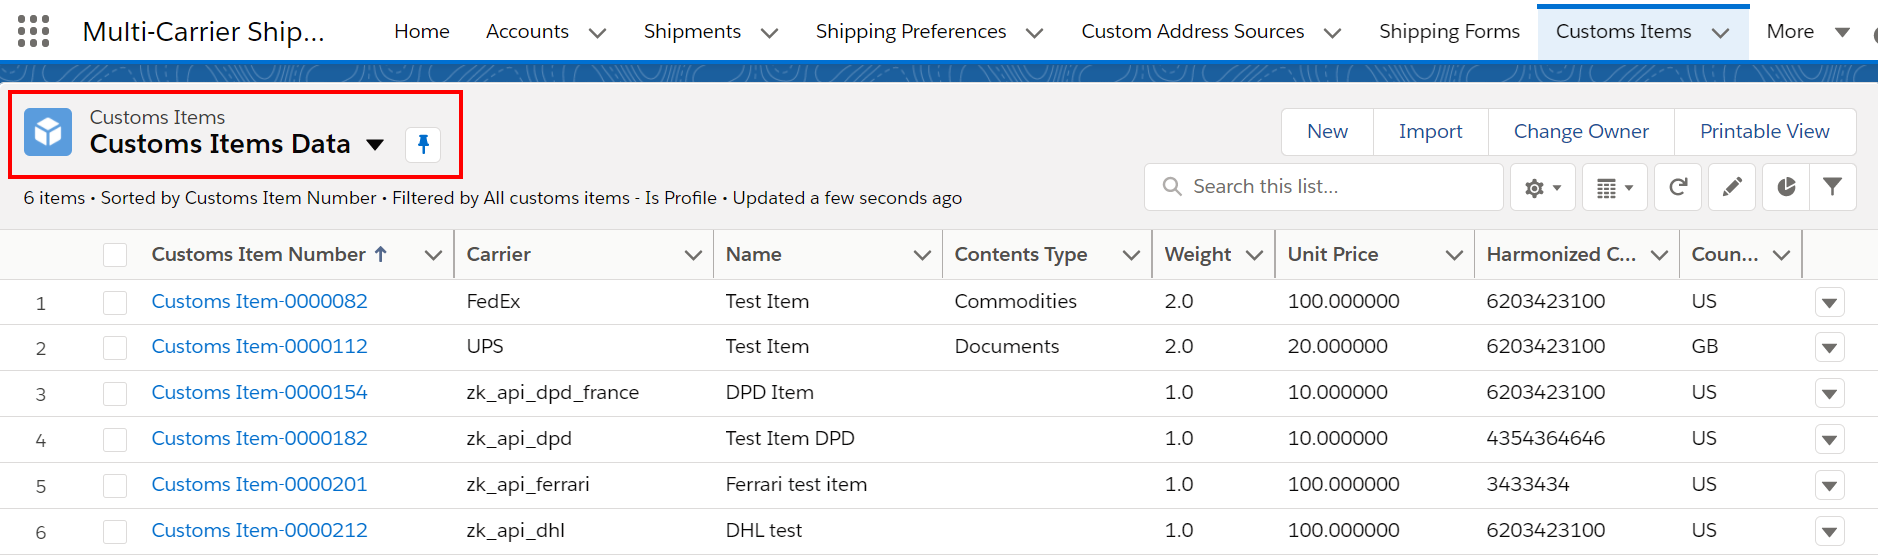
Click on New to create a new profile. Add a description and select the carrier.

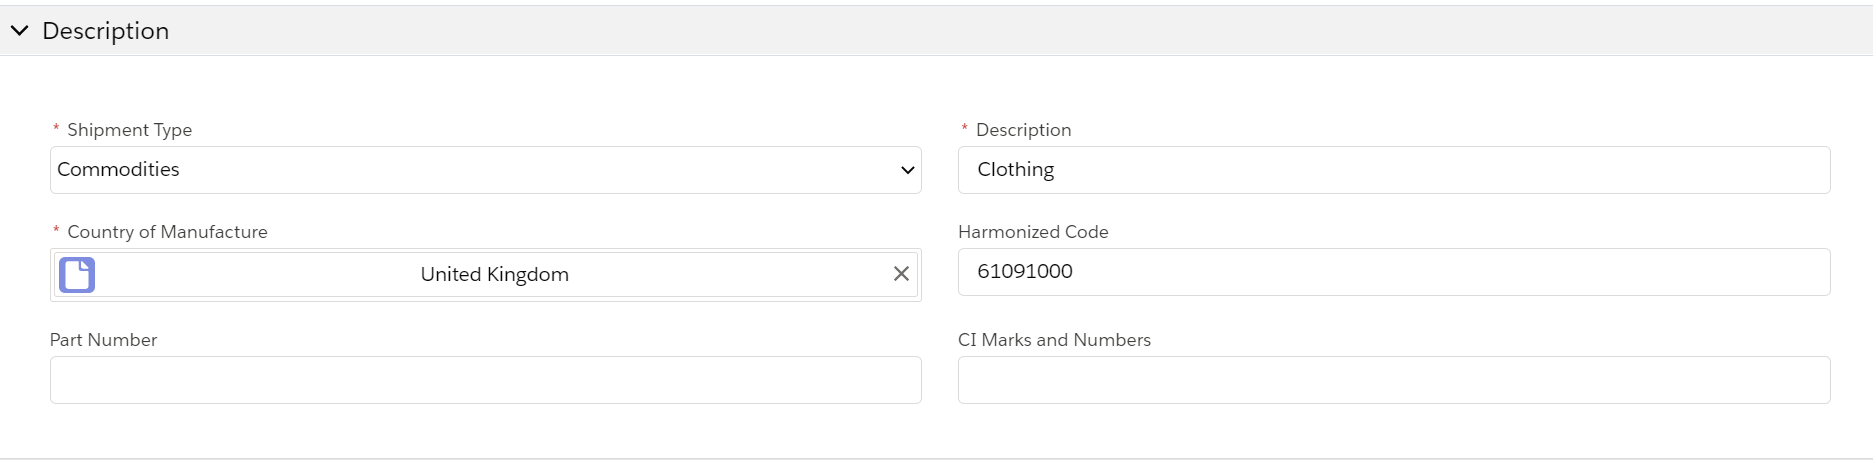
Fill in any required details under the Description section and any other sections. Please bear in mind that the required details vary by carrier.
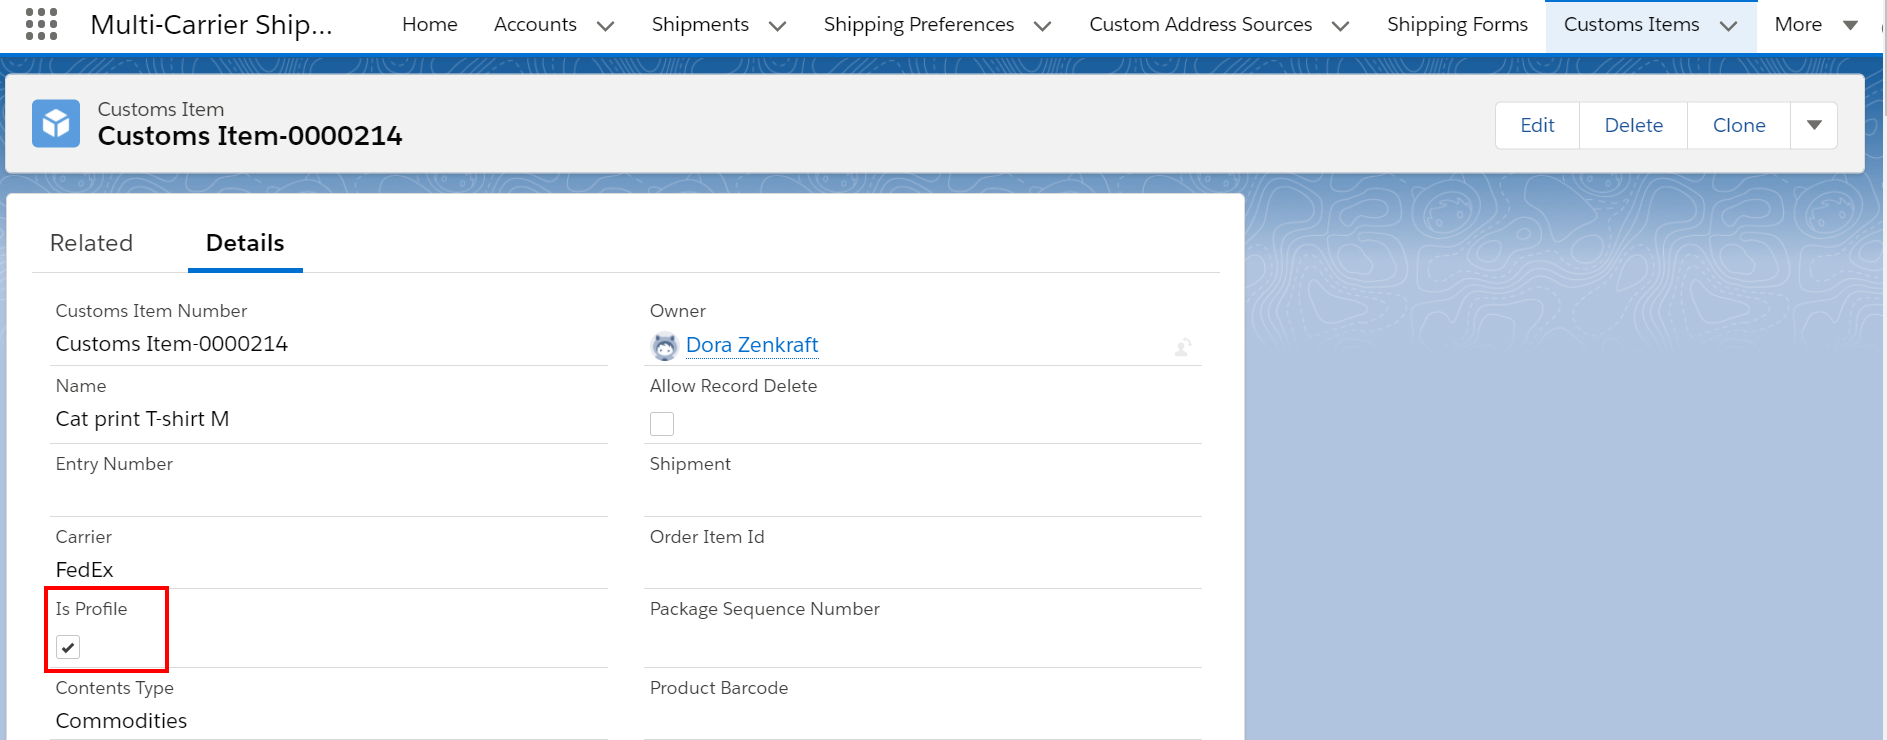
Save these details and a new profile will be created. You will always see if a Customs Items record is a profile from the Is Profile checkbox.
Modify or Delete Customs Items Profiles
You can easily modify or delete a customs items profile by opening the profile record and selecting Edit or Delete.
Use Customs Items Profiles
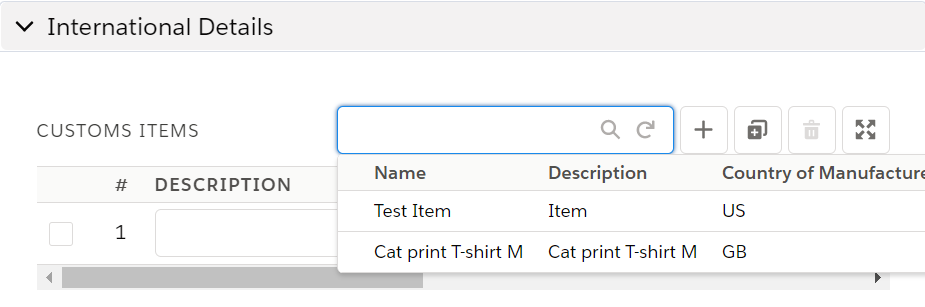
Customs Items profiles are most commonly used for international shipments in the regular Shipping Wizard.
Open the Shipping Wizard and make sure that all the address lines, package type and service type fields are filled in. Click in the Customs Items search box and select the package profile you want to use.
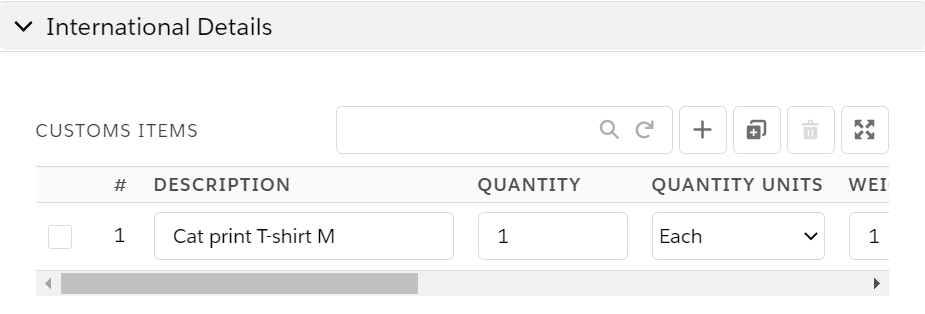
The selected item will be added automatically and you can proceed with filling in the remaining fields and/or creating a shipment.
Troubleshooting
In this section you will find the troubleshooting steps to the most common issues that may come up during setup.
Shipment Invocable Method
When implementing the Shipment Invocable method, you may experience certain times when the shipment doesn't auto-create. This is likely due to missing information being sent to the carrier from the Custom Address Source.
The best way to test this is to go to the shipment related list of the object you have integrated with and click New.
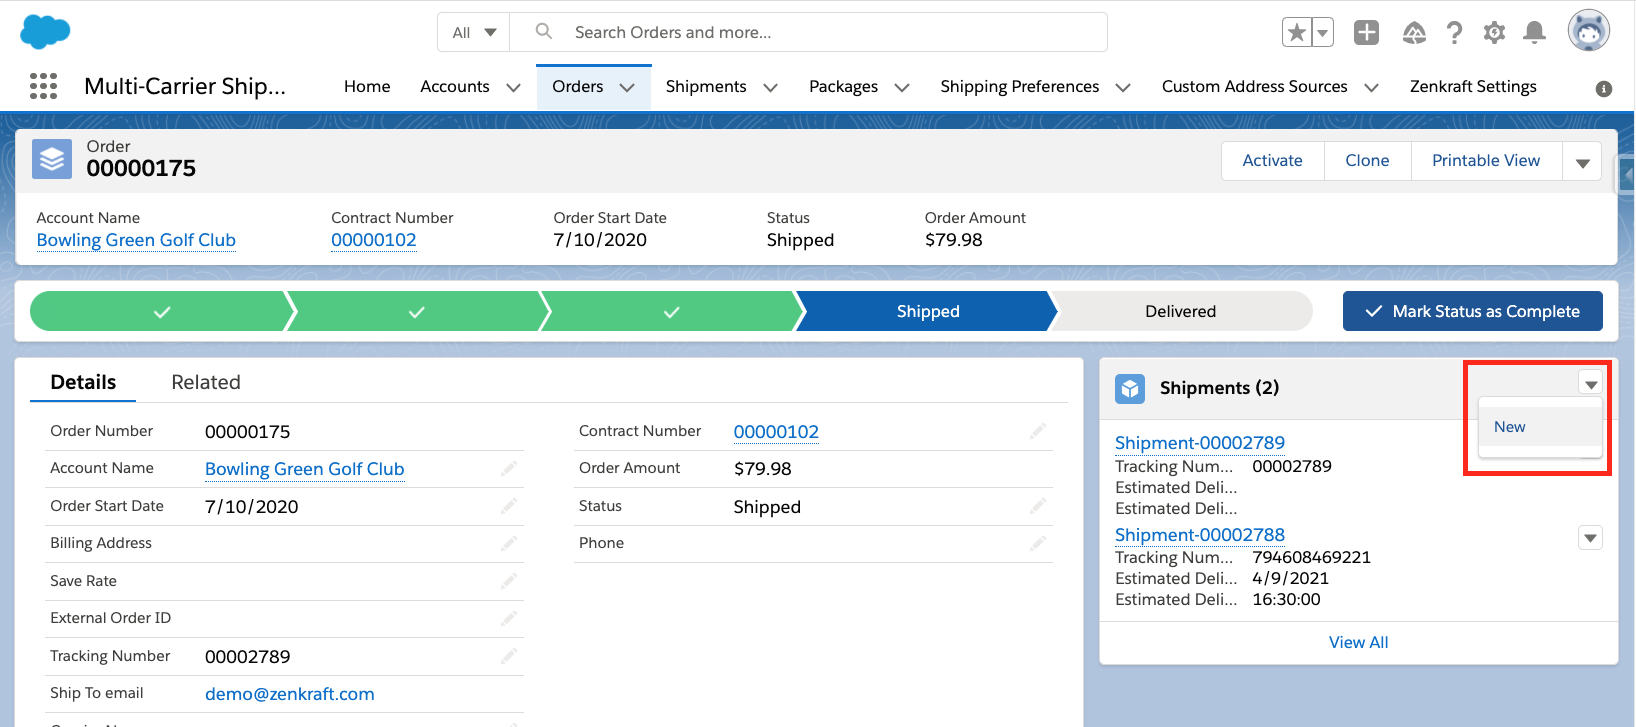
Don't change any fields in the wizard and click Ship Now.
You might see an error such as the one below:

Which you can then fix in your Custom Address Source and then re-attempt to create the shipment.
You can keep repeating this process until the shipment successfully creates.
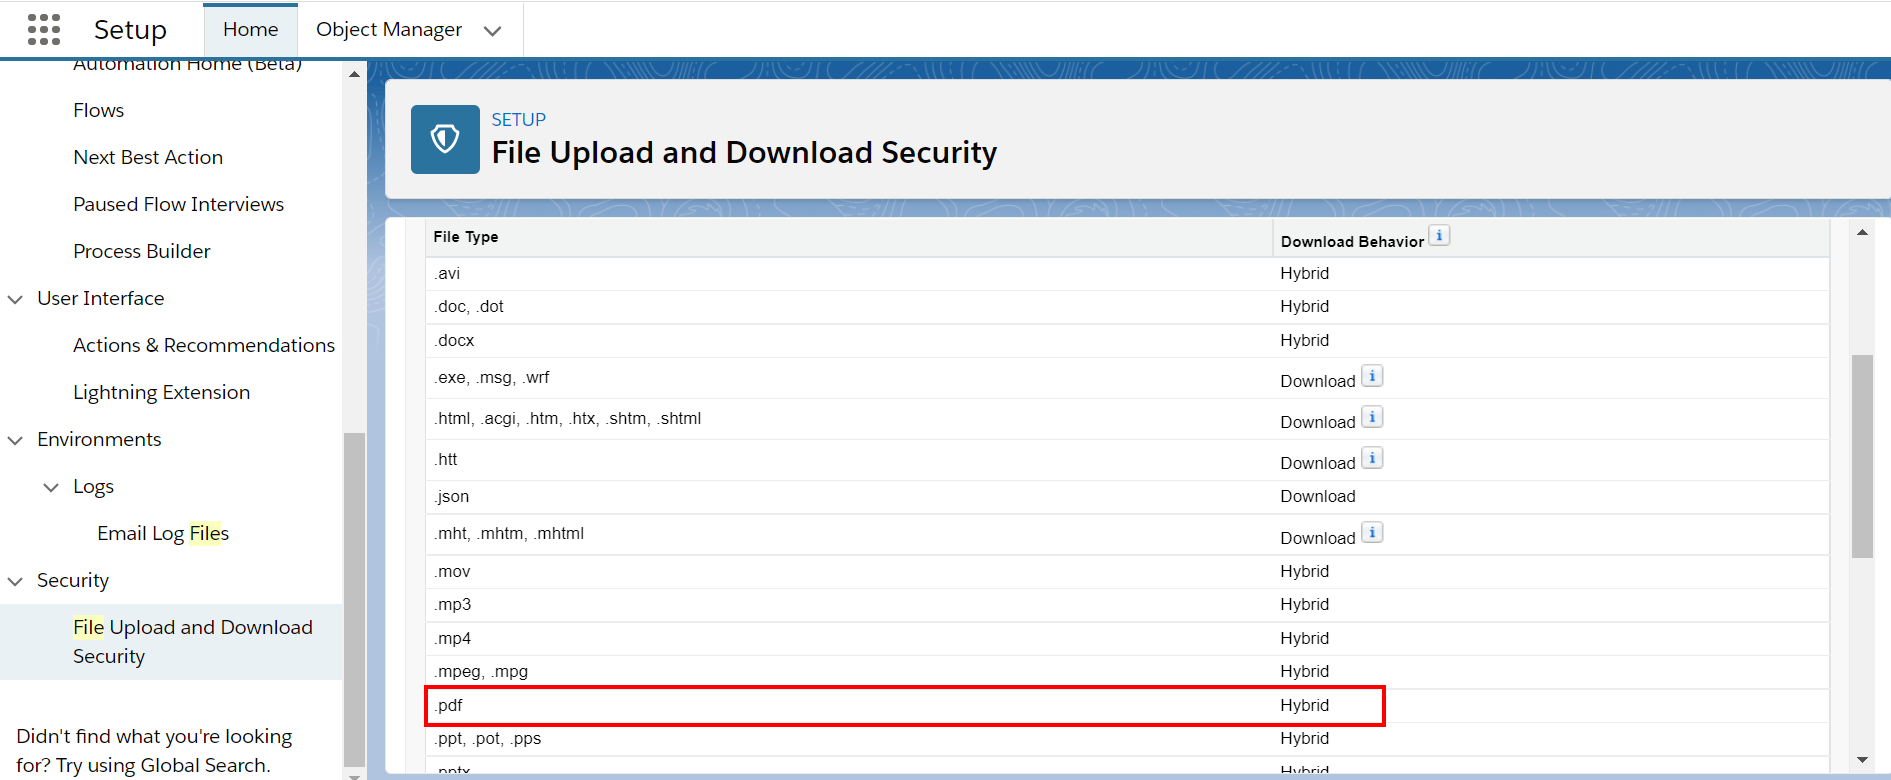
Label preview not available
Once the shipment is generated you should be able to see the preview of PDF labels. If this is not available, you need to change your Salesforce Security Controls settings.
Go to Setup > File Upload and Download Security and look for .pdf. The Download Behavior needs to be set to Hybrid.
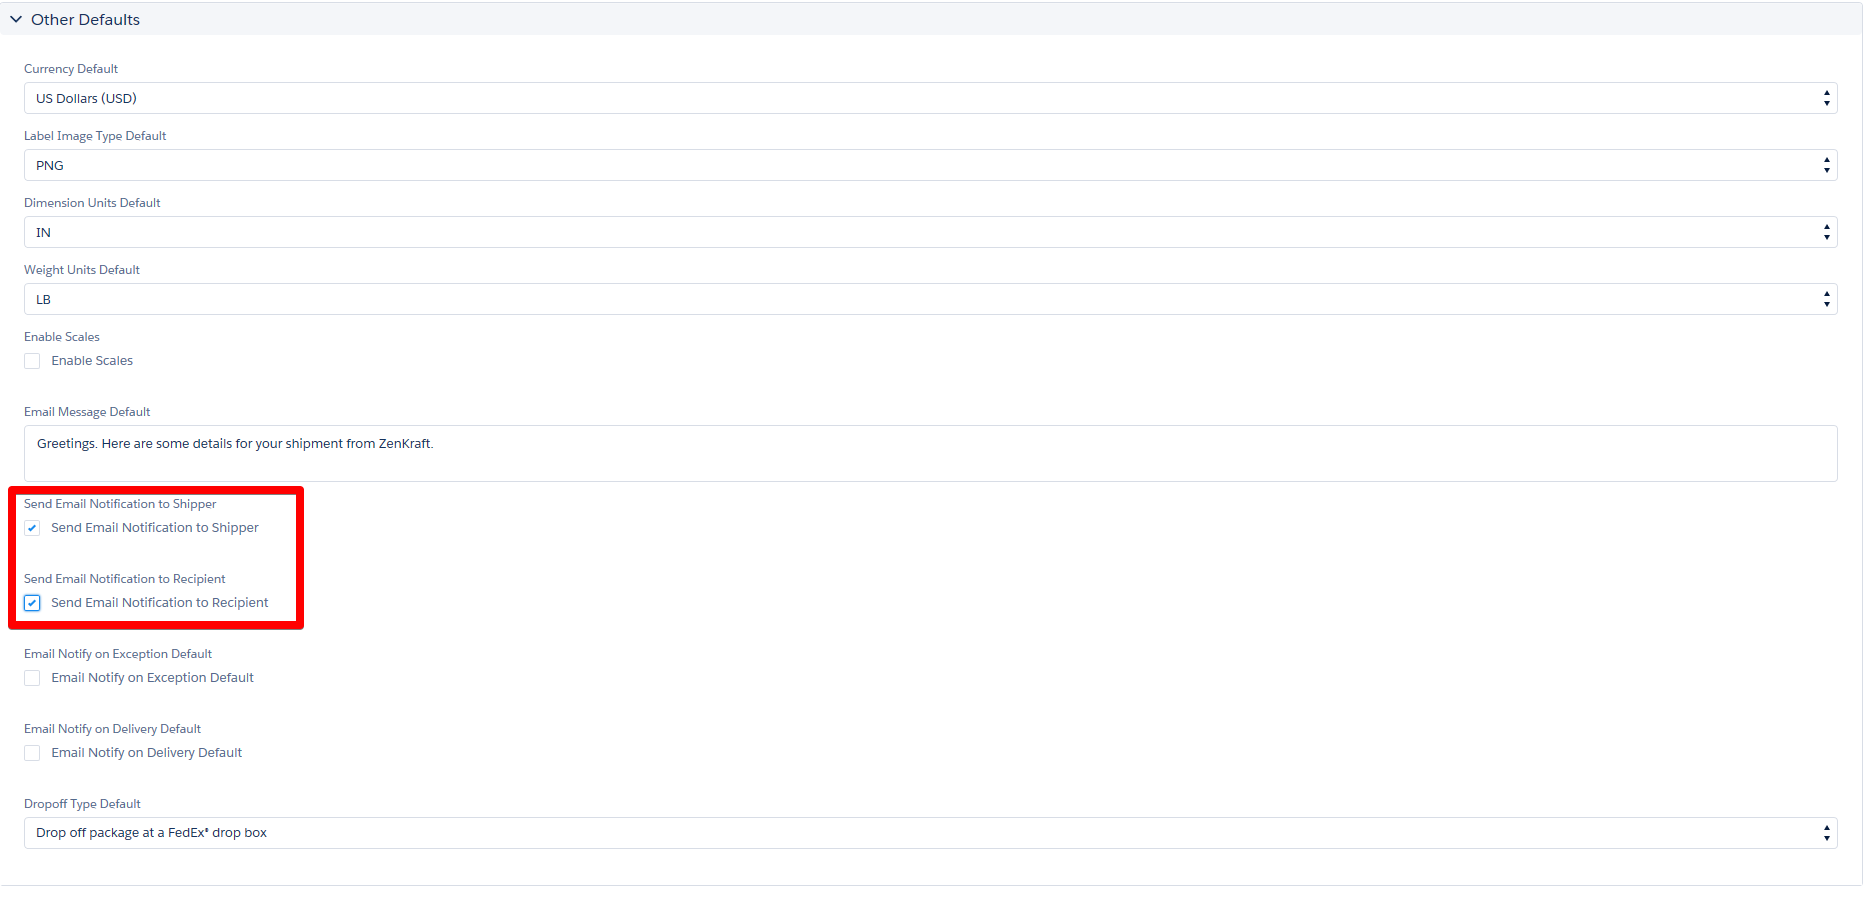
Label Emails are not sent
The email gets sent to either the sender email address and/or recipient email address. To set which one it gets sent to, please edit the Preference and edit these fields:

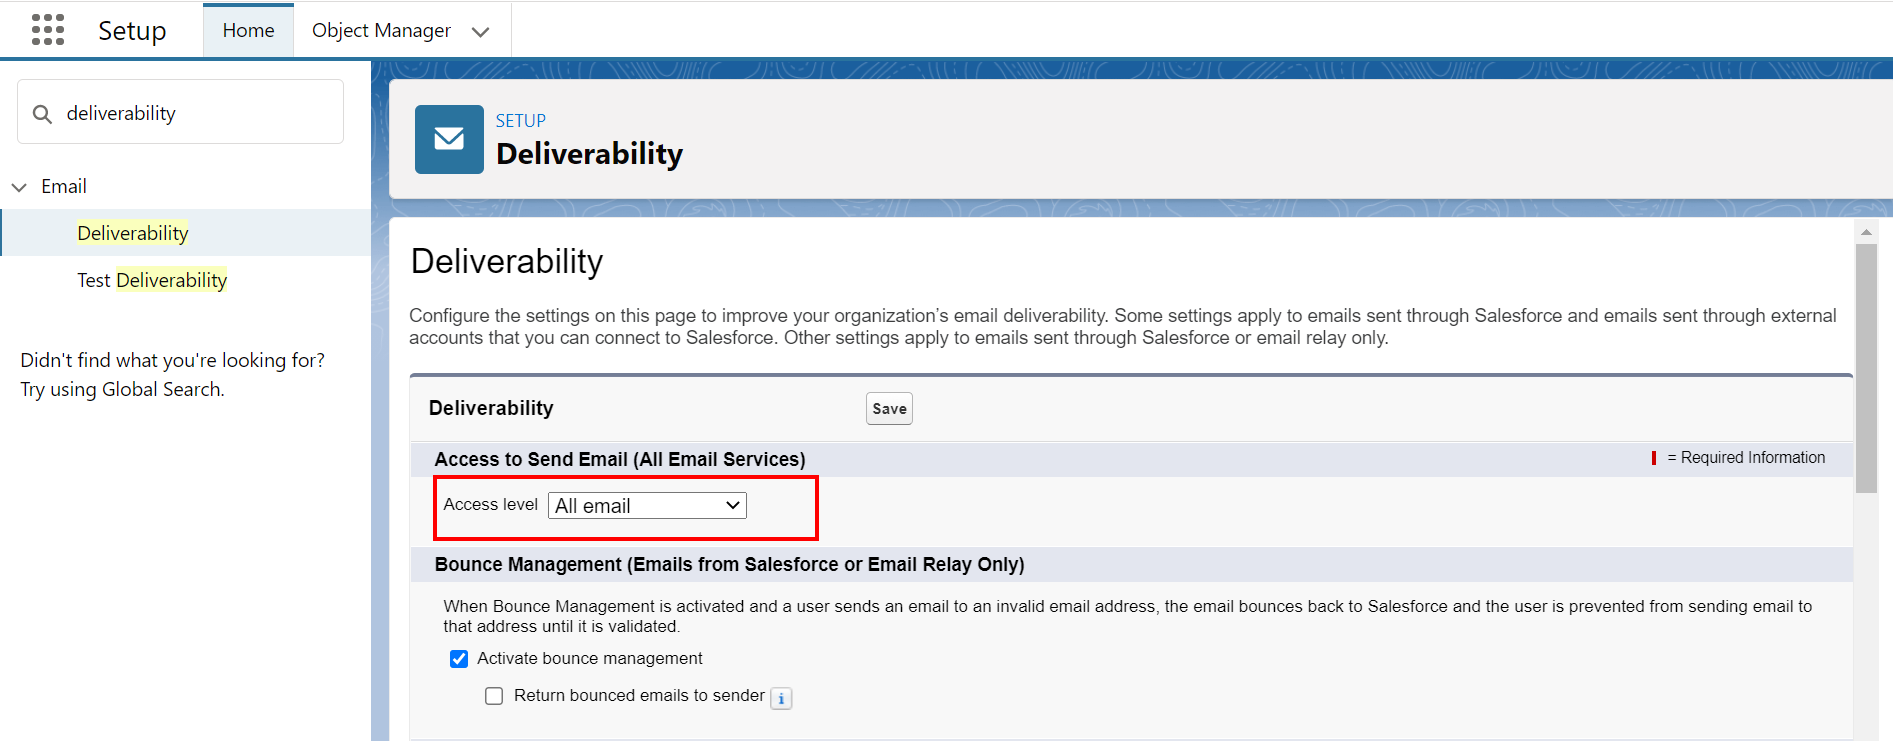
For the email to be delivered, please make that Deliverability is set to "All Email".
Deliverability setting can be found by going to Setup and typing
Deliverability in the quick find box.
Special services not populating when using the Custom Address Source
Make sure that the Package Type, Service Type, and Package weight have been set in the Custom Address
Source correctly.
This section needs to be completed successfully because the special services are available only after
the previous sections have been completed.
Failed to insert Shipment record with reply data from FedEx
This error message is not specific to FedEx.
A trigger or flow is running on shipment creation but the information is not available. Change the
trigger/flow from before insert to after update or filter by the Shipment Processing Completed
checkbox.