Sales Cloud Tracking
Track shipments sent to leads an opportunities. These might be samples, gifts or promotions related to a Campaign in Salesforce. Once the shipment is delivered you can schedule follow-up tasks such as a rep calling to ensure the package arrived safely.
Install Multi-Carrier
To install, begin by going to the Salesforce AppExchange and finding the Multi-carrier for Salesforce listing. You can find the app through Search or by clicking this link.
Click on the Get It Now button and select the desired destination (sandbox or production). Multi-carrier for Salesforce can be installed in both Sandbox (does not expire) and Production (7 day trial) instantly. Click Continue.
Preference Setup
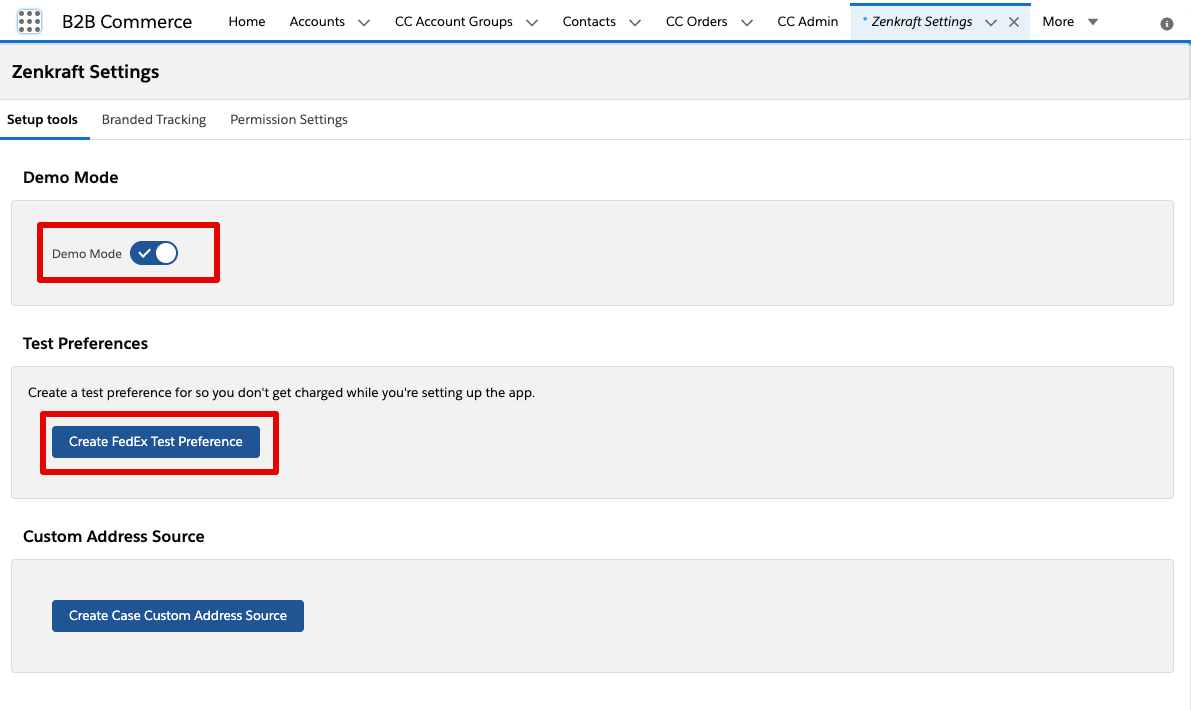
If you want to test the shipping functionality then we recommend using our test FedEx preference (this is because FedEx offers the most friendly test environment). By using this test preference you won't be charged for any of your test shipments.
You can add this by going to Zenkraft Settings and turning on Demo Mode and then clicking the "Create FedEx Test Preference" button.
Otherwise please do go ahead and add your own preferences. Make sure Demo mode is off though, otherwise you might see some authentication errors.
Track Zenkraft Shipments/Returns
Once you are booking shipments and generating labels with Zenkraft, you are able to track them. The frequency of tracking updates depends on your use case but we typically recommend hourly.
The Zenkraft Shipment object has tracking fields that update and Zenkraft can also generate checkpoints for each tracking update (carrier scan). This is very useful for example if you'd like to trigger an email notification only if a shipment is delayed.
For a full guide on how tracking can be configured please view this link for the Tracking Guide.
Where is my Order "WISMO" Tracking
Our invocable method allows you to create a Multi Carrier Shipment object as long as you have a Tracking Number and the Ship Date* (only required for FedEx) using Process Builder and our standard Multi Carrier for Salesforce App.
You also need to create a lookup relationship and have Custom Address Source object set up. You don't need to fill in all the fields just create the custom address source with the correct lookup relationship.
For this guide we will work from an Opportunity object.
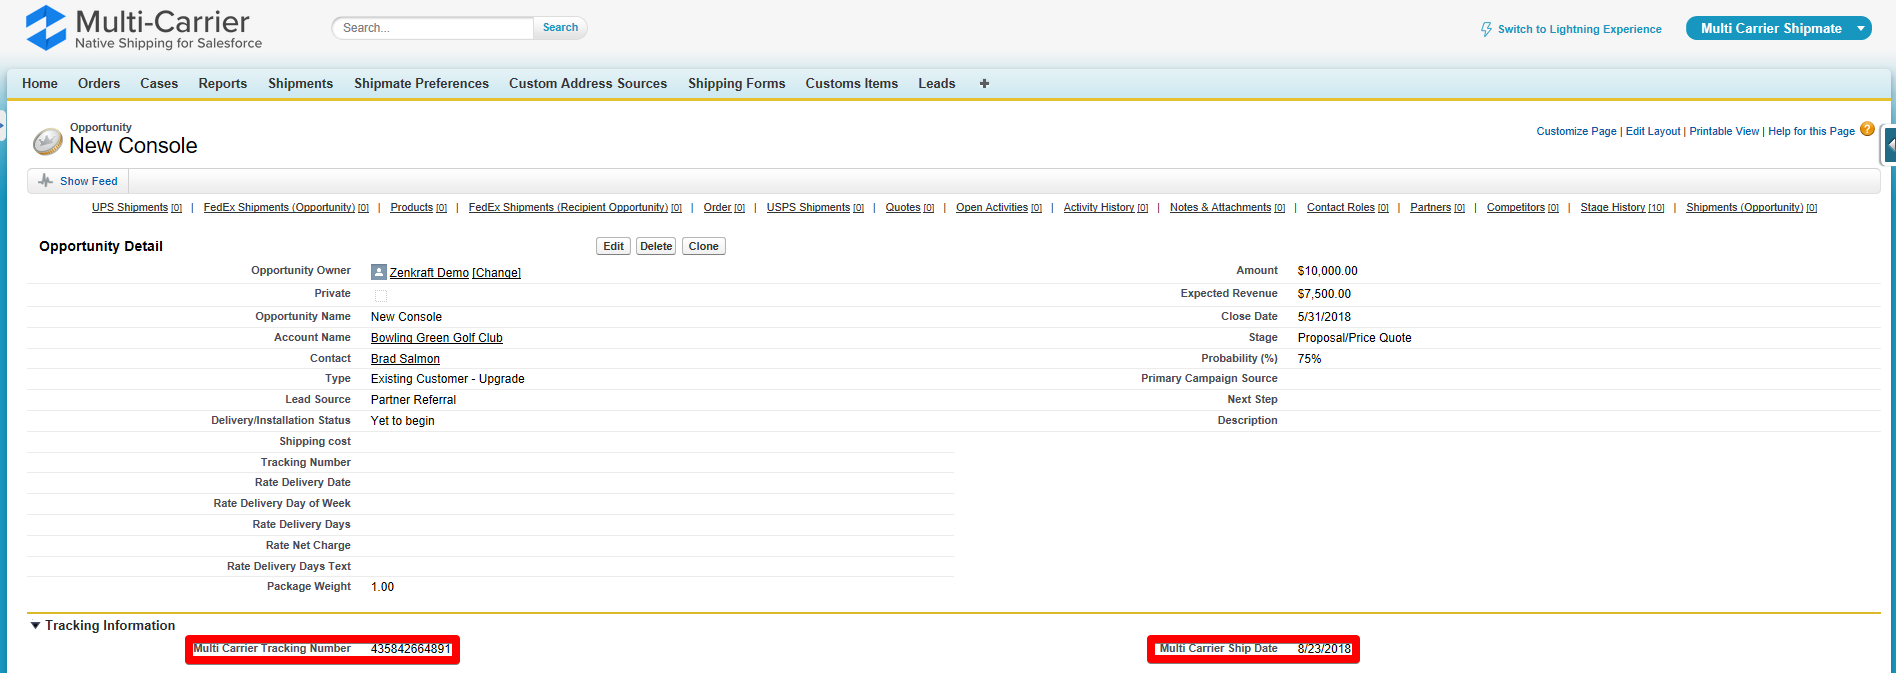
Step 1: Create Fields
Firstly make sure you have two custom fields available on the Opportunity object where the user will add the tracking number (Type: Text, Length 100) and the shipment date (Type: Date):
Step 2: Create Process Builder Process
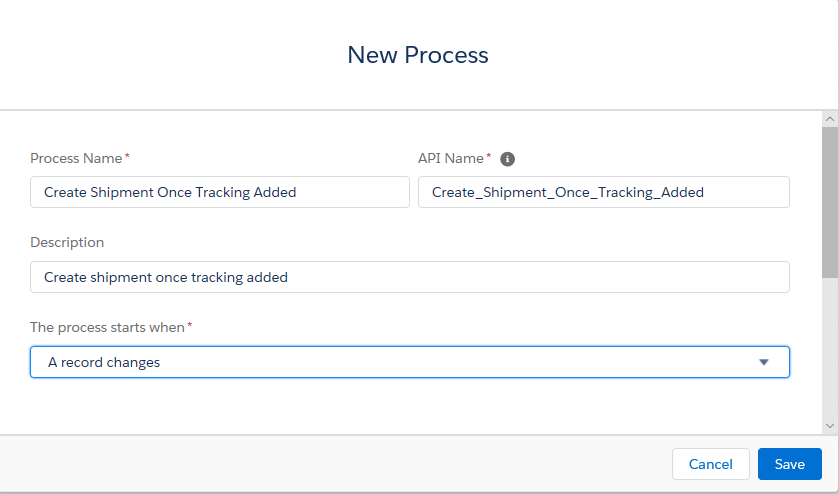
Create a Process Builder Process by going to Setup > Create > Workflow & Approvals > Process Builder and click the New button.
Give the process a name, description, and choose to start the process when "A record changes".
Next choose the object you are starting the process from. Remember in this guide, we are using the Opportunity object, and we will be running the shipment creation once the Opportunity object has the Tracking Number and Ship Dates filled.
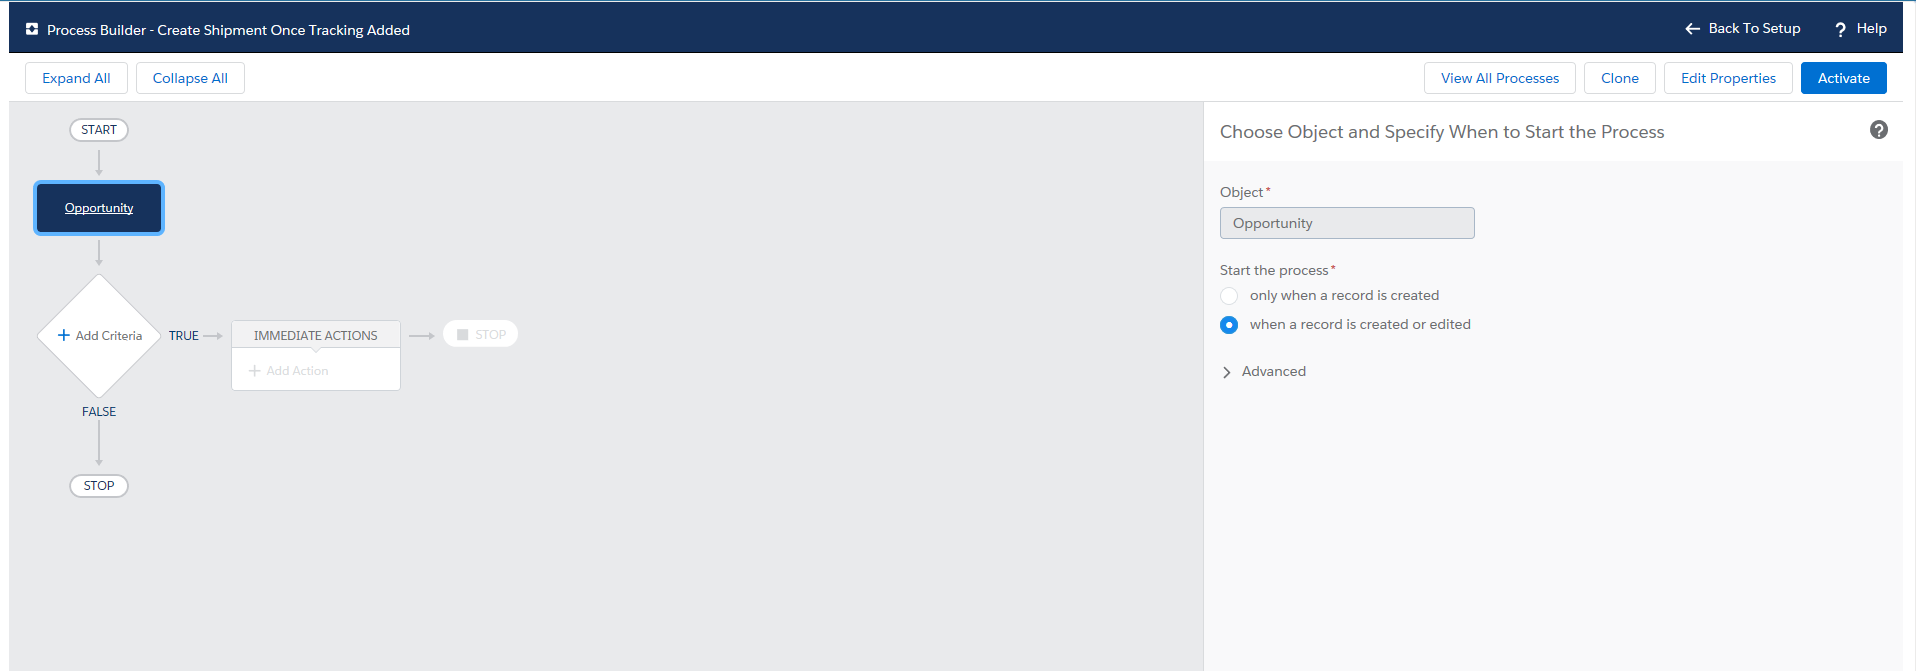
Make sure you set "Start the process" to be "when a record is created or edited". Click Save, and then select "Add Criteria".
We need to look out for three conditions to be met.
- Tracking Number has been changed
- Tracking Number is not null
- Ship Date is not null
This is how your page will look:
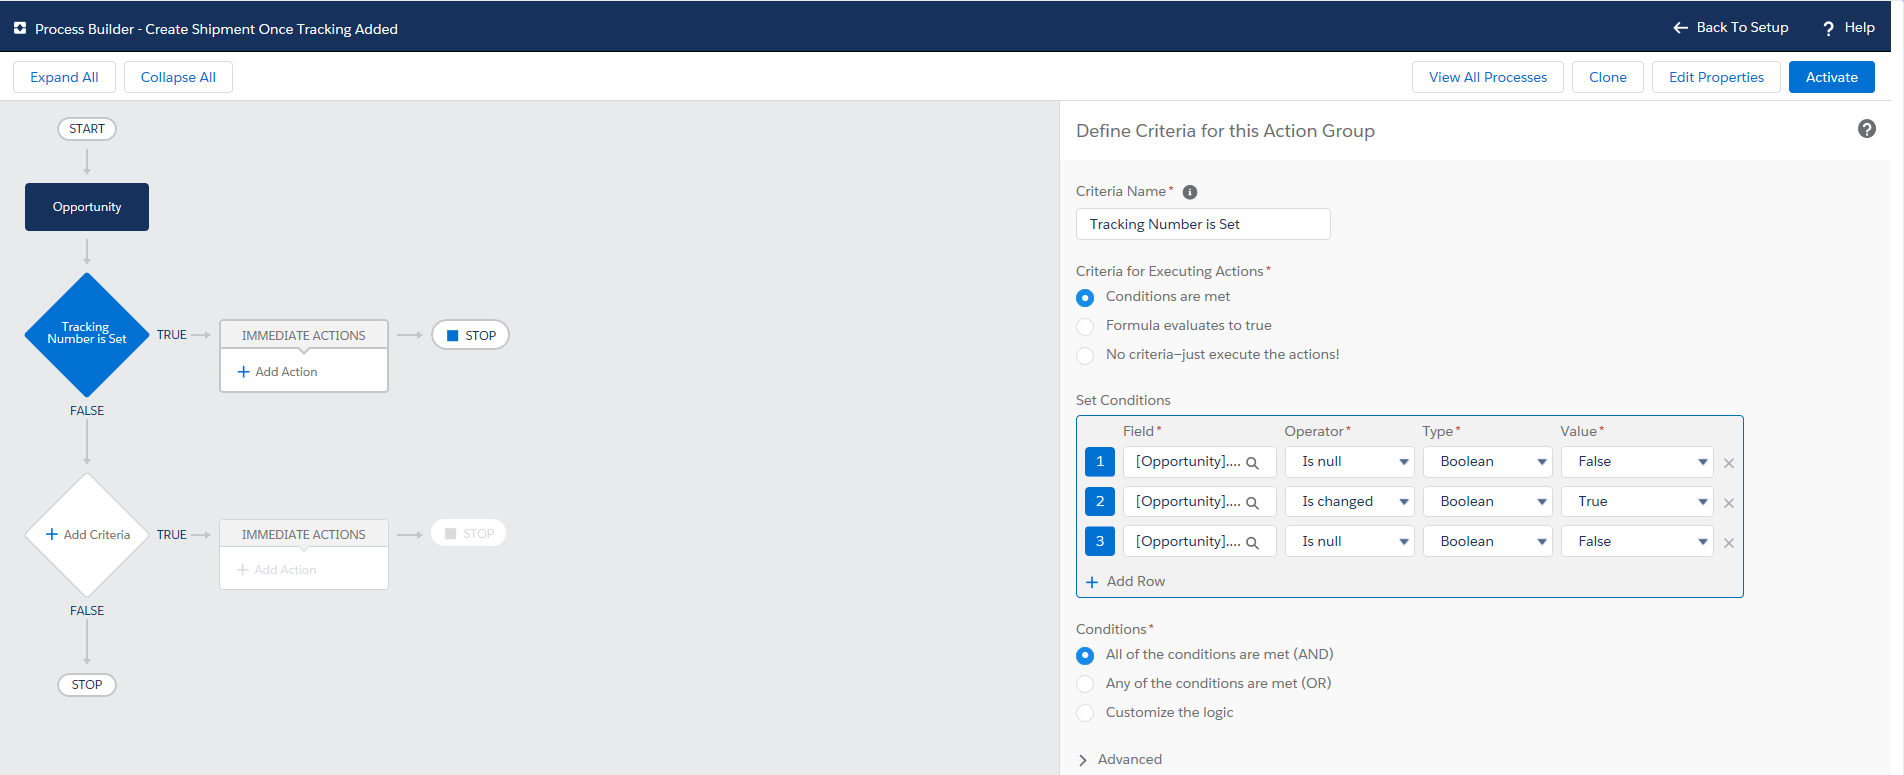
Click Save.
Next add an Immediate Action. The Action Type will be "Apex", and the Apex Class will be "Track Shipment".
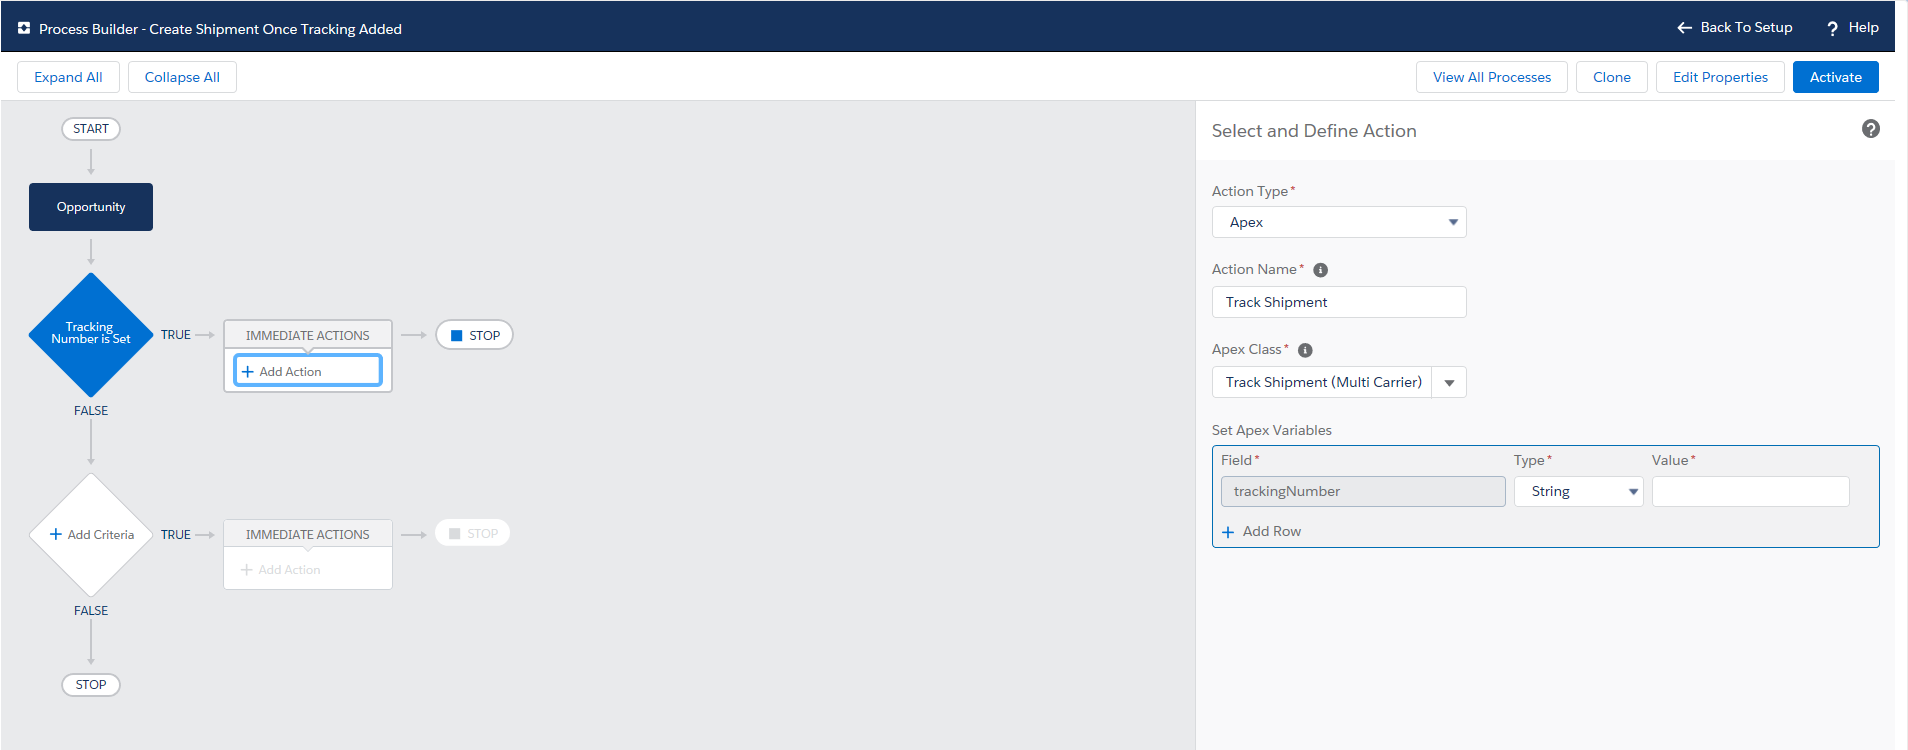
There are now 2 Apex variables that need to be set, and up to 6 variables that can be set. Below is an explanation of each one:
preferenceId - this is the Preference ID
trackingNumber - this is the tracking number you want to track
shipDate - the date this tracking number was created
recordId - the Opportunity ID (in this case)
createShipmentIfNotFound - if set to True, a new shipment object will be created if the tracking number does not already exist as a shipment on Salesforce
customAddressId - if you want to relate this shipment to your Opportunity (in this case) you need to specify the Custom Address Source ID, so that the link can be made
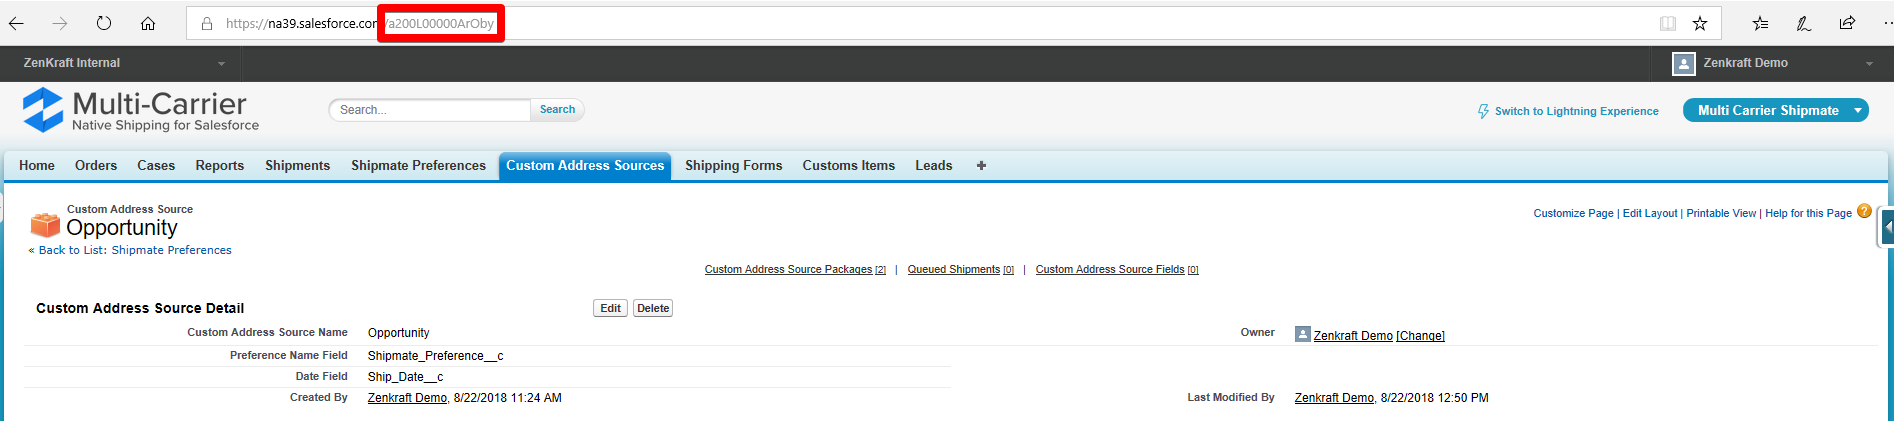
For the customAddressId please set it to the Custom Address Source ID that you are running this process from. To get this ID, navigate to your Custom Address Source and copy the last part of the URL. If you are in Lightning just use the first 15 characters of this objectId
For the recordId please set the Type as Field Reference, and the value to be the Object ID. In our case it will end up being the Opportunity ID.
Once all these fields have been added your screen will look like this:
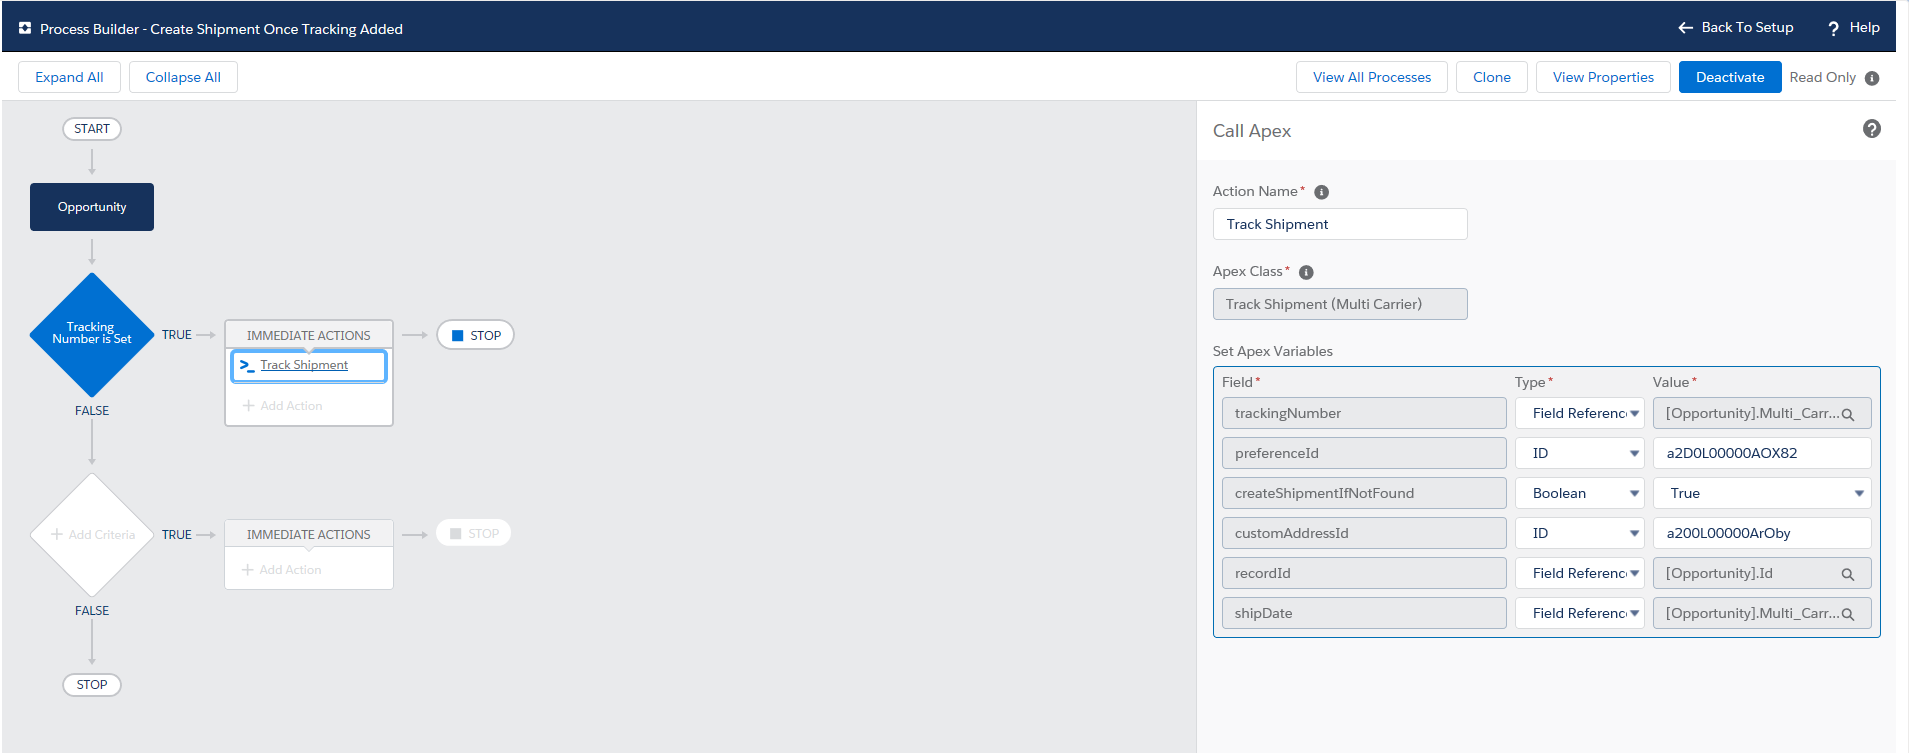
Click Save, and don't forget to Activate this Process.
That is all set, you will now be able to have shipments created via process builder for tracking.
Once you have activated the process builder, go to an Opportunity object, add the tracking number and ship date and the shipment will be auto-created.
Troubleshooting
If you have missed a step and the shipment isn't created, you can view error messages under Setup > Jobs > Apex Jobs.
The error messages are extremely helpful for debugging.
Please contact us using the icon to the bottom right of this screen if you have any queries, and we will be glad to help.
Tracking Limitations
Our tracking tool is only as powerful as your Salesforce org. Please check and calculate the limitations of you Salesforce org before turning on the automated tracking function.
You need to consider how many shipments will be in transit at any point, keeping in mind that shipments with longer delivery time stay in transit for a longer period.
It is also important to remember, that shipment tracking data is managed by the carriers. Before enabling scheduled tracking please ensure that the carrier has confirmed they can provide regular and frequent tracking updates.
Test
Now it is time for you to test.
If you have any queries then please contact us and we will be happy to help