B2C Commerce Cartridge Installation
Instructions for installing cartridge on B2C instance
Install the Zenkraft Cartridge
Zenkraft supports both SiteGenesis and SFRA. Our live documentation is in SFRA but you can fin our SiteGenesis documentation included in the installation package.
Install the Package
To receive the installation package from our support team please open a
case including the customer name,
and whether you use SFRA or SiteGenesis.
NOTE: To be able to install the plugin you need to be a Commerce Cloud developer.
Assign Cartridge Path
In order to use the int_zenkraft_sfra cartridge, it needs to be assigned to your site through Administration -> Sites -> Manage Sites -> Your Site -> Settings tab. Add the cartridge to the left of your base cartridge as there are several methods and models that are extended via the Zenkraft cartridge.
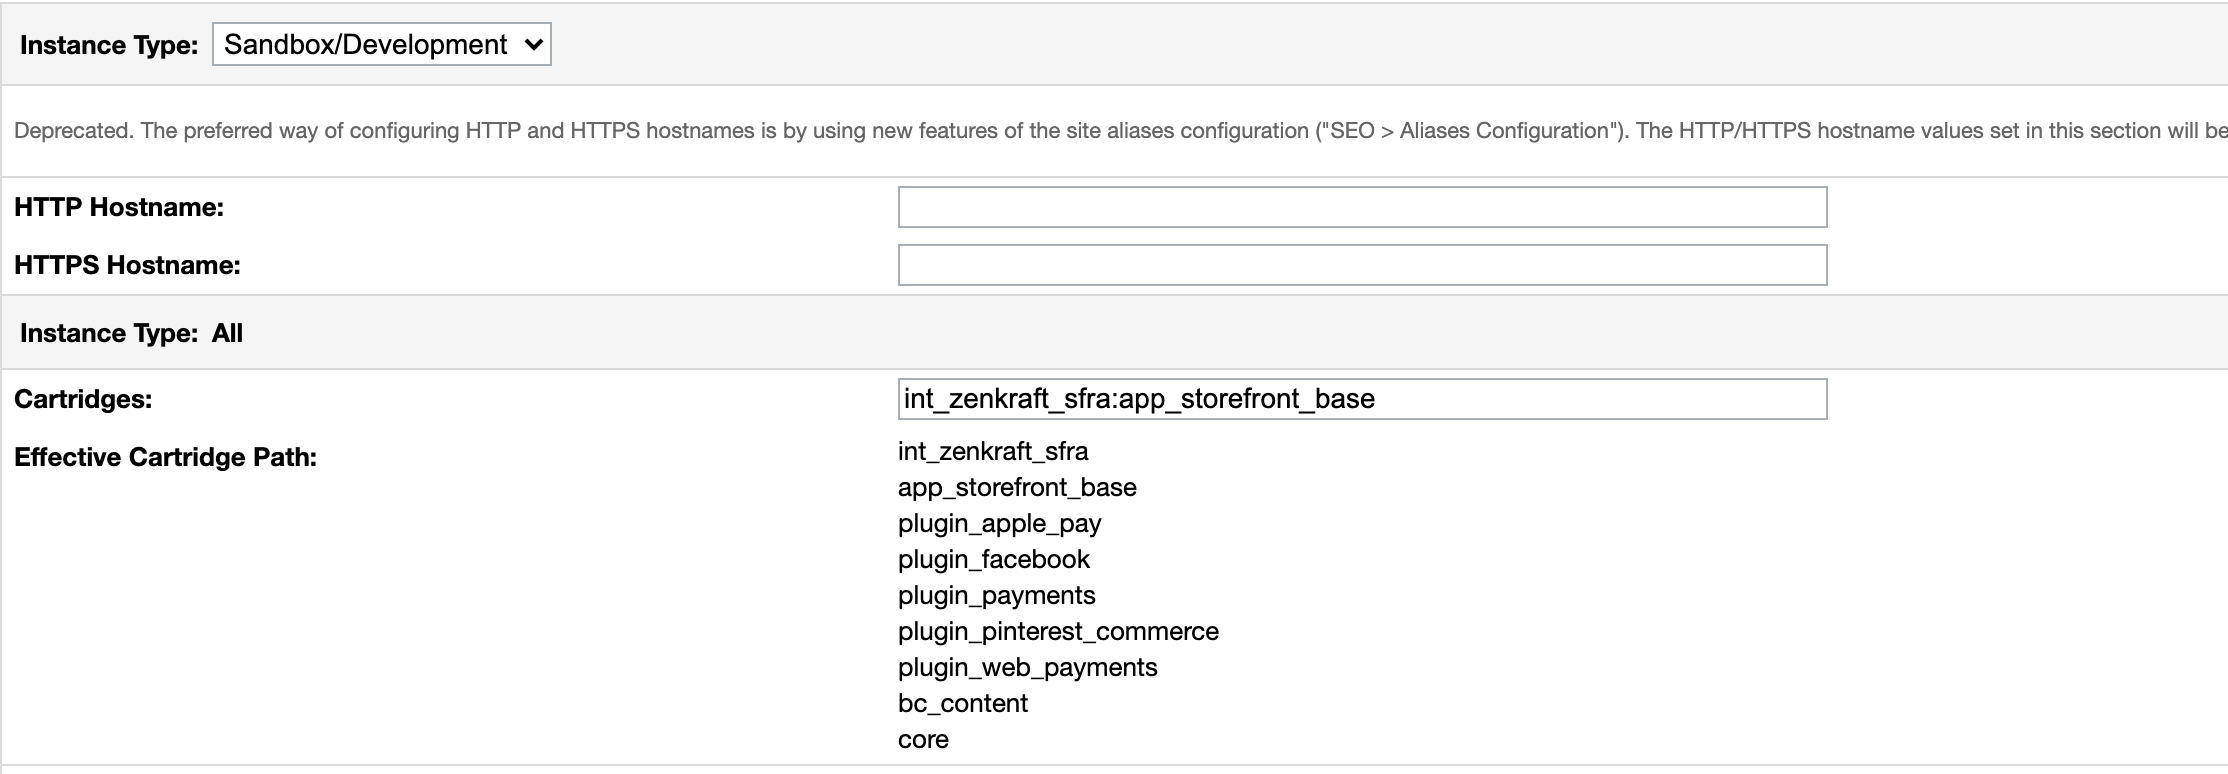
Please keep in mind that the cartridge uses overwritten SFRA files which you can find in the templates section.
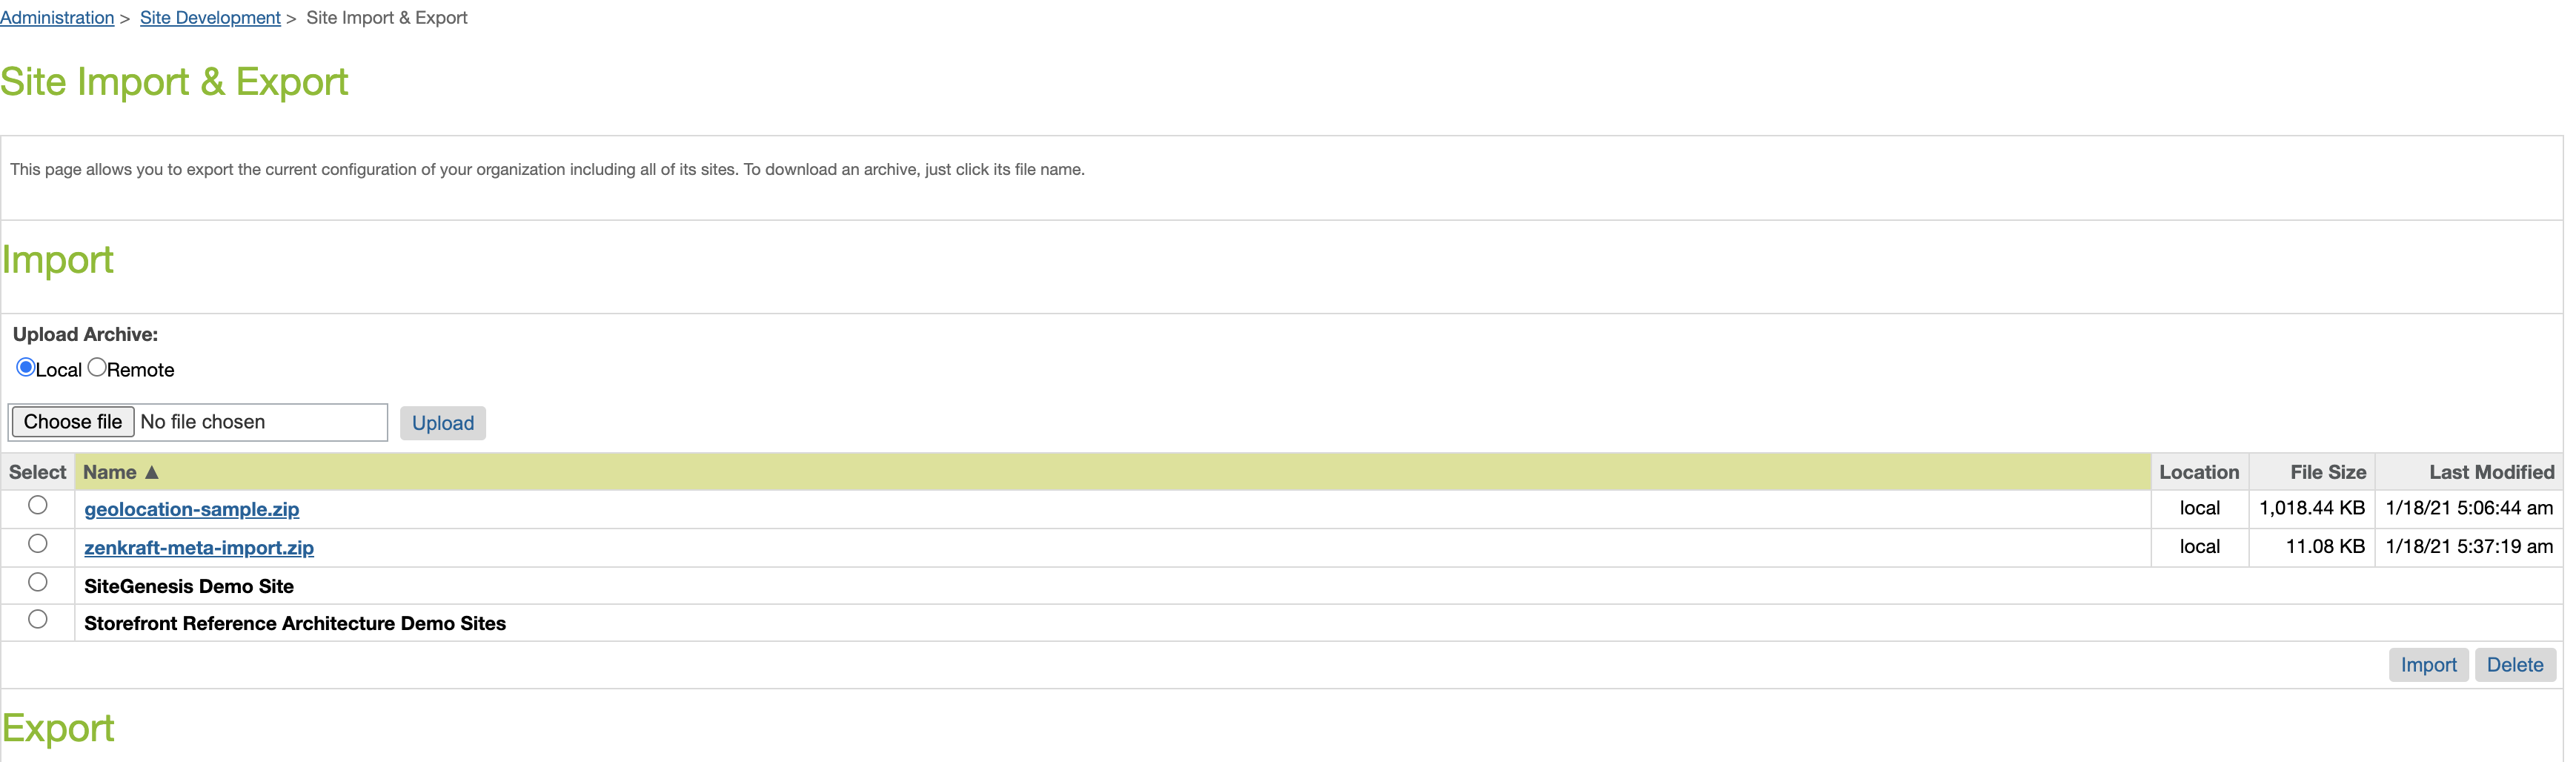
Import Metadata
In order to function correctly, there are several imports that need to be done. All of these imports can be found in the metadata folder of the integration.
metadata/meta/system-objecttype-extensions.xml - This contains all of the system object definitions and custom site preference definitions, as well as a custom object definition for Shipment Notifications. Import it at Administration -> Site Development -> Import & Export -> Meta Data Import
metadata/meta/custom-objecttype-definitions.xml - This contains all of the custom object definitions. Import it at Administration -> Site Development -> Import & Export -> Meta Data Import
metadata/services.xml - This import contains the Salesforce Commerce Cloud Service Framework definitions for connecting to the Zenkraft API. Import it at Administration -> Operations -> Import & Export -> Services
metadata/jobs.xml - This import contains the job that sends shipment notifications. Import it at Administration -> Operations -> Import & Export -> Job Schedules
Assign Cartridge Path
In order to use the int_zenkraft_sfra cartridge, it needs to be assigned to your site through Administration -> Sites -> Manage Sites -> Your Site -> Settings tab. Add the cartridge to the left of your base cartridge as there are several methods and models that are extended via the Zenkraft cartridge.
Please keep in mind that the cartridge uses overwritten SFRA files which you can find in the templates section.
Site setup - Multi-site vs Locale-based site
Multi-site
All site preferences and custom objects defined within the Zenkraft link cartridge are site-specific, so using the cartridge in a multi-site environment is supported out of the box.
In order to setup the cartridge in a multi-site environment, you need to configure the site preferences for each of the site that will use the cartridge, and make sure that the int_zenkraft_sfra cartridge is added to the cartridge path for each of the sites.
Locale-based sites
Locale-based sites are currently not supported out of the box, and will require additional changes on the meta data definitions and code.
Site Preferences Reference
You can find the list of all the Site Preferences available for configuration within the B2C Business Manager by following this link.
Compile files
Static files are compiled using out-of-the-box webpack script that is provided with SFRA cartridge. However this script does not include the files from all cartridges within a project.
If you need to compile all the static files with a single command, you will need to amend the webpack.config.js file.
Please refer to the sample script below:
'use strict';
var path = require('path');
var webpack = require('sgmf-scripts').webpack;
var ExtractTextPlugin = require('sgmf-scripts')['extract-text-webpack-plugin'];
var jsFiles = require('sgmf-scripts').createJsPath();
var scssFiles = require('sgmf-scripts').createScssPath();

// Add those imports to your webpack
var glob = require('glob');
var fs = require('fs');
process.noDeprecation = true;
var cwd = process.cwd();

var bootstrapPackages = {
    Alert: 'exports-loader?Alert!bootstrap/js/src/alert',
    // Button: 'exports-loader?Button!bootstrap/js/src/button',
    Carousel: 'exports-loader?Carousel!bootstrap/js/src/carousel',
    Collapse: 'exports-loader?Collapse!bootstrap/js/src/collapse',
    // Dropdown: 'exports-loader?Dropdown!bootstrap/js/src/dropdown',
    Modal: 'exports-loader?Modal!bootstrap/js/src/modal',
    // Popover: 'exports-loader?Popover!bootstrap/js/src/popover',
    Scrollspy: 'exports-loader?Scrollspy!bootstrap/js/src/scrollspy',
    Tab: 'exports-loader?Tab!bootstrap/js/src/tab',
    // Tooltip: 'exports-loader?Tooltip!bootstrap/js/src/tooltip',
    Util: 'exports-loader?Util!bootstrap/js/src/util'
};

// ZENKRAFT: Add this function
function createScssPath() {
    var cartridgesPath = path.resolve(cwd, "cartridges");
    var clientPath = path.resolve(cartridgesPath, '*', "cartridge/client");
    var result = {};

    glob.sync(path.resolve(clientPath, "*", "scss", "**", "*.scss"))
        .filter(f => !path.basename(f).startsWith("_"))
        .forEach(filePath => {
            var name = path.basename(filePath, '.scss');
            if (name.indexOf('_') !== 0) {
                let location = path.relative(cwd, filePath);
                location = location.substr(0, location.length - 5).replace('scss', 'css');
                result[location.replace('client', 'static')] = filePath;
            }
        });

     return result;
};

// ZENKRAFT: Add this function
function createJsFiles() {
    var cartridgesPath = path.resolve(cwd, "cartridges");
    var clientPath = path.resolve(cartridgesPath, '*', "cartridge/client");
    var result = {};

    glob.sync(path.resolve(clientPath, "*", "js", "*.js")).forEach(f => {
        var key = path.join(path.dirname(path.relative(cwd, f)), path.basename(f, ".js"));
        result[key.replace('client', 'static')] = f;
    });

    return result;
};


module.exports = [{
    mode: 'development',
    name: 'js',
    entry: createJsFiles(), // ZENKRAFT: Change the entry from  sgmfScripts.createJsPath(), to createJsFiles(),
    output: {
        path: path.resolve(__dirname) + '/',
        filename: "[name].js"
    },
    module: {
        rules: [
            {
                test: /bootstrap(.)*\.js$/,
                use: {
                    loader: 'babel-loader',
                    options: {
                        presets: ['@babel/env'],
                        plugins: ['@babel/plugin-proposal-object-rest-spread'],
                        cacheDirectory: true
                    }
                }
            }
        ]
    },
    plugins: [new webpack.ProvidePlugin(bootstrapPackages)]
}, {
    mode: 'none',
    name: 'scss',
    entry: createScssPath(),
    output: {
        path: path.resolve(__dirname) + '/',
         filename: '[name].css'
    },
    module: {
        rules: [{
            test: /\.scss$/,
            use: ExtractTextPlugin.extract({
                use: [{
                    loader: 'css-loader',
                    options: {
                        url: false,
                        minimize: true
                    }
                }, {
                        loader: 'postcss-loader',
                        options: {
                            plugins: [
                                require('autoprefixer')()
                            ]
                        }
                    }, {
                        loader: 'sass-loader',
                        options: {
                            includePaths: [
                                path.resolve('node_modules'),
                                path.resolve('node_modules/flag-icon-css/sass')
                            ]
                        }
                    }]
                })
            }]
        },
    plugins: [
        new ExtractTextPlugin({ filename: '[name].css' })
    ]
}];
Upgrade cartridge
The upgrade process usually consists of copying the content of the new version of the cartridge over the existing files, unless you are specified to do differently in the release notes.
Jobs
| Name | Details |
|---|---|
| SendShippingNotifications | In order to schedule tracking updates that allow you to send shipping
notifications, you need to schedule the job that was imported with the
previously mentioned meta data import. After running the import, go to Administration → Operations → Job Schedules, select the SendShippingNotifications job, select the Step Configurator tab, and change the Scope for the site(s) you have. To schedule the job, go to Administration → Operations → Job Schedules and select the SendShippingNotifications job. From there, just schedule it to run at the interval you like, we recommend every 4 hours as a maximum frequency. |
| UpdateReturnCases | In order to update the return tracking statuses of your SFCC returns, you
need to schedule the job that was imported with the previously mentioned
meta data import. After running the import, go to Administration → Operations → Job Schedules, select the UpdateReturnCases job, select the Step Configurator tab, and change the Scope for the site(s) you have. To schedule the job, go to Administration → Operations → Job Schedules and select the UpdateReturnCases job. From there, just schedule it to run at the interval you like, but for returns, we recommend running it only once a day, or a maximum of twice a day. |
Service definitions
There are currently five services to be setup, which can be found by going to Administration > Operation > Services, all of them share the same service profile - service-zenkraft:
| Name | Credentials | Description |
|---|---|---|
| http.zenkraft.dopu | zenkraft-dopu-creds | Endpoint used for drop off locations |
| http.zenkraft.label | zenkraft-label-creds | Endpoint used for generating combined labels |
| http.zenkraft.rate | zenkraft-rate-creds | Endpoint used to get carrier shipping rates |
| http.zenkraft.ship | zenkraft-ship-creds | Endpoint used for creating return shipment labels |
| http.zenkraft.track | zenkraft-track-creds | Endpoint used to get order related tracking information |
Please note if you need to use our EU datacentres then please update the credentials section (Administration > Operation > Services > Credentials) of each of these services so that the root domain points to api.eu.zenkraft.com instead of api.zenkraft.com
Style/UI
The front-end files are compiled using the standard SFRA npm commands.
If you need to extend you webpack configuration to support multiple cartridges, please refer to the compile files section above.
Building scss files
Compiles all requires css files for the projectnpm run compile:scss
Building js files
Compiles all requires front-end javascript files for the projectnpm run compile:js
Frontend Javascript files
List of all front-end javascript files introduced with the Zenkraft cartridge
| Name | Info |
|---|---|
| dropOffModal.js | Contains code and functionality related to the drop-off / pick-up modals on the website |
| returns.js | Contains code and functionality related to the return page in My Account of the website |
| tracking.js | Contains code and functionality related to the tracking page in My Account section of the website |
| zen-product.js | Contains code and functionality related to the PDP widgets for the estimated delivery date and charges for the shipping method |
| zenkraft.js | Contains code and functionality related to the Checkout flow on the website - loading shipping methods and over-writting shipping charges. |
Frontend CSS files
List of the front-end CSS files that are introduced with the Zenkraft cartridge
| Name | Info |
|---|---|
| account/dashboard.scss | Styles for the sections in My Account - Returns page and Tracking page |
| components/dropOffModal.scss | Styles for the drop-off/pick-up location modal |
| tracking.scss | Styles for the tracking page |
| checkmarks.scss | Styles for the Tracking page check marks in My Account |
| returns.scss | Styles for the returns flow on the website |
Master API Key
You will need to enter your Zenkraft Master API key into the Merchant tools > Site preferences > Custom preferences > Zenkraft General > Zenkraft Master API Key field.
If you don't have your Master API key then please contact your Zenkraft account manager and they will be able to help you out.
Release notes
Please find our release notes here