
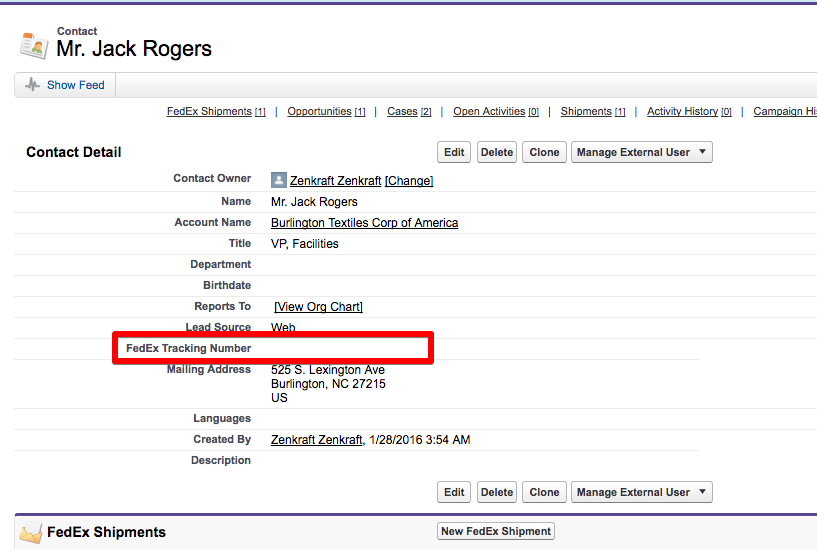
Todays blog post will show you how add the FedEx Tracking Number onto the Contact object after you have created a shipment.
Firstly make sure you have the text field available on your contact object:
Next let’s create a Process Builder task to retrieve the tracking number once the shipment has been created.
To access the process builder page, go to Setup > Create > Workflow & Approvals > Process Builder
Click on “New” and give it a name. We want to start this process when “A record changes” , so select that from the dropdown. This is what you should see:

You are now presented with this blank process builder screen.
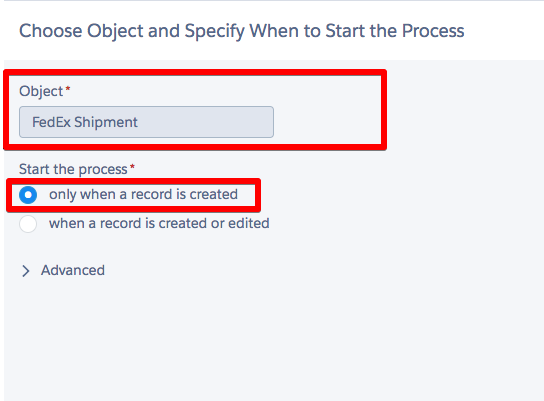
Click on the “Add Object” button and select the “FedEx Shipment” object. We need to start the process only when a record is created.
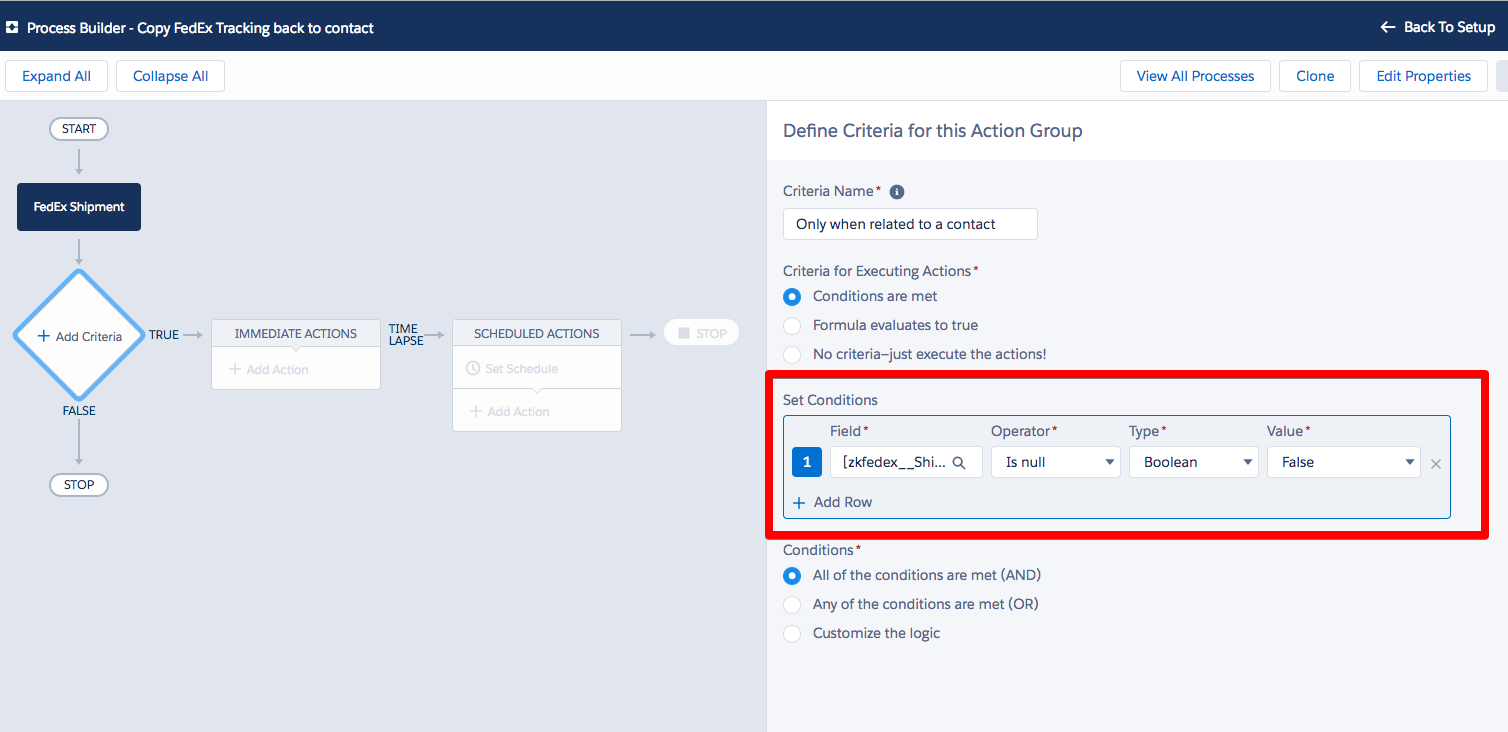
The next step is to “Add Criteria”, and we want to ensure that there is a relationship to the contact object. We do this by filling in these fields here.
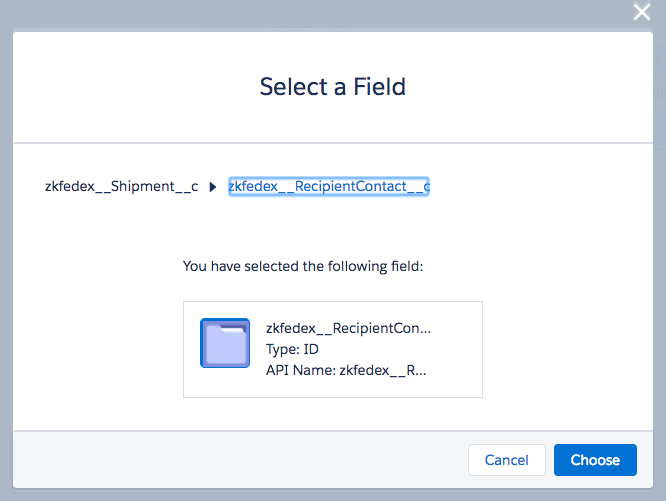
Here is the closer look at the “Field” value we have chosen
Next we click on “Set Schedule” and set the time for actions to execute at “0 Days After CreatedDate”
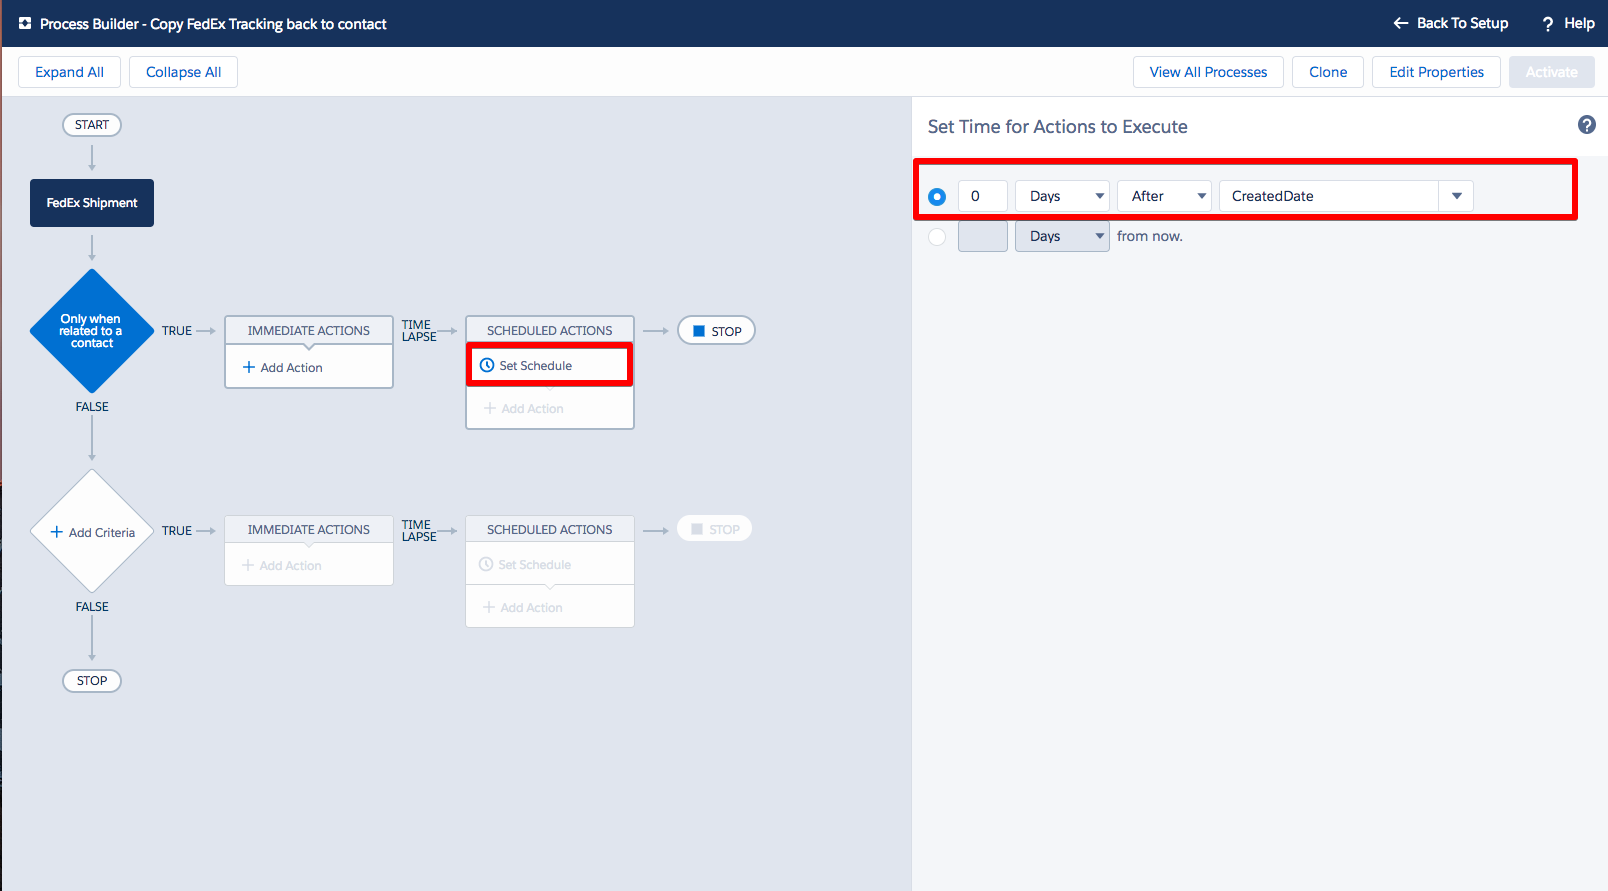
We do this as it creates a small delay after the shipment has been created, which ensures the shipment creation process is not blocked.
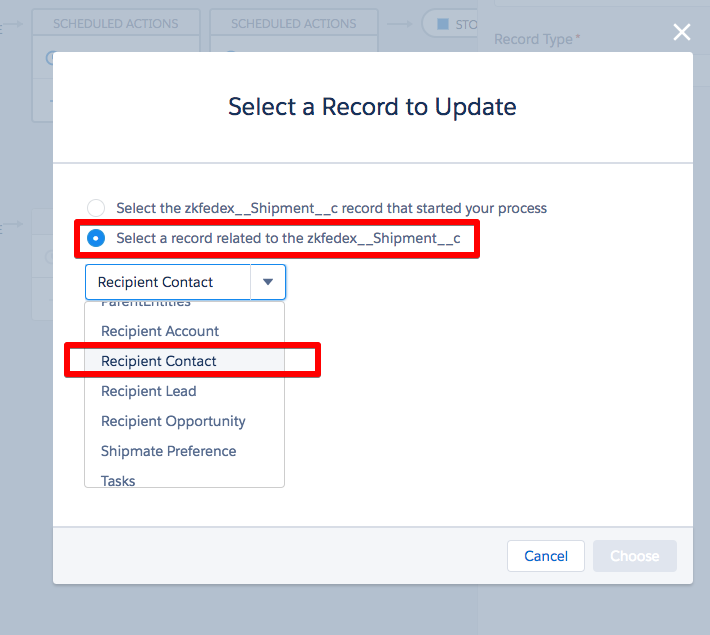
Next we need to select which records to update. Make sure you select “Recipient Contact”, and not “Recipient Contact >” as there is a big difference.
Next set the field value you want to update on the Contact object, which in our case is “FedEx Tracking Number”.

The Value field we are using is the Master Tracking Number as you can see here.
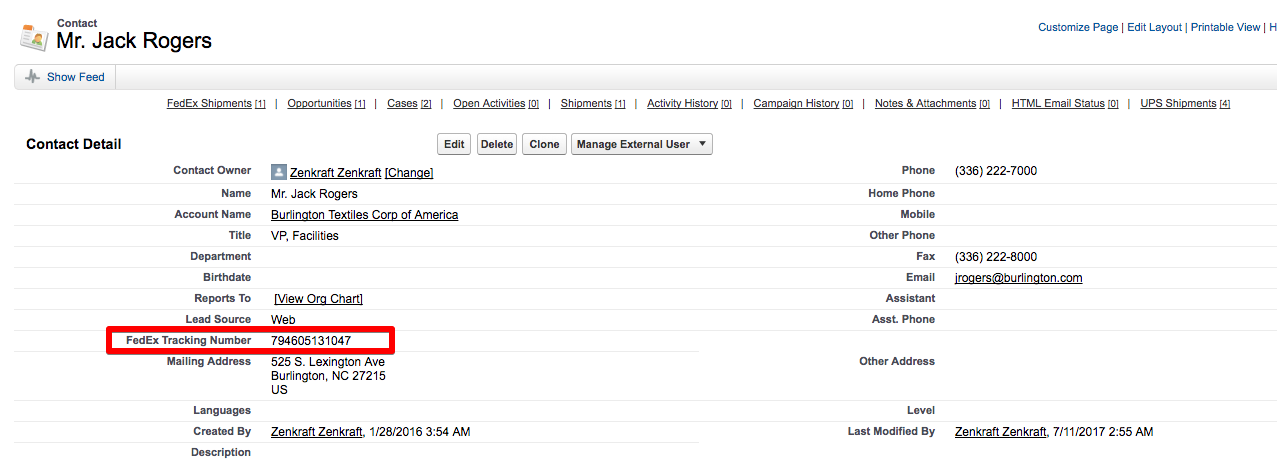
That’s it, lets activate it and do a test shipment from the contact object, and you should then see the tracking number appear like so:
If you have any issues then please contact us and we would be glad to help.