
Last week we wrote a first post on how we created a Pick and Pack station on Salesforce. In that post we’ve covered UI, scanning barcodes and integrating weights and scales. Today we’re focused on label generation and custom printing.
- Labels
- On this occasion, we made custom thermal labels in a 4×6 format using the ZPL programming language. The link to the ZPL thermal label documentation is here: https://www.zebra.com/content/dam/zebra/manuals/en-us/software/zpl-zbi2-pm-en.pdf
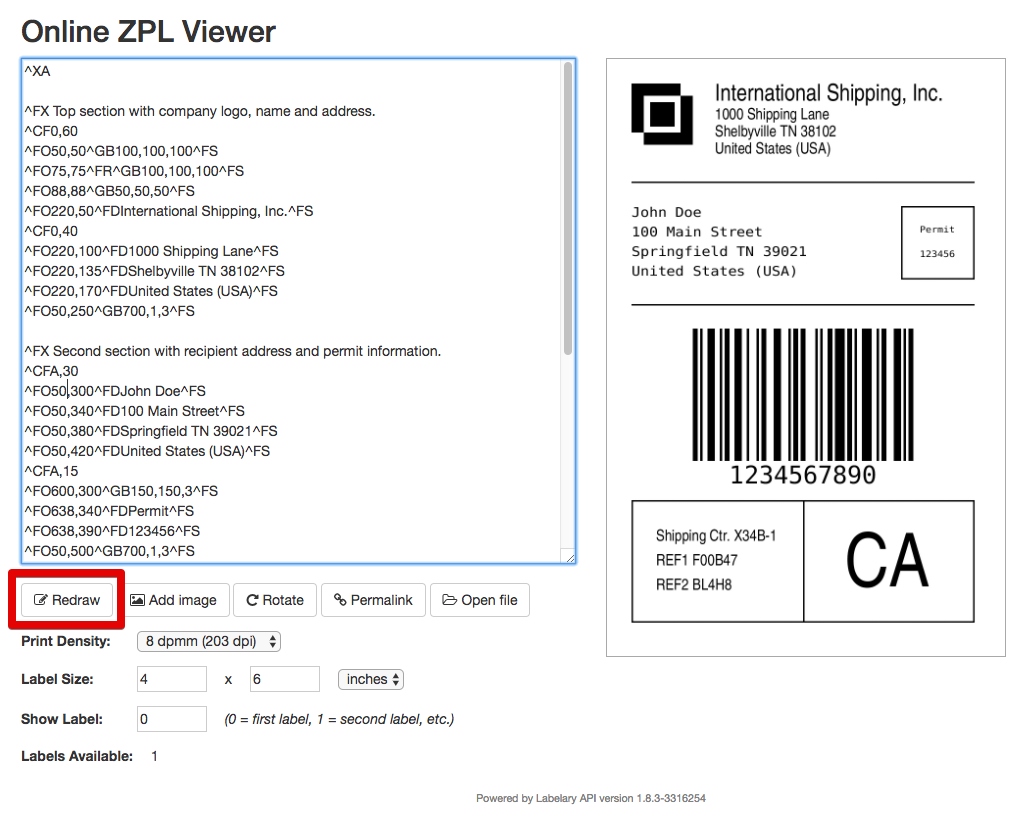
- Here is some example code of a ZPL label:
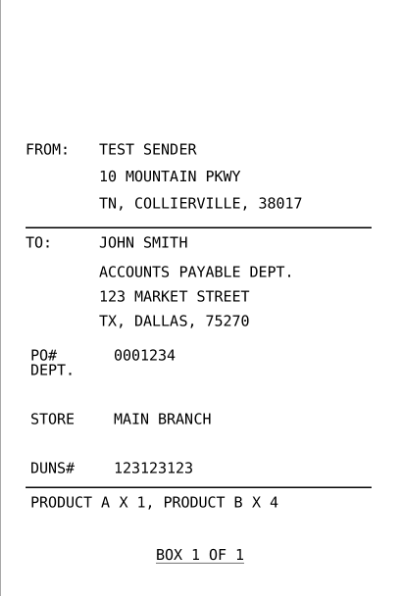
- And how it looks once printed out:
- The quickest way to test your ZPL coding is to load your code into http://labelary.com/viewer.html, and press the Redraw button, it will then show you what the label will look like once printed out.
- We created our own bespoke PDF documents, which is essentially a styled visualforce page that gets converted to PDF by the Salesforce platform. It is actually quite simple in Saleforce, the tutorial on how to do it is here: https://developer.salesforce.com/docs/atlas.en-us.pages.meta/pages/pages_quick_start_renderas_pdf.htm
- Custom printing
- By Using our Zenkraft Printing app we were able to send jobs to the pre-defaulted printers based on user actions. Here is some example code to show how we can send labels for printing:
- In the code above, we can see that ‘line 18’ sends the label for printing, where “this.labelId” is the attachment id of the salesforce object where the label resides.
- For example, once a box was packed successfully and the user set the box as closed, we automatically sent two print commands; one to the thermal label printer to print out the content label (we mentioned in the previous post), and secondly we send the command to the laser printer to print out the packing slip (our PDF page).
- Hopefully in the future HTML5 will support native browser printing, but until then our desktop app works great for automating print jobs from the browser.